How to: MGF & MGTF Clocks and Oil Temp Gauges

How to: MGF & MGTF Clocks and Oil Temp Gauges was created by Roverlike
Posted 4 years 7 months ago #197888
Clocks
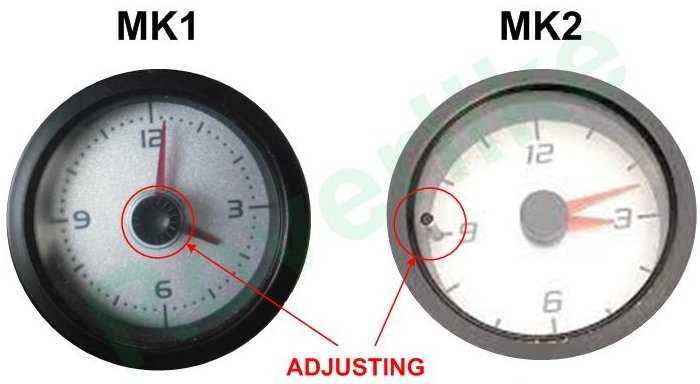
There are two clocks YFB100450 (MK1) and YFB100240 (MK2) which can be found. First one mostly in MG F while second one mostly in MG TF. First noticable distinction is that first one has adjusting button in the middle of the clock while second have it as metal pin on the left hand side.
Most important thing is on the back side of these two clocks. Electric connections are completely different so you cannot just swap them around. You will need to make some adjustments on the wiring.
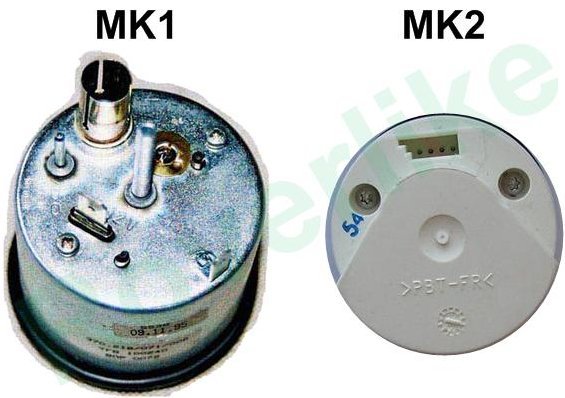
Few pictures of MK1 clock back side for connector view.

Clocks wires/pins functions:
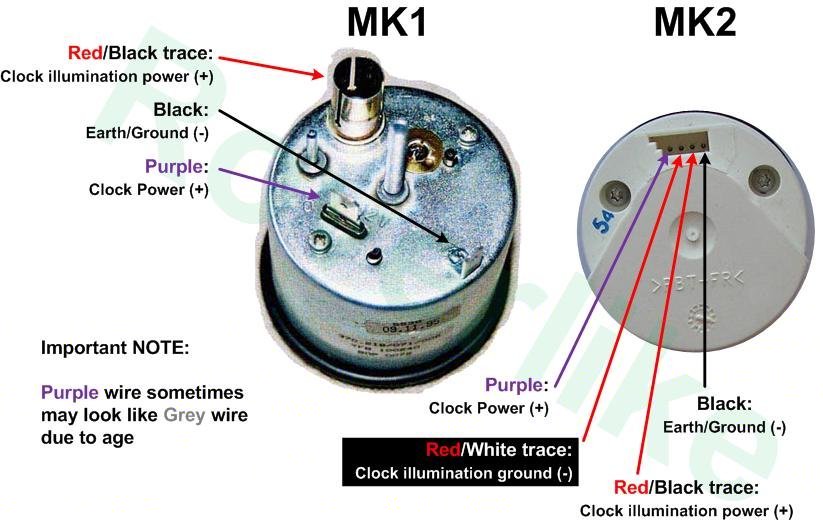
Important information is that MK1 clock illumination uses clock ground as ground wire, so this clock has only 3 wires attached. MK2 clock illumination for ground wire uses 4th wire (Red/White trace) from Dimmer switch.
If you want swap MK2 clock with MK1 clock you will have to brake existing MK2 connector and use spade connectors for three corresponding wires while 4th, Red/white wire will remain unconnected. In this situation dimmer switch will have no influance on clock illumination, so you will loose this possibility on clock.
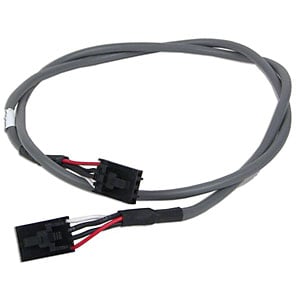
If you want to swap MK1 clock with MK2 clcok you will need to make adating cable. Easiest way to do it is to use CD ROM audio cable.
You have to take care not to use CD ROM audio cable with 3 wires:
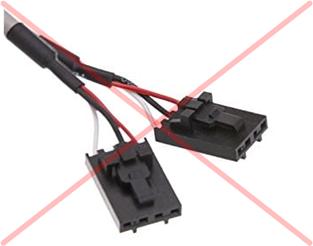
but CD ROM audio cable with 4 wires:

One end of CD ROM 4 wire audio cable has suitable connector for MK2 clock while on the other end of the cable you need to use suitable spade connectors to join them with existing wiring loom in the car.
NOTE that in this case clock illumination ground (Red/White) and clock ground (Black) wire must be connected to same existing wiring loom Black ground wire.
Oil Temperature Gauges
In order for this thread to be complete it is necessary to explain differences between MK1 and MK2 Oil Temperature Gauges.
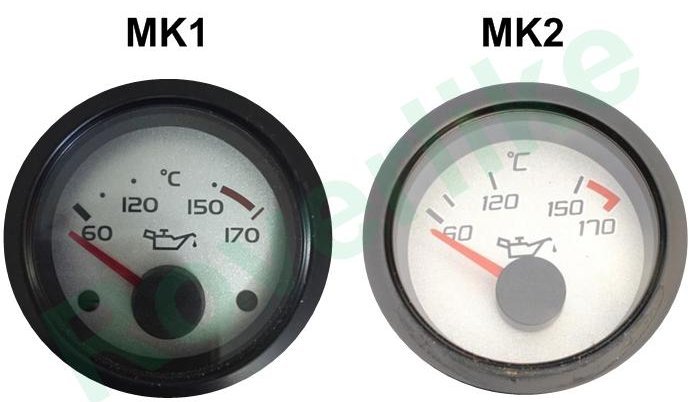
From the front these gauges are almost identical:
Main difference is on the back side where you can see different type of connections:
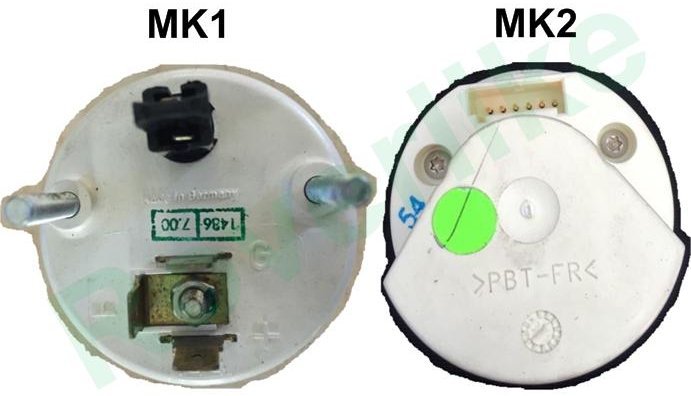
Following is the explanation of connection wires and functions:

If you want to make connection for MK2 Gauge instead of MK1 you can use two (2) CD-audio cables explained above, but you would need to cut one of the connectors in half (easy to do with cutter) and use only two wires.
Note that only 5 wires are used, so pin number 3 has no wire attached.
.
by Roverlike
The following user(s) said Thank You: David Aiketgate, talkingcars, Cobber, sworkscooper, Airportable, Notanumber, Red110, TA22GT
Please Log in or Create an account to join the conversation.
Time to create page: 1.790 seconds