Sign In   Register

Topic

02 TF 160 rear end refurbishment 10 years 2 months ago #139285

Sunday 23rd February
Decided to make up some lock washers for the upper ball joints on the hubs, so that I could get them fitted.
Selected a suitably sized hole saw (30mm) by offering the likely suspects to the threaded end of the ball joint.

Then determined the overall size by measuring the top of the hub…

…45mm. need at least 5mm either side, so 55mm or bigger.
Found a suitable off-cut of metal which was already the correct width, and when cut it 2 would be 62mm for each lock washer. Marked it up for drilling…

Drilled both holes out before cutting in half as that gave more material to clamp to a block of wood, and then cleaned up the burrs around the holes and the edges.
Checked the final item for size.

Made things ready for assembly by cleaning up the thread with a wire brush, being careful to ensure any old thread lock was removed. Then screwed in the ball joint to be sure everything was ready to go. Confident it was all good, removed, applied some thread lock, and started the final fit.
The lock washer decided spin when the ball joint made contact. Now I knew why they are usually circular! So decided to lock it off by knocking one side down…

With the ball joint fully tighten (210nm), I could bend the other side up to lock it off…

…whoops damaged the paint a bit .
Followed same process for the other one, and then time to install (sorry no pictures of this bit as it feels like you need 3 hands before you even think about picking up a camera!)…
Used a small bungee to hold the upper arm up, then installed the drive shaft at the gearbox end. Rotated a little in each direction until the splines lined up and it pushed in. However to get it fully home it needed a sharp whack with the soft faced mallet whilst holding with the CV joints as straight as possible.
Offered up to the other end of the drive shaft and fiddle around a bit to get the splines lined up.
Pushed the ball joint end through the hole in the upper arm. It helps if you’ve planned ahead, taken the nut off, and put it close to hand, but I didn’t :doh:. Lesson learned for the other side.  Fitted nut hand tight.
Aligned trailing arm and fitted bolts hand tight. These had a bit of thread lock applied before installing.
Aligned lower arm and fitted bolt.
Tightened all bolts with ratchet until contact with surface.
Then finished with torque wrench.
Ball joint nut through upper arm 54nm.
Both trailing arm to hub bolts 60nm.
Lower arm could not be done, as weight of car has to be on it, so I wrote 100 on the end of the bolt to save me looking it up later.
I didn’t fit the track control arm as I needed new nyloc nuts.
And this is what it looked like…

Did the same on the other side, and then fitted the dampers along with poly bushes either side of the top mount…

…I was also missing the top washer for these so I used a standard one temporarily.
One of the bottom ones was difficult to get started so I had to clean up the threads both in the arm, and on the bolt. Once all the way home they were torqued up to 100nm.
Finally checked for damaged paint work and touched up where necessary.
That was a lot of progress!
Time for :beer:
The following user(s) said Thank You: David Aiketgate, Uncletone

Please Log in to join the conversation.

02 TF 160 rear end refurbishment 10 years 2 months ago #139292

Great to see it progressing.

Like the colour of the subframe, you'll be able to see the dirt more , joking of course, but great thread.

You should be pleased with your efforts and it will be all worthwhile in the end.

Tone

Please Log in to join the conversation.

02 TF 160 rear end refurbishment 10 years 2 months ago #139303

Great to see it progressing.

Like the colour of the subframe, you'll be able to see the dirt more , joking of course, but great thread.

You should be pleased with your efforts and it will be all worthwhile in the end.

Tone


Thanks Tone. The colour choice was a result of a bargain.
When I went out shopping the usual sheds for a 1lt tine of black smoothright I happens on a number of tins on clearance in homebase. There were a couple of shades of green, and white. Was in quandary as to which shade of green was the closest and finally decided to got for something that would stand out. I got 2 1ltr tins for less than the normal price of a 750ml tin of black. :woo2:

Please Log in to join the conversation.

02 TF 160 rear end refurbishment 10 years 1 month ago #139523

Saturday 1st March
I’ve spent the week researching exhaust and induction upgrades.

On Monday I called Mike Satur to check if his complete system (Daytona with Quads, Sports cat, 4-2-1 manifold, mill eliminator, and fitting kit) was still available as his web site says “out of stock”. He confirmed it’s available to order with a 10 day lead time. At £1,200 all-in, it works out to be quite competitive compared to the alternatives once you’ve spent the time to add up the cost of all the components.
Hmmm Tempting.
He also still sells the Vader induction kit. So the total quote came to £1440 :pinch:. Hmm I could by another TF160 for that! I decided to check I was doing the right thing! :-?

Come Thursday I’d read of short lives for sport cats, failed MOTs on emissions, and little increase in power given the cash outlay. :nonod: Perhaps the most surprising was that the standard CAT is not very restrictive. And I guess the least surprising find was that the cheaper CATs can lose as much as 6hp.
See the exhaust section of http://www.mgf.ultimatemg.com/

So I called Mike and ordered the Daytona with round tail pipes only, having decided I want the car to remain standard looking. I do prefer the “sleeper” approach, and the Mini Cooper is testimony to that.
I also ordered an ITG Panel filter from PTP. It’s more expensive than the alternatives, but I have an ITG filer on the Cooper which is very good, and importantly that meant I already have the “sticky” spray you have to apply after cleaning.

So having spent nearly £500 I set about seeing if I could save £200. If I could clean up the existing cat I wouldn’t need to order a new genuine one, which even with Rimmers 10% off deal (for spending over £50 before 2nd March) would still cost £188.
2 of the nuts/bolt ends from the union with the exhaust had become one with the flange, and at the other end I had had to grind one of the nuts off, leaving half a stud. But crucially the internals were in good condition.


So out came the angle grinder to get rid of the remains. The rest was either punched or drilled out. Then I spent the best part of an hour with a file cleaning up, till it looked like this:-

Not so bad for 2 hours work.

Next I needed to drill out the broken adjustment bolt on the alternator. This was a total pain, as it was incredibly difficult to keep the thing level while drilling, which resulted in the hole being off centre :rant: . I tapped it out regardless and carried out a test fitting, which went ok. So I give it a clean with the wire wheel / drill combination.

Half way through BarryD appeared :drive:
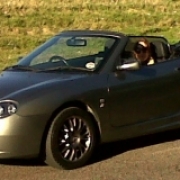
. Well it had been a lovely day so far. His 135 X-power grey TF was looking very nice. It really is in greatcondition, and worth every penny he paid! :broon: After a cupper and a chat he bid farewell and I pressed on.

Once cleaned up the alternator was ready to fit, so out came the belt DaveM had shipped half way around the world. It was tight getting the torque wrench in for the lower bolt, would be impossible with the engine in the car!
Job done.


To finish off the day I fitted the link assemblies and the correct washers for the top damper mounts.

Only the callipers and discs left to go back on, but that can wait until after the sub frame has been fitted back in the car.
The following user(s) said Thank You: David Aiketgate

Please Log in to join the conversation.

02 TF 160 rear end refurbishment 10 years 1 month ago #139589

Looking fantastic! Can I ask something of you?

Can you take a pic of the rear top arm from the side (i.e. from the hub) so i can see if yours sits horizontally on the bush please?

Felix's sits very wonky:


Yours seems to be a fairly horizontal fit from this angle:


Thanks.

Please Log in to join the conversation.

02 TF 160 rear end refurbishment 10 years 1 month ago #139590

And jolly nice tea and biscuits they are... I should point out that Argen69 is a jolly decent chap and will pick bits up at Stoneliegh you didn't know you needed and supply intelligent trickle chargers which you defiantly do need.

He remains cheerful even when I suggested that instead of buying a TF he should have just bought a mecano set and be done with it. Just don't turn up with a dirty car otherwise Mrs Argen69 will explain to you how to clean it properly :) :clap:
The following user(s) said Thank You: David Aiketgate

Please Log in to join the conversation.

02 TF 160 rear end refurbishment 10 years 1 month ago #139594

Looking fantastic! Can I ask something of you?

Can you take a pic of the rear top arm from the side (i.e. from the hub) so i can see if yours sits horizontally on the bush please?

Felix's sits very wonky:


Yours seems to be a fairly horizontal fit from this angle:


Thanks.


Looks like the top arm is on an angle; if the rubber of void bush has delaminated on the compliance bush it may allow the top arm to tilt or could the lower suspension strut bolt be bent?

Remove the lower strut bolt to take the load off and check the movement and travel of the top arm and compliance bush. I changed the top rubber bushes on the suspension for polly ones the other month and took an image as below which you may be able to compare.


Attachments:

Please Log in to join the conversation.

02 TF 160 rear end refurbishment 10 years 1 month ago #139596


Looks like the top arm is on an angle; if the rubber of void bush has delaminated on the compliance bush it may allow the top arm to tilt or could the lower suspension strut bolt be bent?

Remove the lower strut bolt to take the load off and check the movement and travel of the top arm and compliance bush. I changed the top rubber bushes on the suspension for polly ones the other month and took an image as below which you may be able to compare.


Thanks, will have a look - mine is definitely at more of an angle than appears so far on anyone elses pictures. As an aside it 'clonks' badly when I go over a bump or am on uneven road surfaces - much more from the drivers side rear than passenger. So I am guessing some bush has gone somewhere!

Please Log in to join the conversation.

Last edit: Post by adamelphick.

02 TF 160 rear end refurbishment 10 years 1 month ago #139618

Here are a couple of pictures Adam.


It looks pretty straight.

But I'm wondering whether the difference is because of the bump stop. I can't tell from your picture if it's making contact with the tower.

In the picture Badger has added he has removed the bracket.

One more point to take into account is that the picture you referenced from my build didn't have the damper unit installed.
In a later picture I show the damper installed without the correct washer and therefore the nut was not tightened to the correct amount of torque. Notice how off centre it is (red circle)

You can also see the bump stop rubber is missing (blue circle).
Finally here is another picture I took this evening which shows that it's more central now that the correct washer is in place and the nut has been tightened to the correct torque.


If the bump stop is not touching then I'd defer to Badgers suggestion.
If it is you can probably check by jacking up the hub to put some load on the suspension.
The following user(s) said Thank You: Davem

Please Log in to join the conversation.

02 TF 160 rear end refurbishment 10 years 1 month ago #139643

Brilliant thanks - never thought of the bump stop! I'll look again when it stops raining and fingers crossed I've either found the problem or eradicated it from the possible causes!

Please Log in to join the conversation.

Re:02 TF 160 rear end refurbishment 10 years 1 month ago #139650

Barry D I can see what you write!! Would you like your nuts tightened??? I can easily do it with my rubber cleaning toothbrush!!!!

Sent from my SM-N9005 using Tapatalk

Please Log in to join the conversation.

Re:02 TF 160 rear end refurbishment 10 years 1 month ago #140018

Barry D I can see what you write!! Would you like your nuts tightened??? I can easily do it with my rubber cleaning toothbrush!!!!

Sent from my SM-N9005 using Tapatalk


:spank:

Barry, that was Mrs Argen69, if you hadn't already guessed!
I've de-install Tapatalk from her phone now.
The following user(s) said Thank You: BarryD

Please Log in to join the conversation.

Time to create page: 0.140 seconds
© 2024 The-T-Bar.com All Rights Reserved. Hosted By SEBS IT