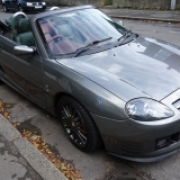
In an attempt to further improve the comfort and handling on my LE500 I decided to fit the VHS Bilstein and 85th Anniversary ARB kits.
There are at least 2 How To's covering the replacement of TF dampers on various fora so I'm not going to attempt to better those efforts. However, I did discover a few things in the upgrade which might be of use to others. So I'm posting this as a collection of observations and top tips.
VHS Bilstein Comfort pack
My LE500 is fitted with Tenneco Twin Tube dampers and has green (300lbs) front and yellow (420lbs) rear springs.
The 85th Anniversary TF has Bilstein dampers fitted with green (300lbs) front and red (600lbs)rear springs.
You can see that as well as the Bilstein dampers I need a pair of 600lbs springs for the rear so as to emulate the 85th setup. Now the OEM springs RKB00520 are no longer available but after market versions are available from eBay for around £17 each delivered. Suplex supply them under part No. 18026. Aftermarket springs with the same spec are also available from Rimmers under the part number RKB00521P for £30. Reasoning that the Rimmer versions would be better quality I ordered from them. Wrong! They are identical to the eBay items. Both Suplex 18026. They fit fine anyway although they cost me more. I suppose that makes up for the times that I have used Rimmers diagrams to identify the part number and sourced them cheaper elsewhere. What goes around....etc.
As an aside here are the spring rates for the TF since 2002
Rear 02-05 Red RKB000520 - 600lbs
Front 02-05 Blue REB000670 - 375lbs
Rear 05-on Yellow RKB000880 - 420lbs
Front 05-on Green REB001220 – 300lbs
This might be of interest too if you are interested in ride heights etc.
Top tips:
1. Buy new damper bolts. Do not re-use the old ones. The Chinese TFs use peculiar dog point bolts, well studs really.
the rear ones are shorter than the front
Front – 500000311
Rear – 500000313
These are cheapest from allcarpartsfast.co.uk. They aren't cheap though.
2. Buy new nuts – M12 x 1.25 nylocs – part No. 500000314
3. Buy standard full nuts of same spec to trial fit the bolts and dampers – M12 x 1.25
4. Buy a pair of external circlip pliers if you need to move the blind circlip on the damper to set ride height. VHS and MGOC advise middle position for my LE500 although they advise top position for all MGR TFs if you want to keep the same ride height. I used Sealey VS5201 Lock Ring Pliers Straight – External. About £8 delivered from eBay – pliers.jpg
5. I used these spring clamps and modified them to fit by cutting the ends off them. Apparently motorcycle spring clamps are a better fit and don't require modifying
1. Cut the ends off
2. So they clear the damper
6. My front damper units were fitted with an extra rubber bush.
I did not fit an extra bush when I built up the Bilsteins
7. I fitted poly bushes, cheapest from Rimmers @ £2.50 each-
http://www.rimmerbros.co.uk/Item--i-RNF100090LPOLY
8. I fitted them all taper to taper even though others have done it differently, because I believe they fit better to the cups they are located in.
9. I fitted new spring retainers as mine were a little worn. The original front ones without the locating spigot aren't available but rear ones with the spigot are and are listed as the proper part for the front even though there is no hole in the body to accommodate them and no need for them. The rear ones have the spigot so the rubber spring seat which is tapered is located correctly. See Rimmers part No – RNC000021 – I cut off the locating spigot. Note that the Chinese TFs have locating holes for the spigot in both the forward and rear position. Make sure when you fit them you use the rear most hole.
10. There is an unexplainably large >1mm clearance gap between the bolts and the damper bush
1. Bolts are ~ 11.7mm diameter, nominal 12mm OD
2. Damper bush is 13mm ID
3. Damper bolts on all previous models were nominally 12mm OD and damper bushes were all 13mm ID. There appears to be no reason for the huge amount of clearance. Dunno if this is the result of conversion from imperial 1/2” to metric but neither the MGOC Tech Dept. nor VHS were able to explain why the difference except to say that is how they had been designed. The bolt simply locates the damper into the recess in the top suspension arm and provided it remains under tension all will be well. However, if the tension was relaxed sufficiently and the damper was no longer fixed into the recess then the clearance would enable a hammering action on the bolt leading to early failure. It would be better IMO to reduce the clearance to limit the effect of hammering under these circumstances. After further consultation I decide to reduce the clearance to a more nominal level.
4. I had some mild steel sleeves turned up by a bored neighbour to 13mm OD and ~12mm ID so that they fitted closely to the damper but gave small clearance with the bolt. All were then assembled with Coppaslip.
11. I use Draper Hi-Torq Coloured sockets now to avoid rounding nuts. They are available in 1/2”, 3/8” and 1/4” drive versions. I have a load of 12 point sockets but they aren't good for high torque applications and the colours are useful after a while in selecting the right socket. They can also cope with undoing rounded nuts because they don't bear on the points.
12. Trial fit the bolts into the top arm before final fitting. This is to avoid the situation where they don't locate sufficiently far into the recess and then the damper isn't fixed properly and the bolts fail. They should be a snug fit.
13. Sequence of fitting
1. Place dampers into position
2. Fit bolts to damper
3. Bend spherical bearing to fit end of bolt into top arm
4. Push into top arm and bolt up with standard bolts finger tight to prove the damper locates fully into the recess
5. Unbolt and fit sleeve
6. Use standard nuts to drift in the sleeve
7. Replace standard nuts with nylocs and tighten finger tight
8. Jack up the hub so that this corner comes off the axle stand
9. Tighten both nuts to 100Nm/74 ft lbs
10. Release jack
11. I believe that torquing up the suspension up whilst the suspension is down could be one reason why it takes a while for the ride height to stabilise. I'm happy with my ride height as it is, which seems very close to what it was, well within 10mm or so!
14. Now is a good opportunity to grease up the front nipples.
15. If you are only fitting the dampers you can do it by unclamping the ARBs at the hub end, but it's a bit of a faff getting the damper units into place. It's much easier if you can drop the ARB entirely but in order to drop the rear one the exhaust back box needs to be removed.
VHS 85th Anniversary ARB upgrade
My LE500 is fitted with 21mm front ARB and 18mm rear ARB. The 85th Anniversary upgrade increases these to 25mm and 20mm, respectively. Stiffness of an anti-roll bar is proportional to its diameter^4. So the front stiffness is increased by 100% and the rear by 52%.
Top tips:
1. You need to remove the exhaust back box in order to replace the rear ARB. It's not possible to replace it without removing the back box. At least I couldn't do it.
2. The front bracket which secures the ARB on the lower wishbone needs to be strengthened because of the increased force of the thicker 25mm OD ARB would otherwise rip off the original single bracket. VHS provide a simple bolt-on replacement with additional fixing and simple diagramatic instructions.
3. Fitting the additional bracket
1. Original bracket
2. The old bolt is a faff to get out, you need to jack up the hub and rotate it and it is only just removable, or cut it out.
3. It's out!
4. Remove the wishbone bolt
5. Fit the new bracket and tighten the drop link using 15mm and 17mm spanners
4. The front ARB clamps used horrible slotted screws which are prone to corrosion. I replaced them with new non-slotted M8 x 25mm flanged head 8.8 screws and cleaned the threads in the existing captive nuts.
5. Incidentally, the head size of the two original screws on each clamp were every so slightly different. I had to use different 10mm sockets to unwind them.
6. In order to correctly position the ARBs centrally to the car I loosely tightened the clamps, after spraying the ARB with silicone lubricant then pulled and pushed the ARB so that it was central and tightened up the drop links before tightening the clamps
Was it worth it?
I suspect the effect of the suspension changes are more observable on pre-2005 TFs. However, my LE500 now feels a bit less crashy over uneven surfaces and my wife says she feels much more confident as a passenger. The ride feels more composed to me and there is less body roll. Negotiating roundabouts is more fun as a result. I've only driven a few miles with the new setup and I'm looking forward to many more so the evaluation can continue.
")

 Topic Author