Sign In   Register
  • Page:
  • 1
  • 2

Topic

How to make a side scoop. 10 years 4 months ago #136440

  • cjj's Avatar Topic Author
  • cjj
  • Offline
  • Administrator
  • Administrator
  • The future is vented.
  • Posts: 6411
  • Thanks: 1326
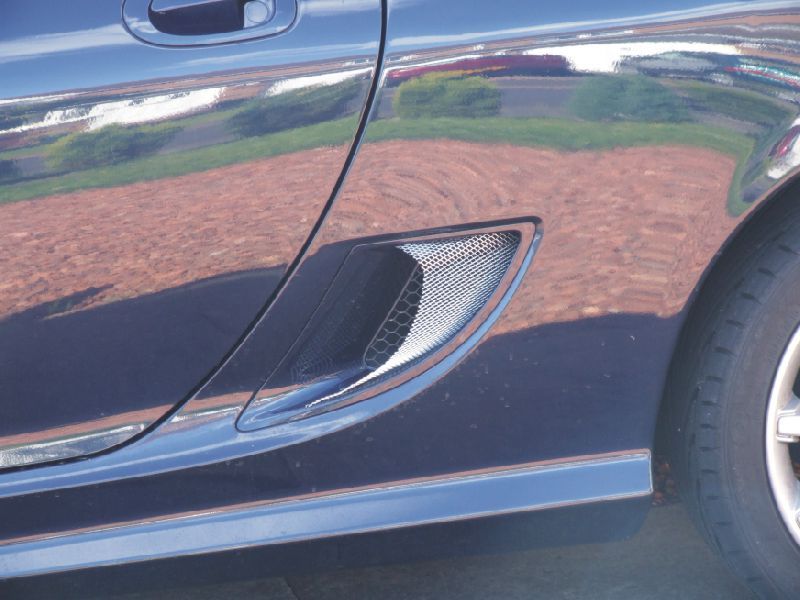
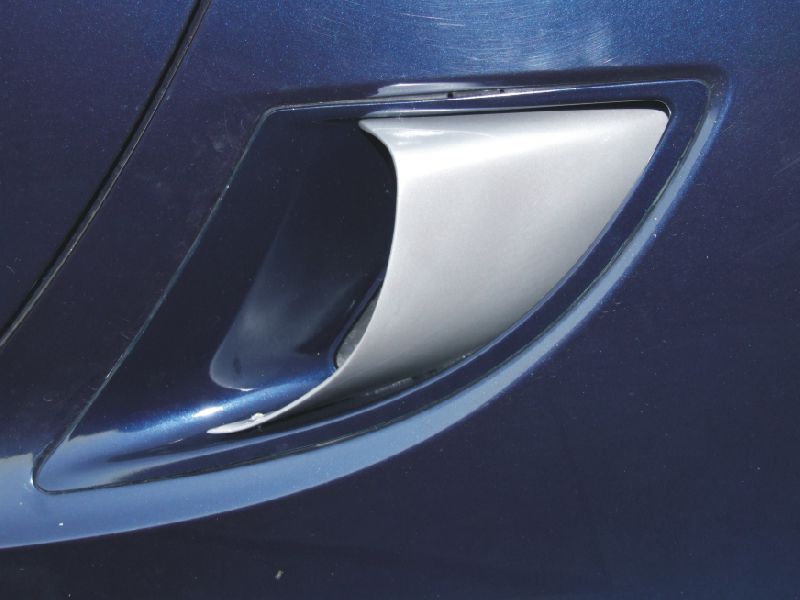
Whether it makes any real difference is up for debate but scoops are cool and if you want some on the cheap, this is how I made and fitted the air scoops and modified the air box feeds.

The main idea behind this is to collect cooler air for the engine induction than can be found in the engine area. It won’t act as a “ram air” system as, due to its size and position it could never deliver a positive pressure.

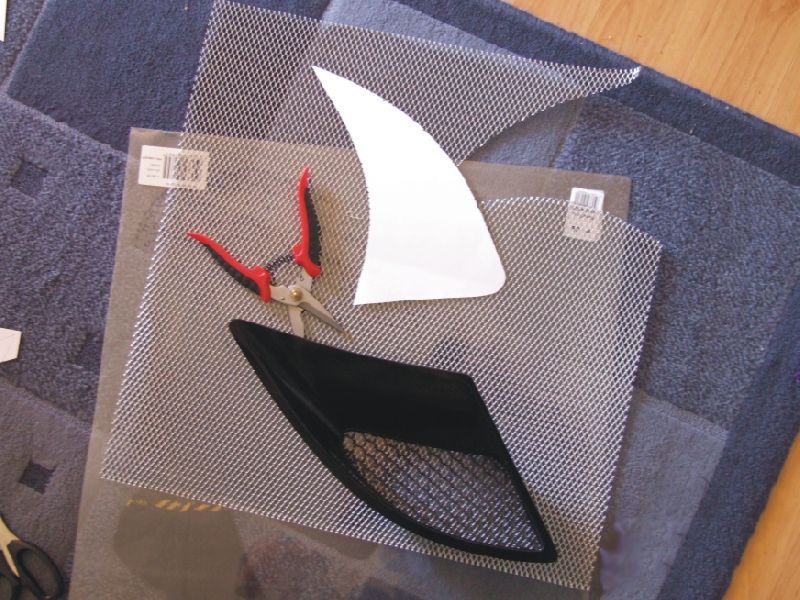
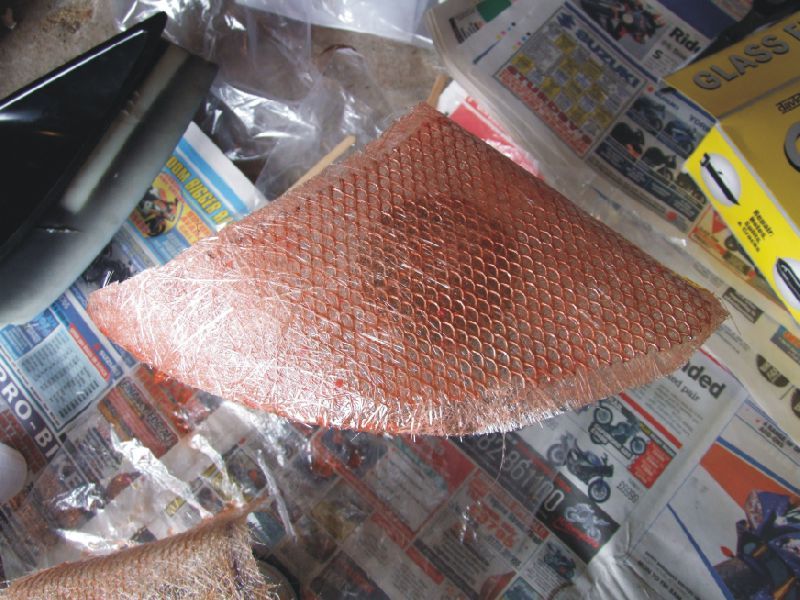
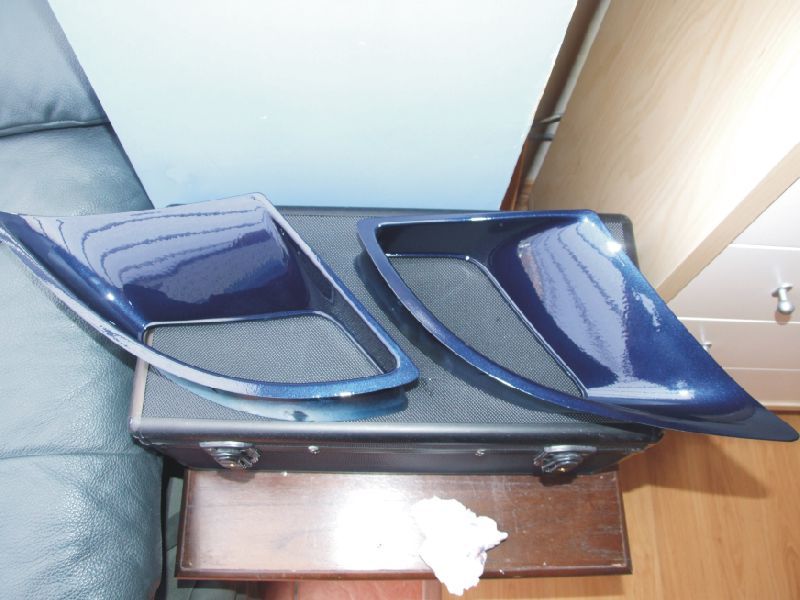
The first thing I did was to make a card template that was roughly the shape I wanted and then trial fitted it against the vent. Several templates later and I had the rough shape I wanted. I then cut the shape out of a sheet of aluminium mesh that I bought from B&Q.


I chose the aluminium mesh so that I could bend and mould it to shape before applying the glass fibre.

I then trial fitted it on the car and made any adjustments that I needed to.


This is the point I realised that silver would be a nice colour for it as I was originally going to colour match it with the car.

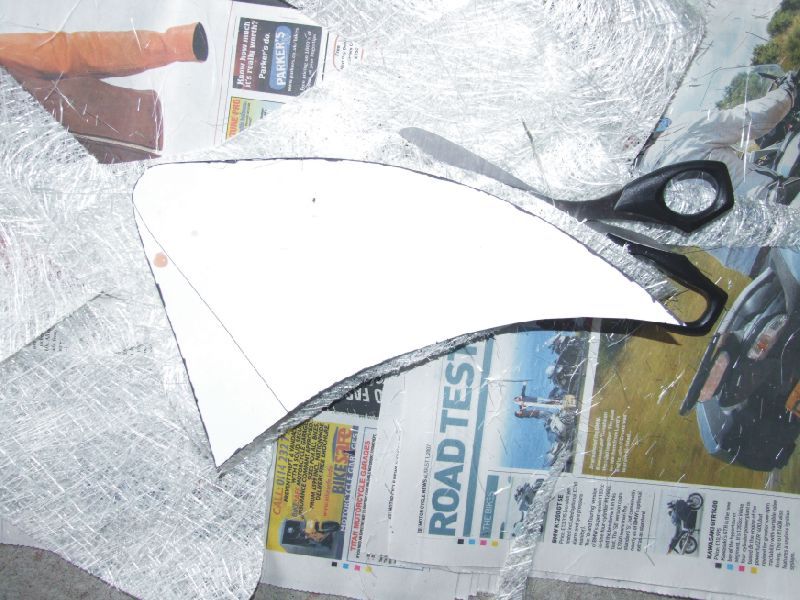
Next I used the template to cut some oversize glass fibre shapes. You need to cut them slightly bigger than the aluminium so that they overlap and seal the edges.


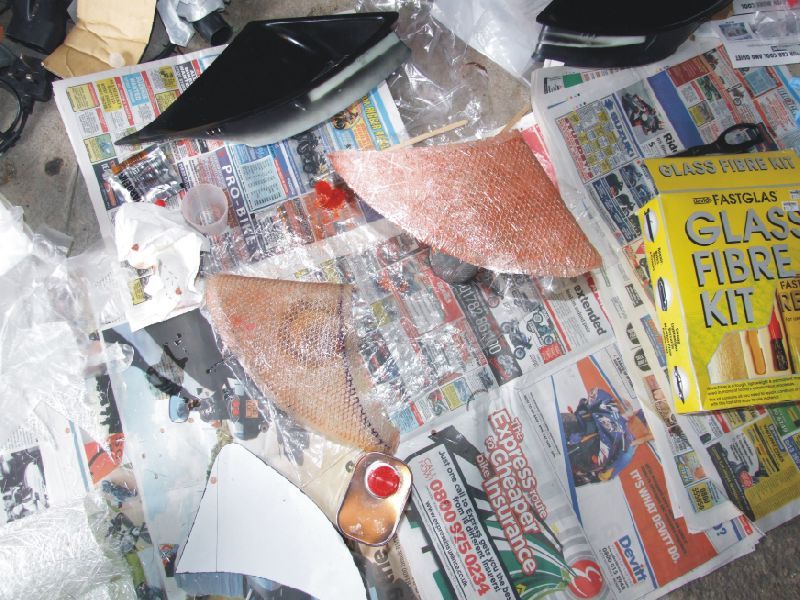
Apply the fibreglass matting to the aluminium using the resin and hardener supplied.


Build up several layers on both sides to add strength.


Trim the edges to shape and trial fit again to ensure that they are still the shape you want.

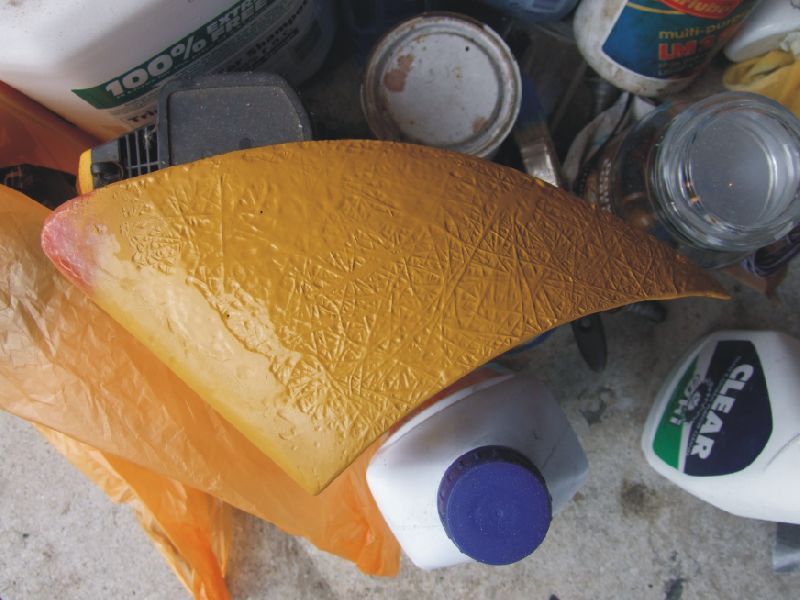
Sand down any large lumps or irregularities.

Warning. When using or sanding fibreglass use protective equipment. The fibres really cause itching if exposed to skin and if you inhale fibreglass it can give you lung problems.

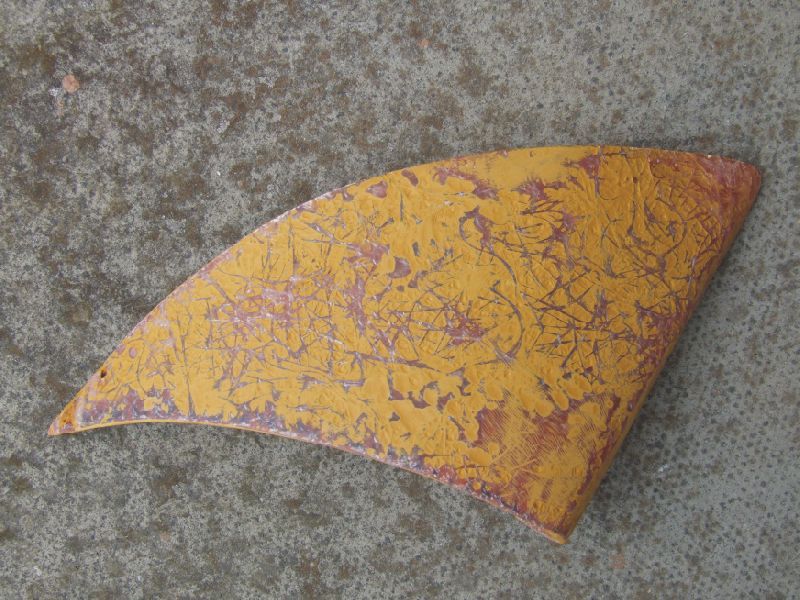
I then used spray putty to build up layers and sanded down with wet & dry to fill any irregularities.


This takes time and several attempts to get a nice smooth uniform surface. Allow coats to dry fully before sanding.


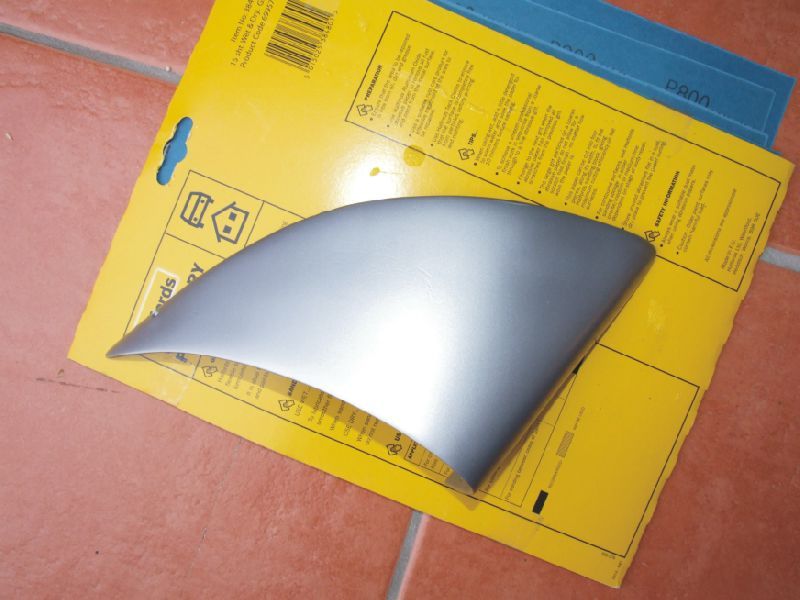
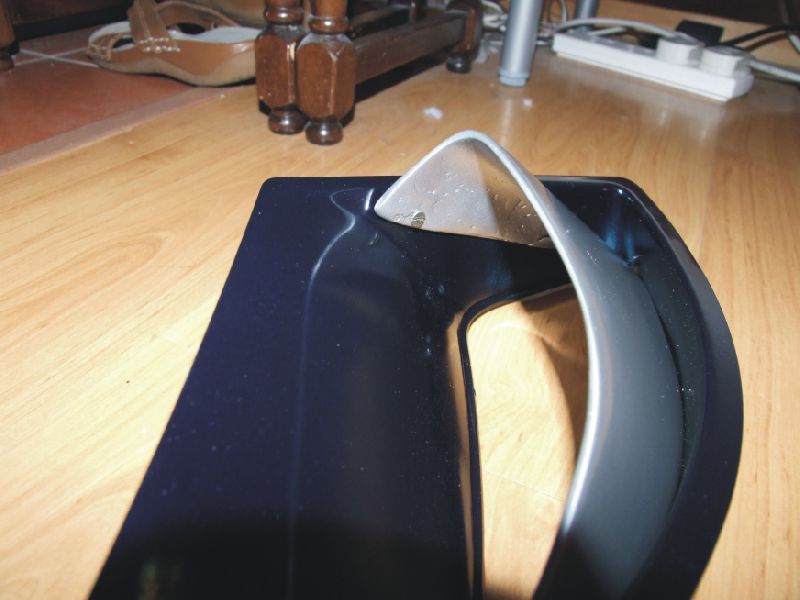
It is now ready to prime and paint the colour of your choice. I ended up using silver alloy wheel paint and lacquer. Again, you should build up the coats and sand back if there are any lumps or craters.


Next I colour coded the new air vents that I got from e-bay, which were originally black.


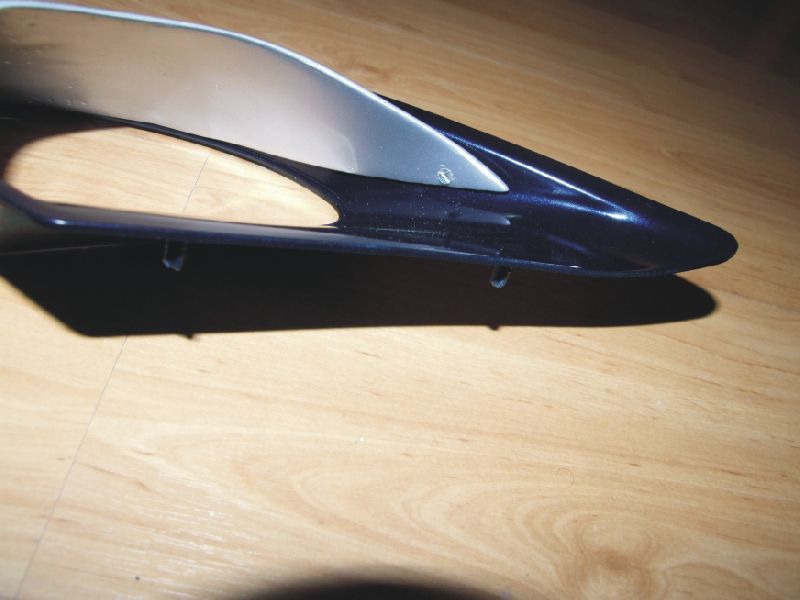
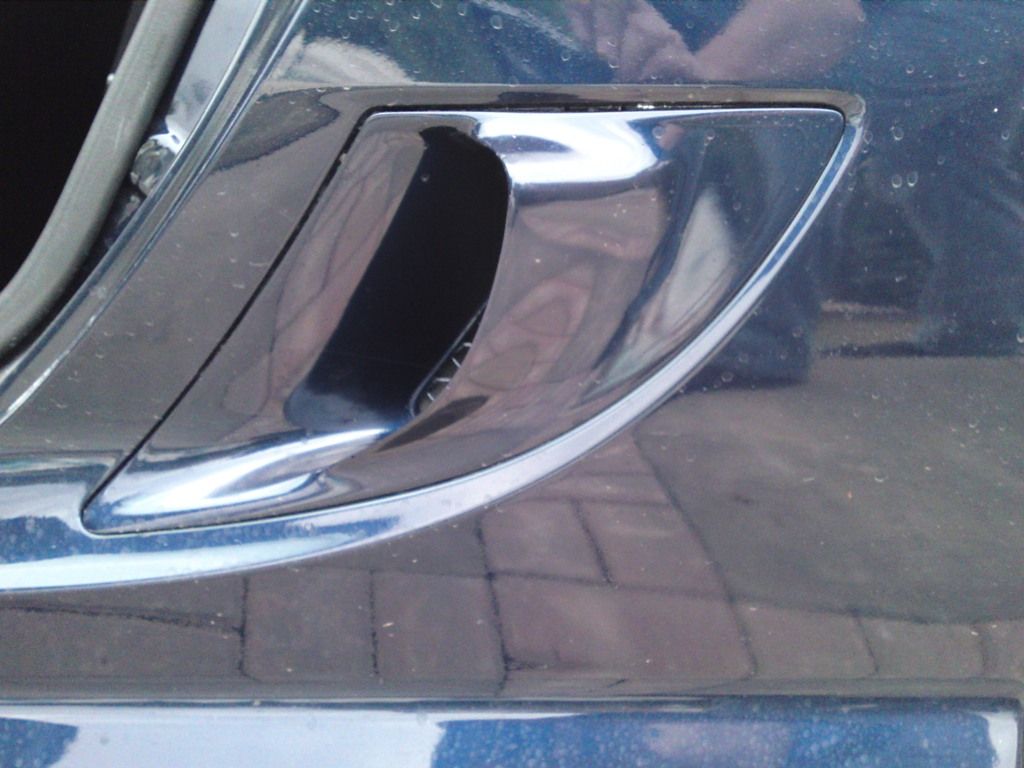
The scoops were then attached to the vents using 2 small screws at the top and bottom leading edges. I used this method for strength as I thought that at speed the wind would try to pull the scoop away from the vent.


The rear or the scoop rested nicely against the bottom ridge of the vent, where the mesh is bonded to the underside. I used araldite to bond the scoop to the vent at this point but nowadays I would use a bonding agent such as tigerseal.

I then re bonded the black mesh to the back of the vent and fitted the scoop to the car.


Next we need to direct the cool air from the scoop to the air box.

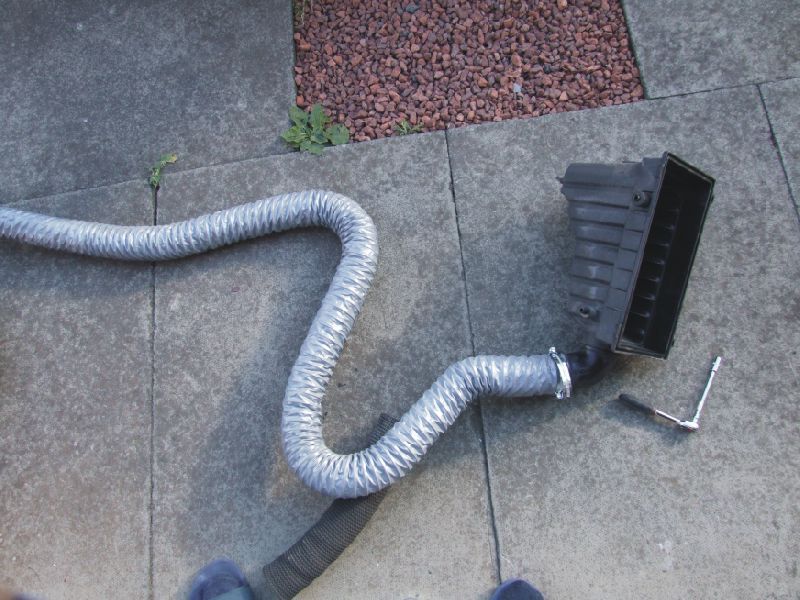
The air box was removed and some new ducting used to redirect the air intake back under the air box bracket to the vent. And no, that isn't off my tumble dryer. I bought it from a car tuning place at £5 a metre.


I would try and use plastic type ducting rather than aluminium as the aluminium will be more prone to heat soak from the hot engine area.

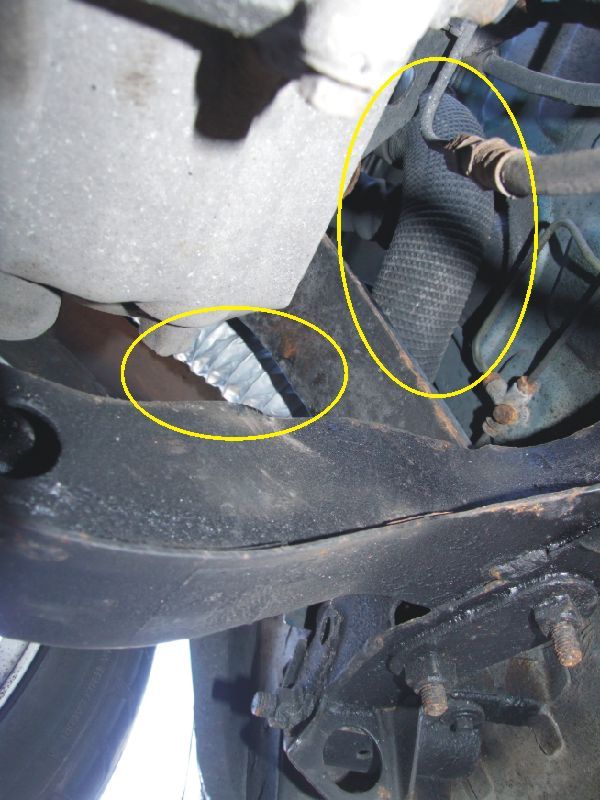
I also redirected the front air ducting from under the wheel arch to the air vent.


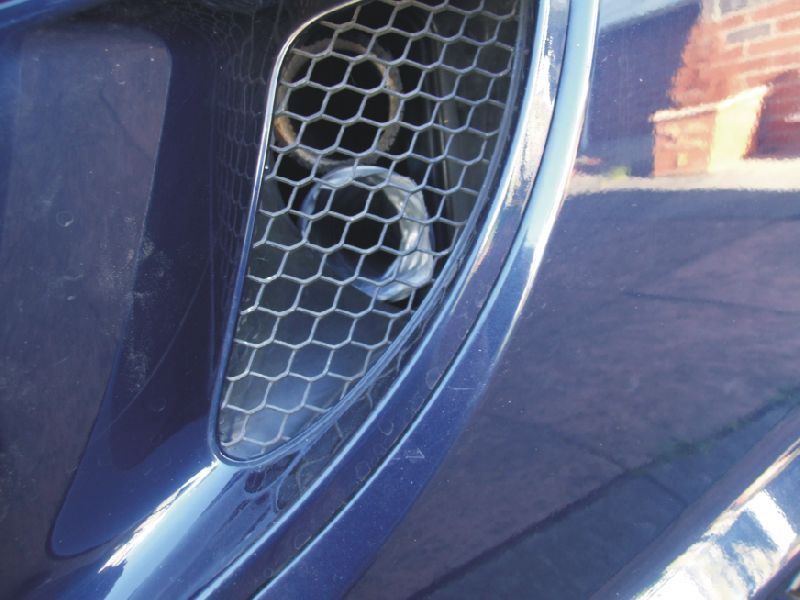
This means that both air intake tubes now take air from the scoop.


You cannot see them now with the scoop in place and I used a bit of black spray paint to tone them down.


I then took the car for a blast around some country lanes and dual carriageway and I have to say the perceived difference is more than I expected. It feels more lively and eager to rev while on the move. This may all be in my imagination, but there does seem to be an improvement.

You could also use this method to fabricate other one off parts. Go on, have a play.

Just as an update, when I had the car re sprayed I had the vents filled and blended. They did look nicer but they did weigh a lot due to the amount of filler.


Unfortunately, in my quest to lighten them a bit, I gave them to someone in the Midlands to mould and make fibreglass copies. That was a few years ago and I have never seen them since.

I do now have some that I bought from XR3TF.

The following user(s) said Thank You: Davem

Please Log in to join the conversation.

How to make a side scoop. 10 years 1 month ago #140452

who is xr3tf is he still making the scoops
BILSTIEN DAMPERS, 4-2-1 MANIFOLD, HEAD WORK BY SABRE.

Please Log in to join the conversation.

How to make a side scoop. 10 years 1 month ago #140455

Please Log in to join the conversation.

How to make a side scoop. 10 years 1 month ago #140497

I've got a guy in Wales making some vents for me, he has just finished the moulds, and prototype, he is talking about £55-60 delivered, and has mentioned a group buy .

Picture of prototype attached, not seen it in the flesh yet, but it is just as I wanted it.

Attachments:

Please Log in to join the conversation.

Last edit: Post by mgbv8mike. Reason: Pic did not attach first time

Re:How to make a side scoop. 9 years 11 months ago #144591

Just got my scoops fitted today (finally) and Im very happy with them to say the least. Brilliant build and came up ok with paint.
We used 3M tape and Urethane adhesive to ensure they don't come off in the tropical heat here.
Better photos to follow but highly recommended.
Sorry for the upside down and sideways photos. Its not me, its Tapatalk or Apple.


Best wishes all.

Ken


Sent from my iPad using Tapatalk HD
Attachments:

Please Log in to join the conversation.

Last edit: Post by David Aiketgate. Reason: clicked insert

How to make a side scoop. 9 years 11 months ago #144593

Yes I know what you mean about Tapatalk/Apple :( Here you go bud........


Nice scoops but no good to me as I've got an F :yesnod: :broon:
Attachments:

Please Log in to join the conversation.

Re:How to make a side scoop. 9 years 11 months ago #144594

HOWEVER:
Just driven 60 kms home, 29 Deg C outside and my water temp has risen by just over one graduation to the 3/4 mark, and i think the oil temp is running a bit hotter at around 125 Deg indicated.
Im really concerned with this as my water temp has never gone over 1/2 before.
Im not sure how this can occur as I thought the scoops flowed more useful air into the engine bay, not less.
Has anyone else from a warm climate experienced an increase in gauge temps?

Ken


Sent from my iPad using Tapatalk HD

Please Log in to join the conversation.

Last edit: Post by Baytown.

Re:How to make a side scoop. 9 years 11 months ago #144611

That's not right. :nonod:
Have you checked that both fans are still operating? Have you somehow stopped the engine bay fan from running?
David
:shrug:

Please Log in to join the conversation.

Re:How to make a side scoop. 9 years 11 months ago #144617

Hi David.
Thanks for the suggestion. All we did was stick the scoops on, didn't open the engine bay. I was interested to check if the engine bay fan was still running after I got out of the car and yes, the right hand intake engine fan was running strong and continued after the car was shut down which is normal up (down) here.
Its got me buggered!


Sent from my iPad using Tapatalk HD

Please Log in to join the conversation.

Last edit: Post by Baytown.

Re:How to make a side scoop. 9 years 11 months ago #144628

Of course, basic principle is- undo what you did last to see if the problem goes away...

Can you remove the air intakes and scoops?
David
:shrug:

Please Log in to join the conversation.

Re:How to make a side scoop. 9 years 11 months ago #144665

Probably not as they were stuck on with 3M urethane panel bond.
I'll see what I can do but the boys did a good job on adhering them to the car.
Best wishes David.
Ken


Sent from my iPad using Tapatalk HD

Please Log in to join the conversation.

Last edit: Post by Baytown.

Re:How to make a side scoop. 9 years 11 months ago #144677

Well, I removed the right side scoop trim and drove the car. Needle went to the top and it actually steamed on me at traffic lights, so Im sitting here in a radiator shop waiting for a report on what's going on.
Looks like a cooling fault which unbelevably started as soon as the scoops were fitted!
All fluids and electrics are good so ? Stuck thermostat ?
More to follow once the pros get back to me.

Ken


Sent from my iPad using Tapatalk HD

Please Log in to join the conversation.

  • Page:
  • 1
  • 2
Time to create page: 0.142 seconds
© 2024 The-T-Bar.com All Rights Reserved. Hosted By SEBS IT