I have noticed a few people have had problems recently with batteries and charging etc.
As it is fairly easy to check things yourself, with the right equipment, I don't like to see people forking out huge money to electricians (unless it is me
")
), I thought I would do a how-to so that anybody who wants to have a go, can.
There are several methods to check the battery voltage.
One easy way is if your Hi Fi has a voltage display. I would only use this as an indication of whether the car is charging the battery, as the actual voltage is not very accurate (mine isn't anyway)
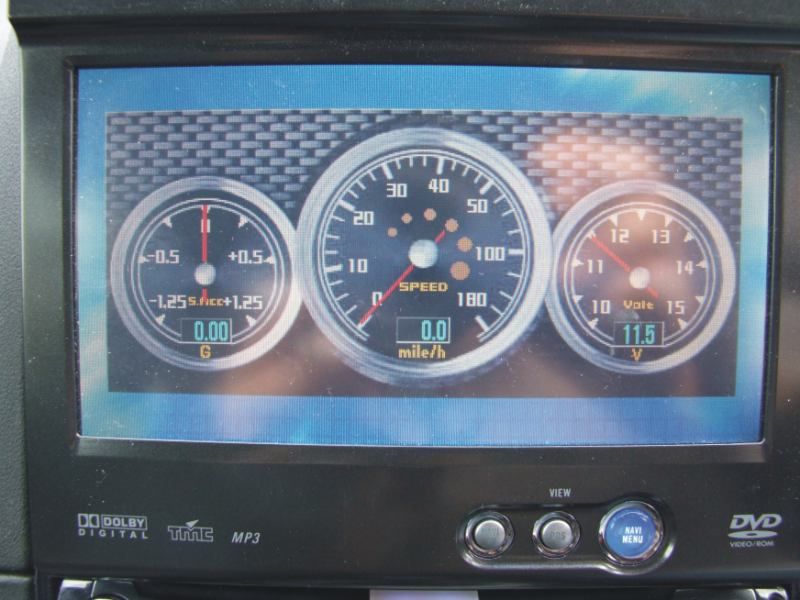
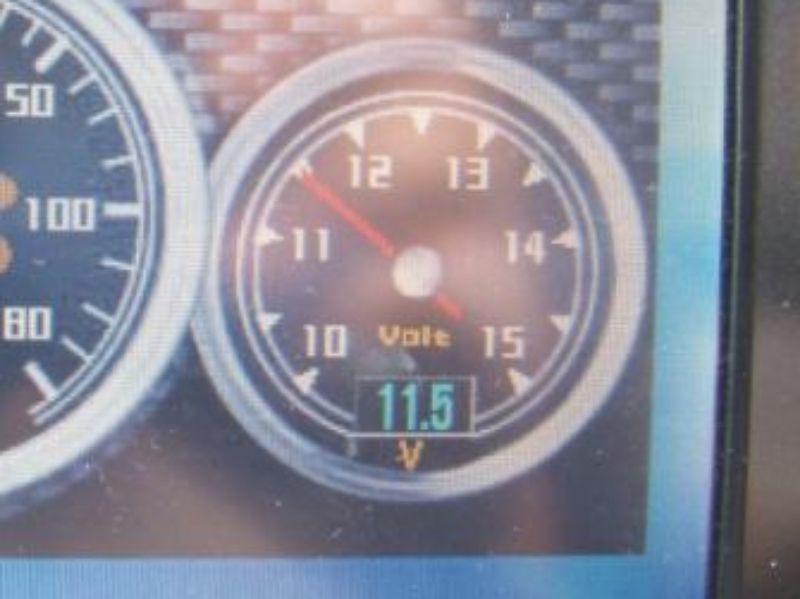
First of all, select the voltage display which depends on your head unit, mine is a Pioneer AVIC.
The Voltage is the right hand meter
Check the display with the ignition on, but without the engine running. In this case it says 11.5V. I know for a fact that the battery voltage is well over 12.5V, so it shows how inaccurate the display can be.
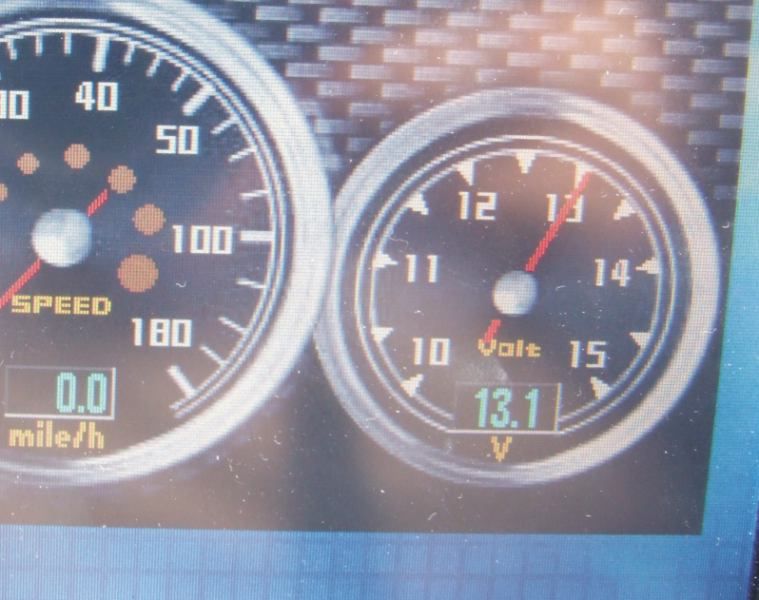
Now start the engine and check the voltage again. If the Voltage is the same or lower then you have a charging problem. The Voltage should be about 1V higher if correctly charging.
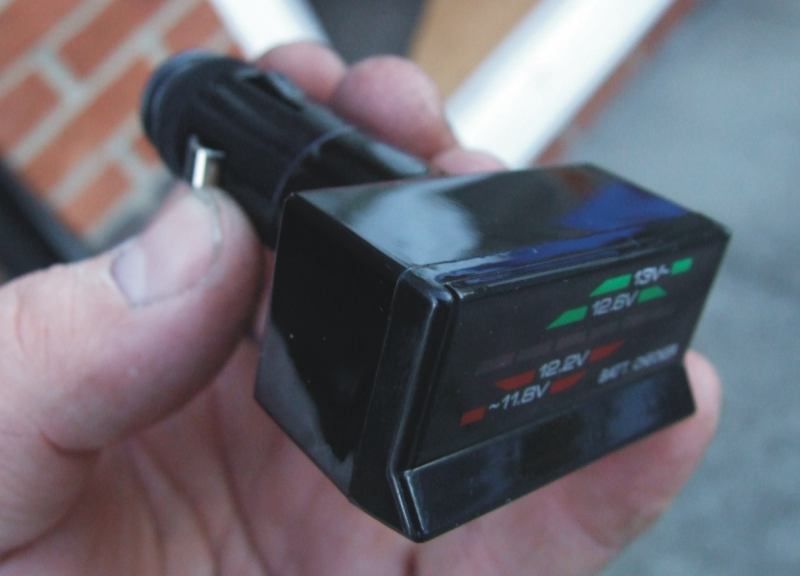
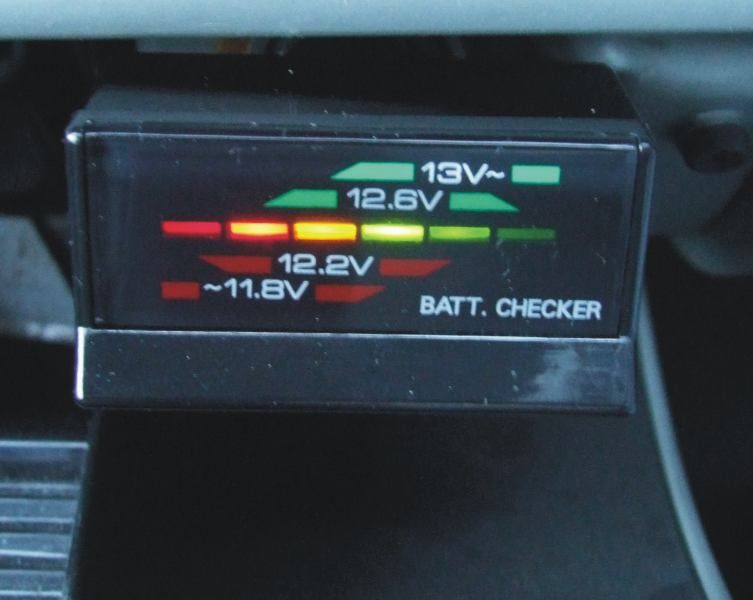
There are other quick and easy ways to check your battery. I bought this device from the bargain bucket at Halfords. Not exactly sophisticated test equipment, but gives you some indication of what is going on.
It is designed to simply push into the cigarette lighter and give you a visual indication of the state of the battery.
Once in the cigarette lighter socket you should turn the ignition on, but not start the engine. You might not need to do this if your socket is permanently live.
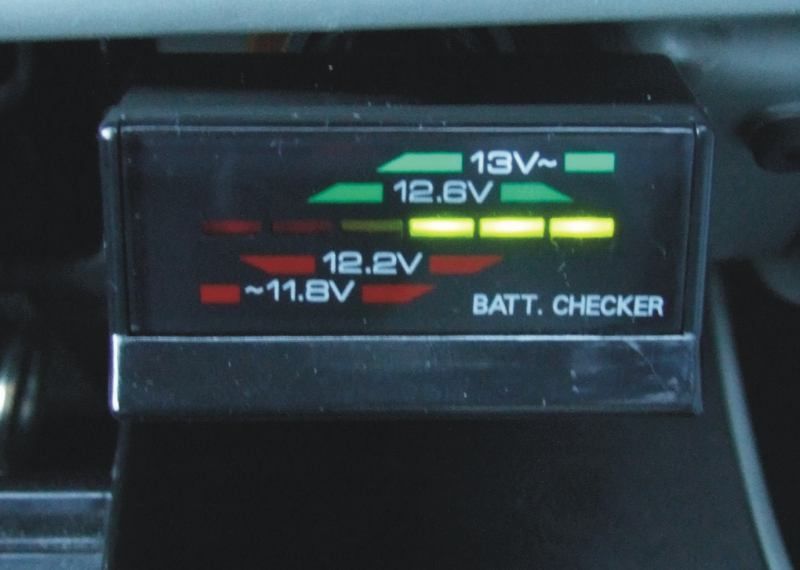
As you can see, my vans battery is healthy. Now start the engine and see what the reading says.
The reading has now gone off the scale, which shows the alternator is charging.
Now if you want to do a proper job you should use a decent multimeter and check at the battery terminals. This will give you a more reliable and accurate reading.
The meter I use is a Fluke, but most meters work under the same principle.
To check the voltage you should set the selector switch to Volts, then connect the red lead to V and the black lead to COM (common).
Connect the other end of the black lead to the negative terminal of the battery and the red to the positive terminal. You should now have a reading of around 12.6V for a healthy, fully charged battery. If it is below 12.4V then it may need charging. Anything below 12V needs recharging or a new battery. While connected, switch the headlights on and the voltage will drop but should still stay above 12V. Switch the headlights off.
Now start the engine and look at the reading. You should now have about 13.8V which will show that the alternator is charging a healthy battery. If the battery is flat, you will see an increase in Voltage, but it will not be as high as 13.8V until it becomes charged.
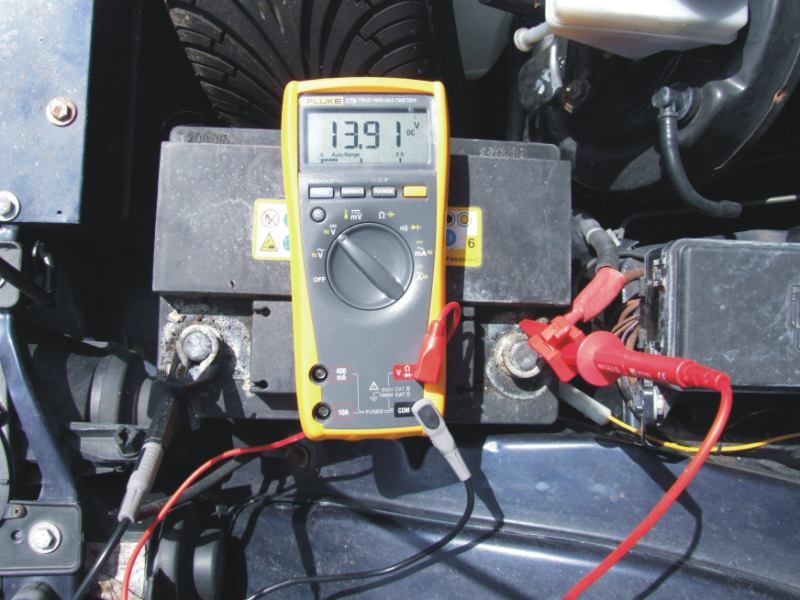
The picture below shows the meter connected for battery Voltage and it also shows that it is charging with a reading of 13.9V.
That is how to check your battery and charging.
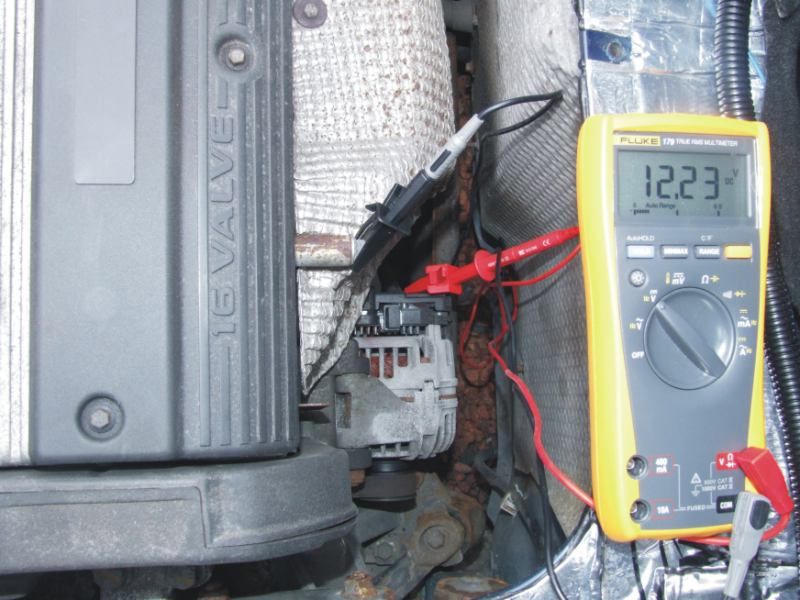
Another place you can check is at the actual alternator for charging. To be honest, you get exactly the same from checking at the battery, unless you have bad connections at the battery. In other words, if it all checks out at the battery, then you don't need to do this check. If the voltage is low at the battery, then you might want to do this just to tick the alternator off your check list.
Set the meter to Volts. Connect the red positive to the alternator output and connect the black negative to a good earth. You should read battery voltage, minus a small amount for voltage drop in the cables.
Now start the engine and the Voltage should rise to show that the battery is charging at around the 14 - 14.5V mark.
Remember that the alternator is rotating when the engine is turning. Be careful not to get caught in the turning machinery/belt. Connect and disconnect with the engine off. The exhaust may be hot too, so try not to burn yourself.
Another thing that gives the effect of a flat battery is a bad connection. This could be down to the connection being loose, damaged or badly corroded.
To test a connection you need to connect the test leads to the meter, as shown previously, but turn the selector to resistance or ohms (Omega symbol). In this example I am testing the negative battery terminal to the chassis. Ideally the reading should be as close to zero as possible, showing that there is little resistance to the flow of current. In real world conditions you will probably see a couple of ohms.
You must ensure that you have good connections to a good known earth, so try a few different places. A tip, it is no good connecting to a metal bolt or screw if it is screwed into plastic (I have seen electricians do this, and have done it once or twice myself, it is not always obvious with colour coordinated panels). A good indication of this is if the reading is infinity.
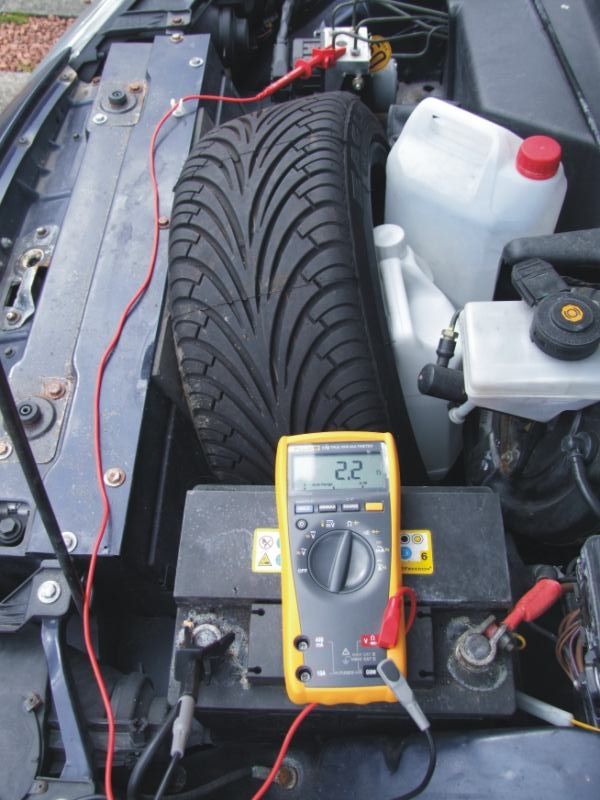
You can see here that the reading is 29.9 ohms. This either shows a problem or I have chosen a bad place to test.
Choose a better connection. In the next shot I chose the ABS block as it should be physically bolted to the chassis and looked clean and free of corrosion.
2.2 ohms, much better. That will do for me. So, as you can see, your choice of connection is important.
If you just want to test a lead, for example the negative battery lead, then connect one lead to the negative post and one to the chassis connection. This will give you a low reading but will not necessarily show you whether the connection to the chassis is any good, just the length of cable.
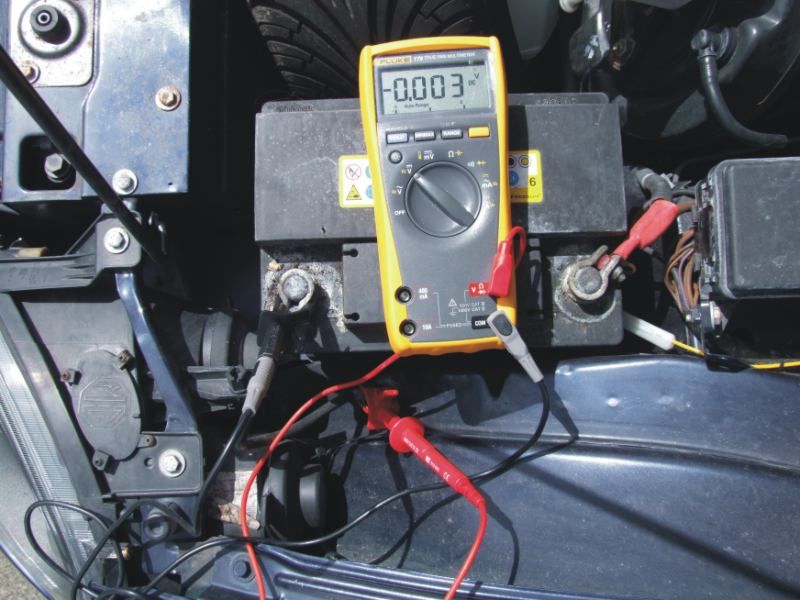
You can also connect the meter across the connections in Voltage mode. If there is a substantial voltage when there is a load on (lights etc) then you have a bad connection. This is just another way of detecting a high resistance as it will drop Voltage across it.
As you can see, it is reading 0.003 Volts. Hardly worth mentioning. If it was 0.5 Volt or more you should worry.
If anybody has any electrical tests that they want explaining, let me know and I will try my best.