If you have fitted a de-cat pipe, or, like me, a sports cat, you could find that the MIL (Malfunction Indicator Lamp) keeps coming on on the dash.
The reason is that there are two O2 sensors, one pre cat and one post cat, that compare figures to judge the efficiency of the cat. If the reading starts going out of specification it will light the MIL as a warning and will normally log a fault (O2 sensor bank 2).
It is not that the sports cat isn't working, it is because the system is calibrated for the original cat.
You can buy an OBD II reader, or equivalent for < MEMs 3, and reset the codes and MIL, but the fault will keep re-occurring.
Another way around it is to buy a CAT Eliminator. I bought mine from PTP for around the £28 mark. A little expensive for a few resistors and capacitors, bit of wire and 4 crimps, but hey, what ya gonna do?
http://www.ptp-ltd.co.uk/shop/258_111/mg_rover/mgf__mg_tf/exhaust_systems/mil_eliminator_(malfunction_indicator_lampcheck_engine_light).htm
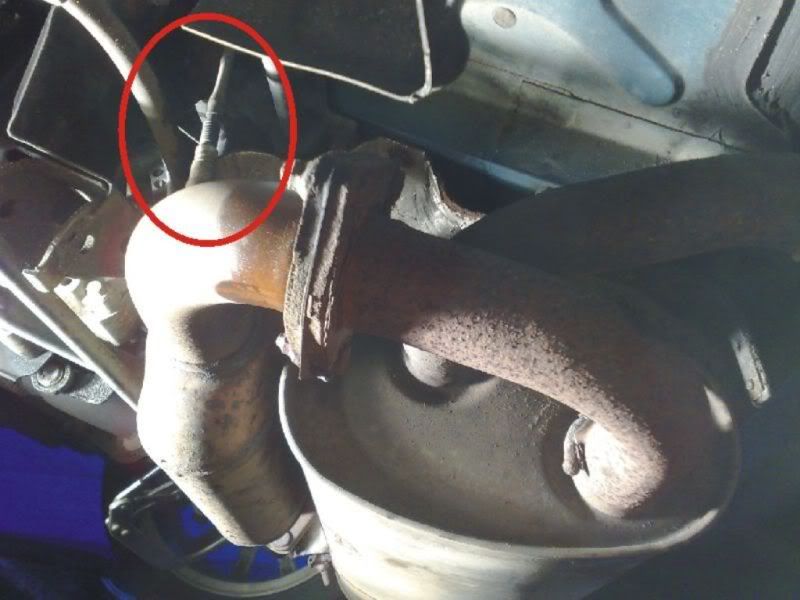
First thing to do is remove the O2 post cat sensor. You can find it on the cat pipe (just after the cat).
First of all disconnect the multi plug, which is just in front of the ECU, beside the air box. A good trick is to tie a bit of string to the plug so that when you come to refit the sensor, you can just tie the string back on and pull it up through the engine bay.
Next you need to remove the sensor from the exhaust. It is a 22mm open ended spanner that you will need and plenty of muscle power. If you cannot remove it you can do this job in situ, but it is so much easier crimping from the comfort of your settee. If you do use release oil or a hammer, be aware that you could contaminate/damage the sensor. Not too much of a disaster if you are fitting the MIL, but you will never be able to go back and use it again. A bit of heat may loosen it up if you have a blow torch handy.
You may also want to loosen the exhaust, or drop it, to gain more access. That wasn't a big job for me as I have just recently fitted it.
Here is the sensor on a standard TF cat.
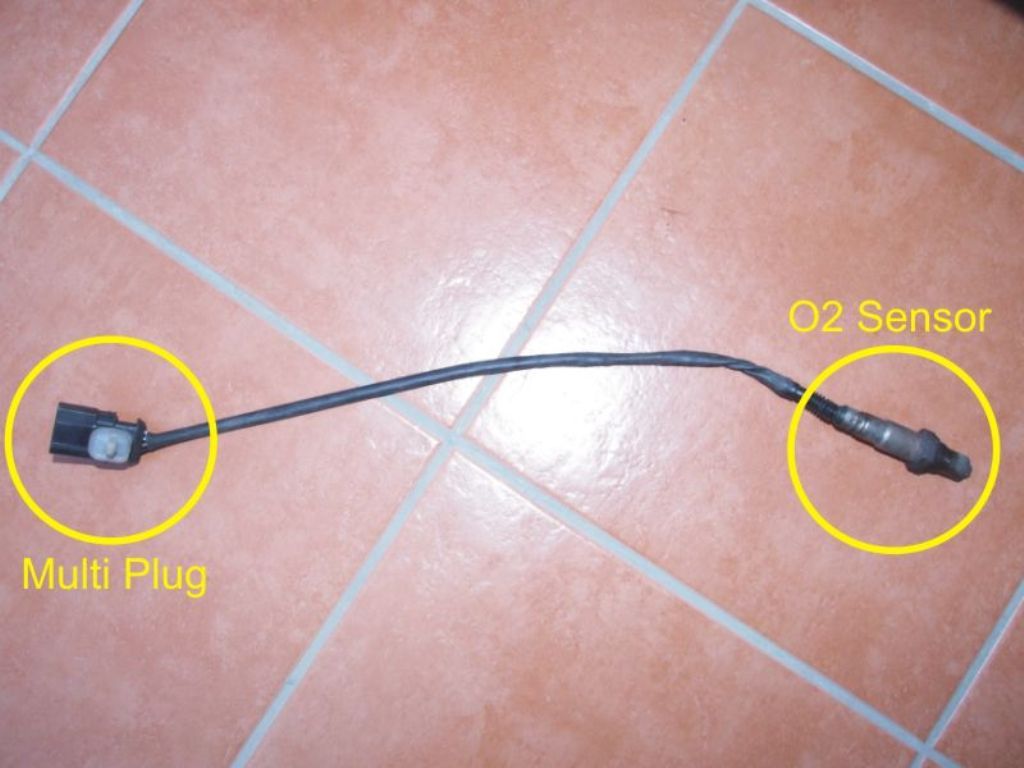
Here is the sensor removed.
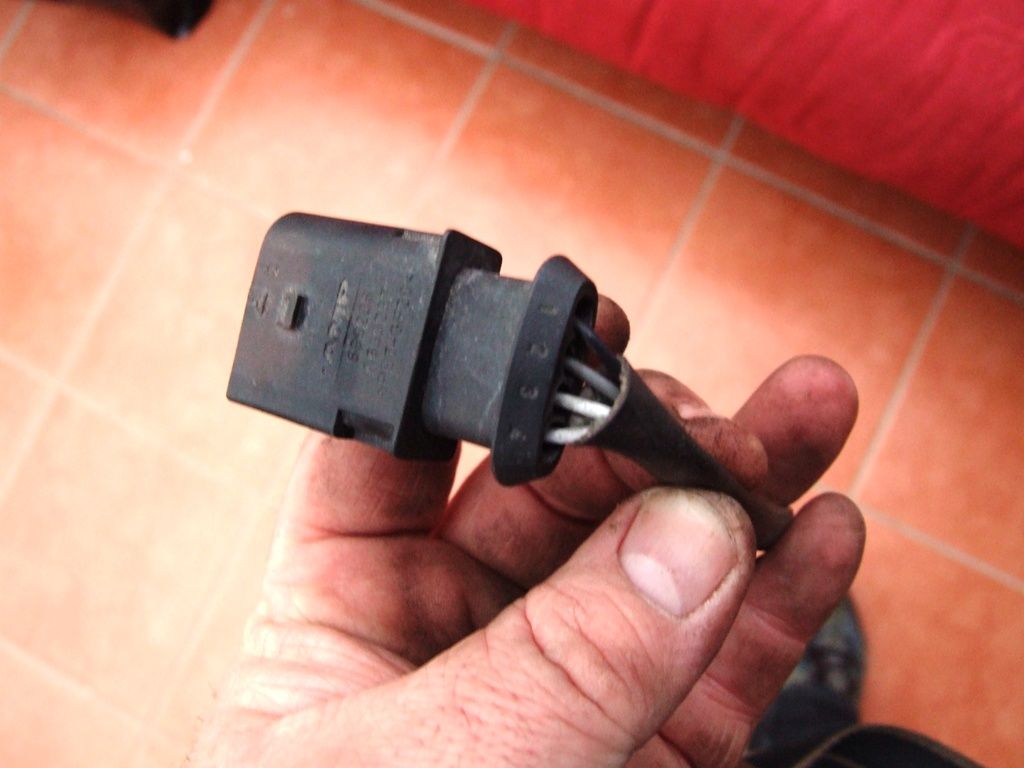
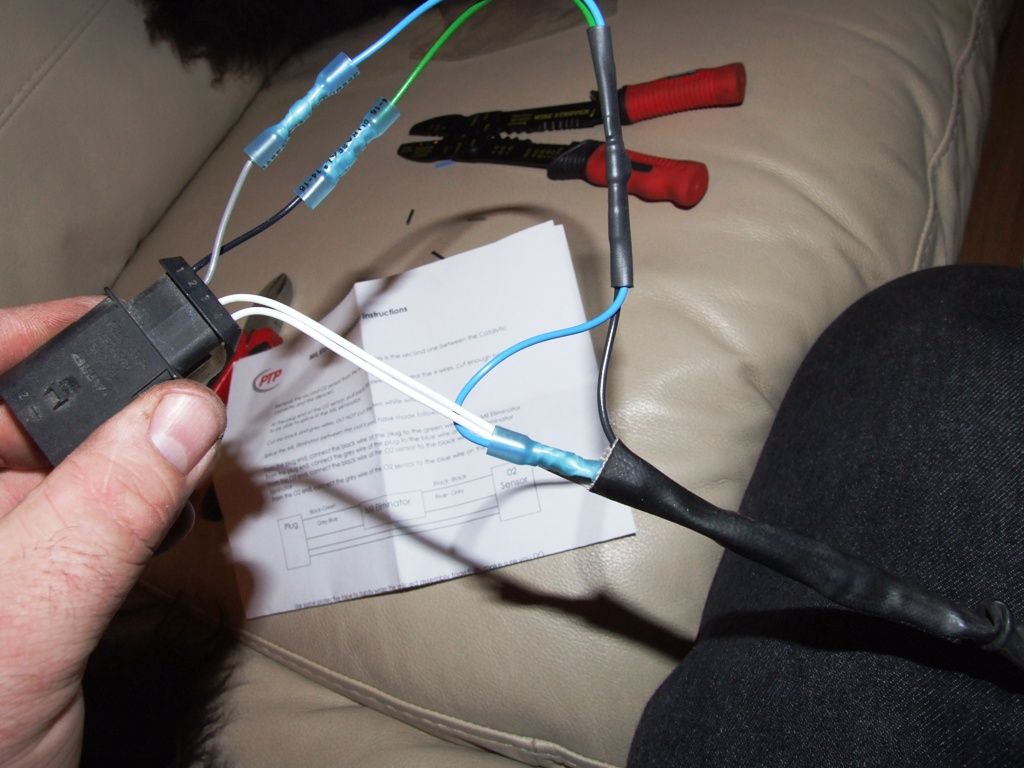
There are 4 wires going from the plug to the sensor. You want the Black one and the Grey one. DO NOT touch the white ones.
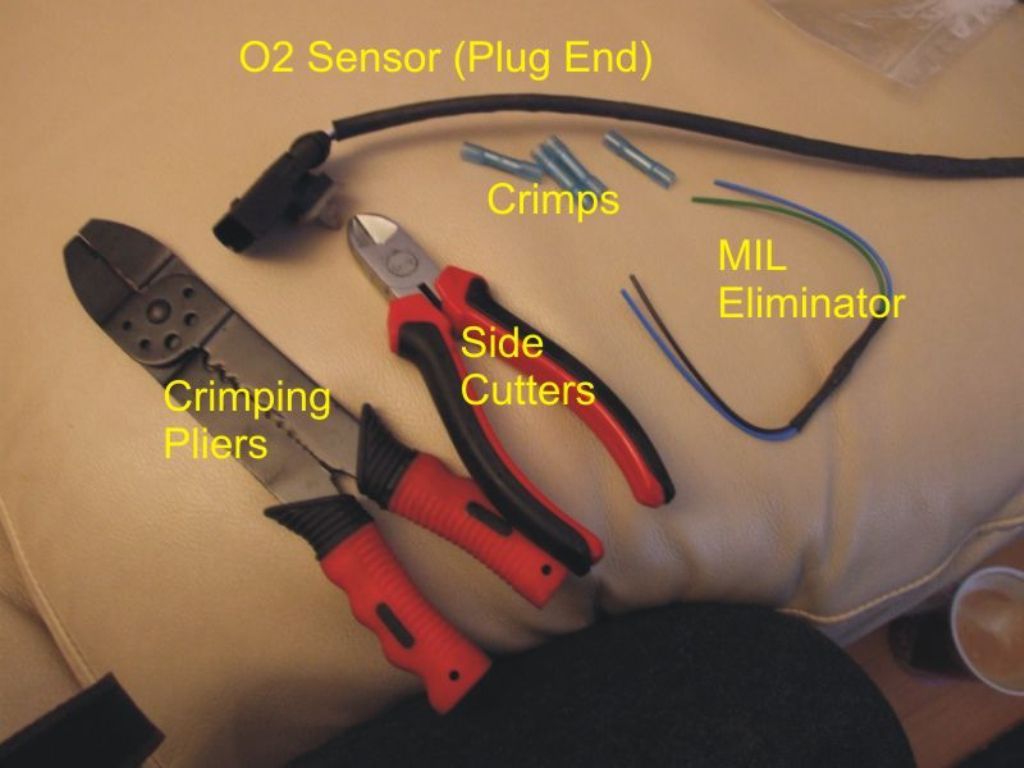
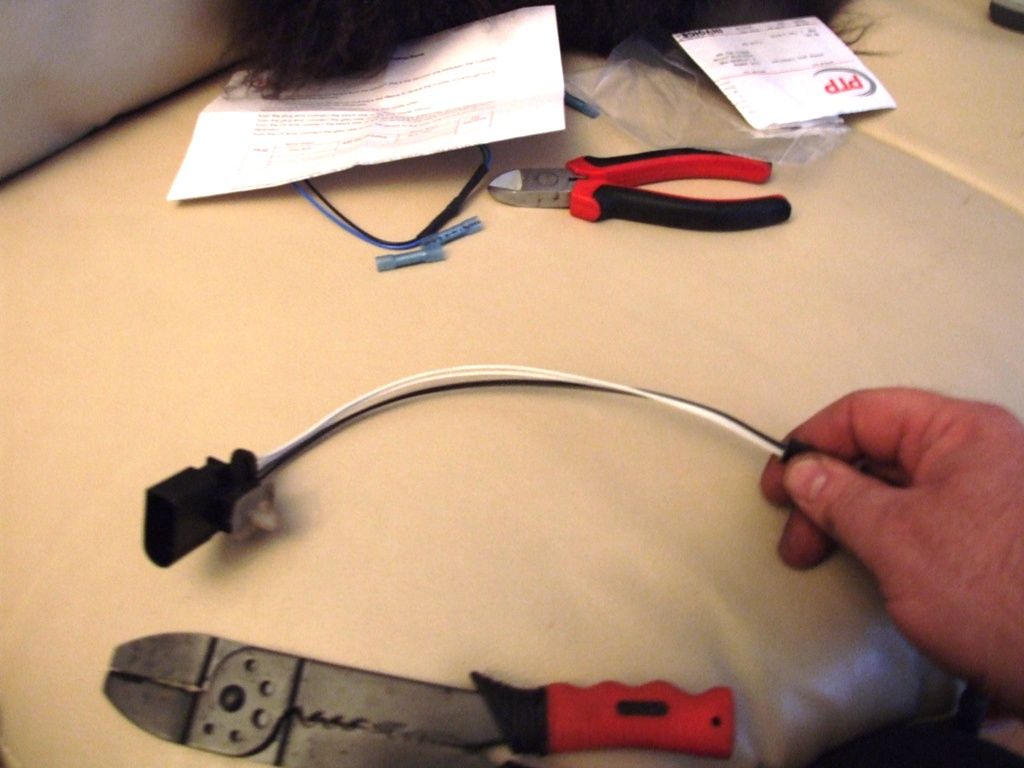
This is what you get in the kit and the tools you will need.
Pull back the outer sheath (easy there tiger
")
) to expose the 4 wires.
Cut the Black and the Grey wires about 2" from the plug end, using the side cutters.
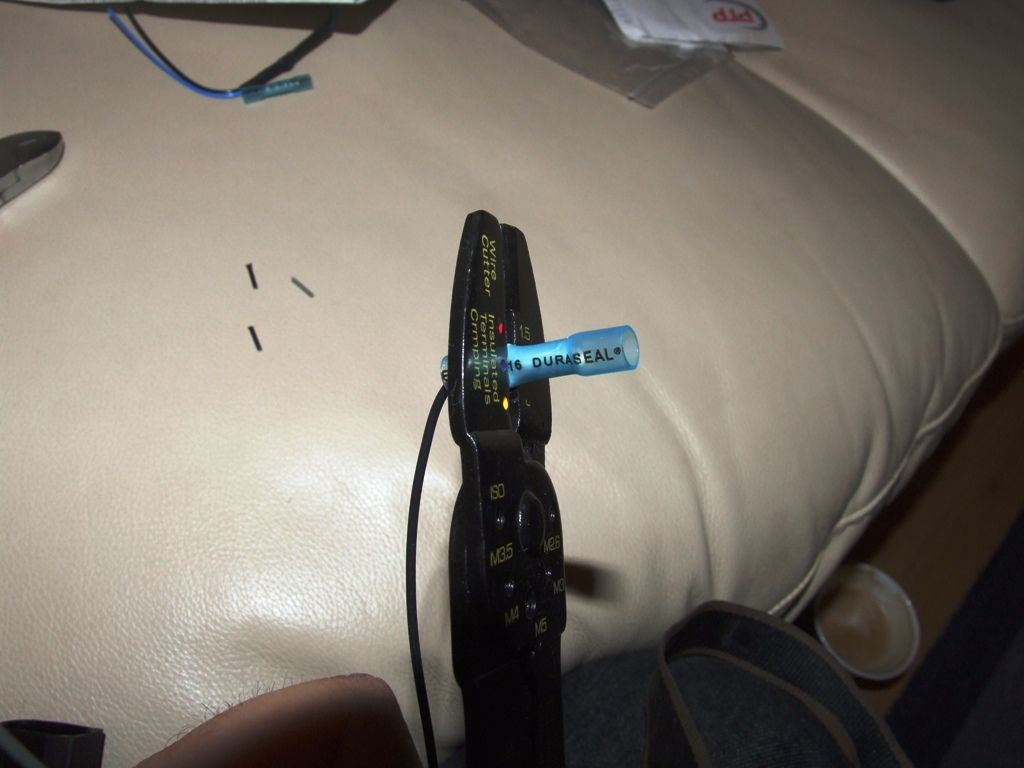
Using wire strippers (not teeth please), mine are part of the crimpers, strip off 1/2" to 3/4" of insulation on all of the new ends you have made. 2 on the black and 2 on the grey. I tend to strip this much, twist the metal conductors together and fold it so that the end going into the crimp is twice as thick as normal. This gives better contact. Crimp a connector to each of these exposed ends.
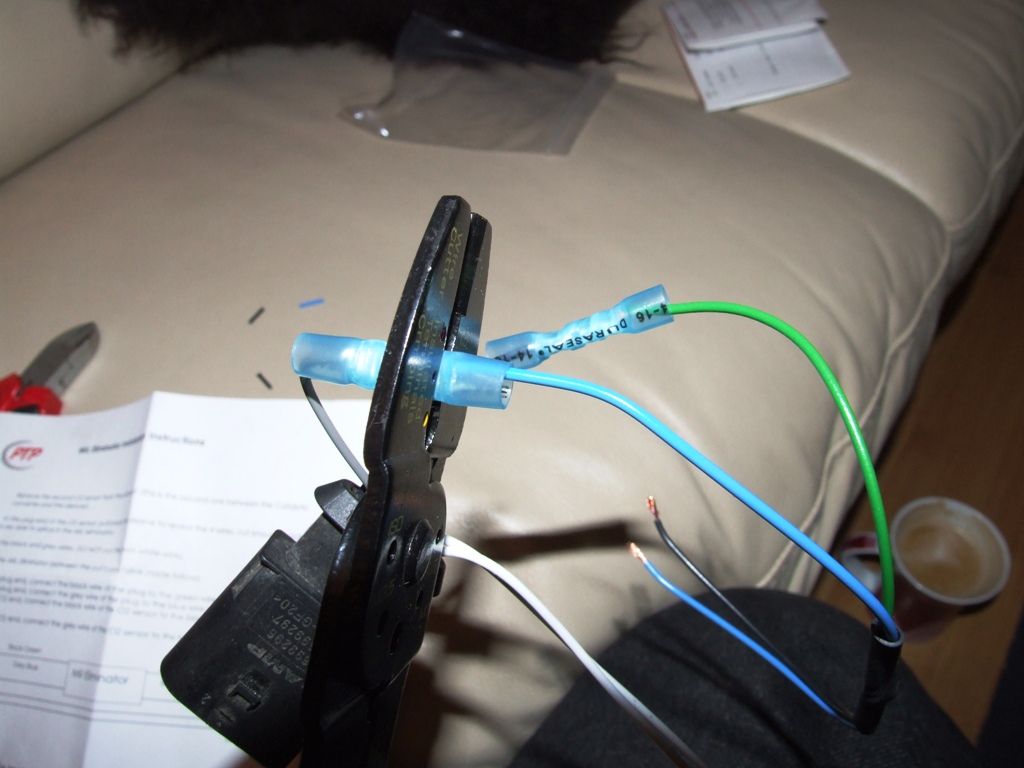
Now you need to crimp the eliminator in line with the sensor. Crimp the eliminator wires into the crimps that you have just prepared. Towards the plug end you will crimp the eliminator green wire to the plug black, and the eliminator blue wire to the plug Grey. At the sensor side you will crimp the eliminator black wire to the sensor black, and the eliminator blue wire to the grey. Don't worry too much about this as it comes with a diagram.
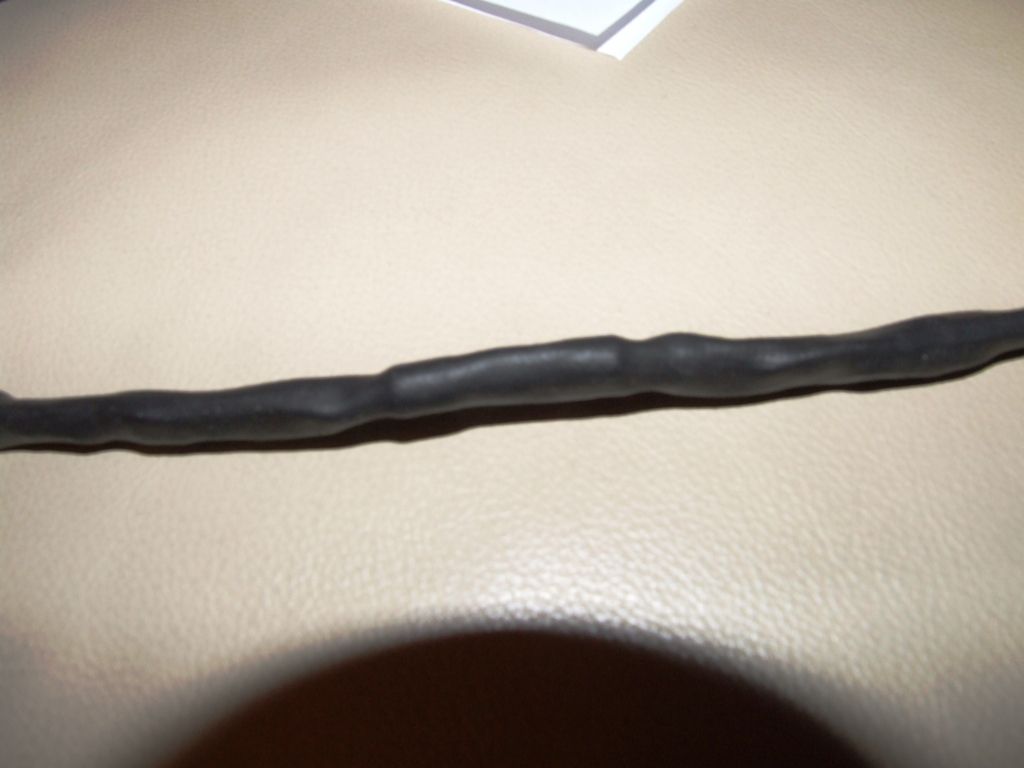
Once crimped, try to feed the crimps and the MIL Eliminator into the outer sheath. This will protect it and looks neater. If you cannot manage this use some heat shrink or good quality self fusing/amalgamating electricians tape, not the normal stuff that gets wet and falls off.
The finished item. A little more lumpy, but still fairly unnoticeable.
Now all that is left to do is refit the sensor, as Haynes would say, simply the reverse of removing
Now you realise why you used the string earlier. Just tie on the string and pull the plug end up through the engine bay. Do not attach the plug yet as you will be turning the sensor into the threaded bit on the cat and the wires will twist. Bolt the sensor back into the cat. Not sure but I think you just tie wrap the sensor out of the way on a decat pipe as there is nowhere to bolt it into, someone might correct me soon.
Once the sensor is fitted, let the wires untwist and reconnect the plug. Check that the wiring/sensor is protected by heat shield where necessary.
Reset your MIL and fault codes and everything should be rosey.
Hope this helps all you Sports cat / Decat people.