
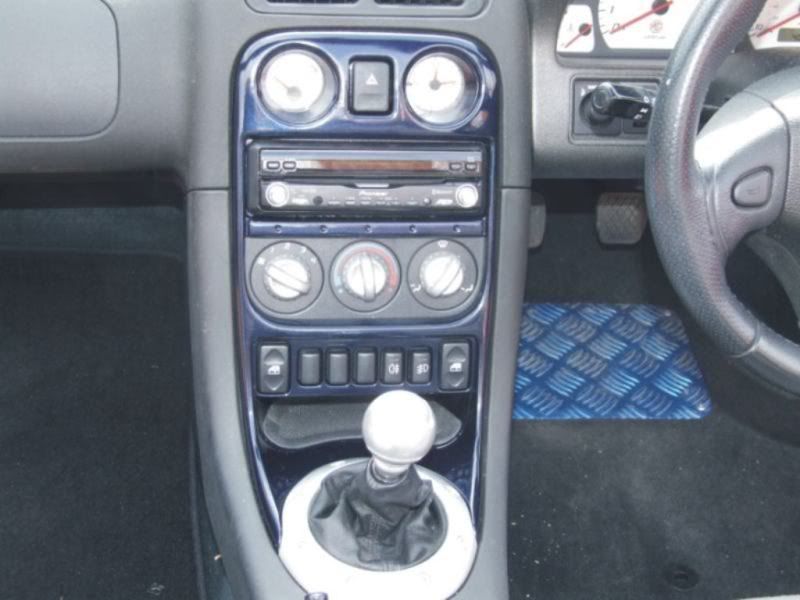
Centre console. - How to Remove
This was on a TF and there may be differences on Fs.
First thing to do is remove your radio/head unit. this all depends on the type you have. It could be the wire type tools, keys or screws. Make sure if it is a coded unit, that you have the codes, otherwise you are stuffed once you disconnect the power. Mine just forgets half it's settings, which is annoying enough.
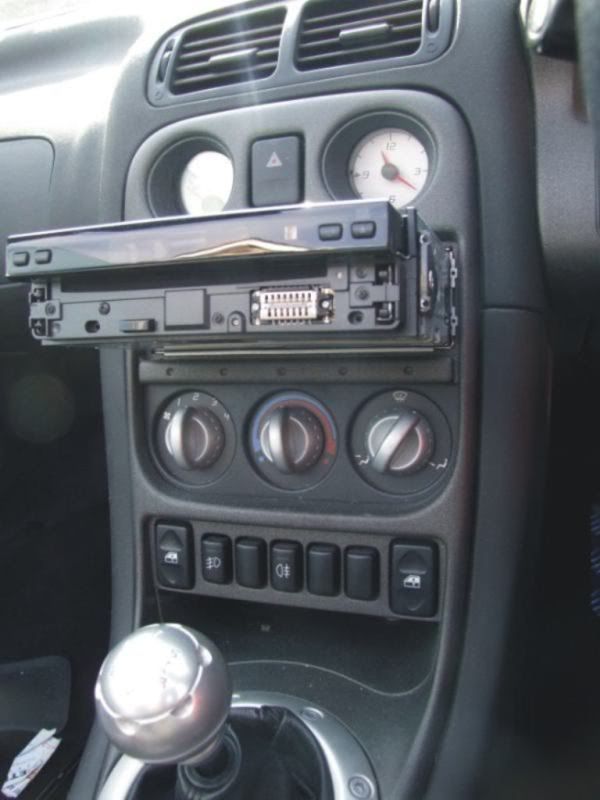
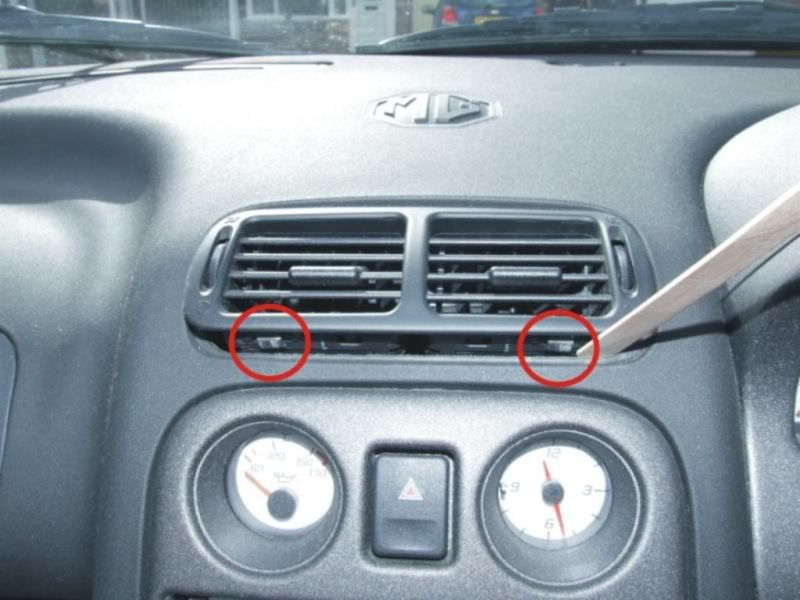
I then removed the top air vent to give me more room to work. This is held in by 2 plastic lugs at the top and 2 at the bottom. Carefully lever the 2 bottom lugs out and the unit should pivot out on the top 2. Be careful what you use to do this as you can end up marking the vent or dash if you use too much force or a sharp object.
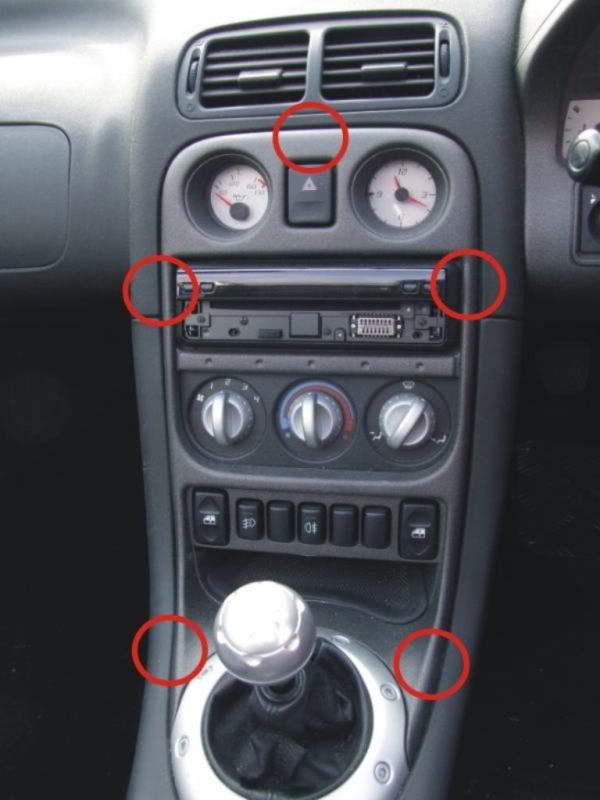
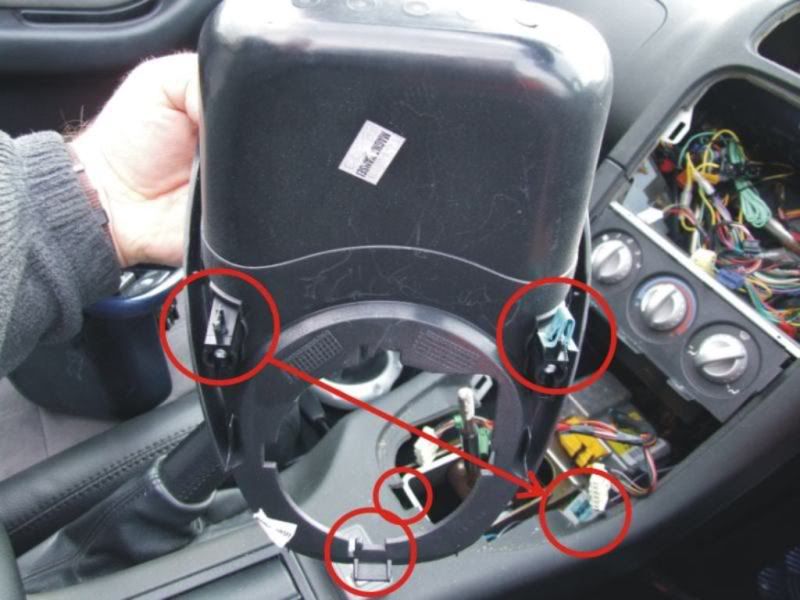
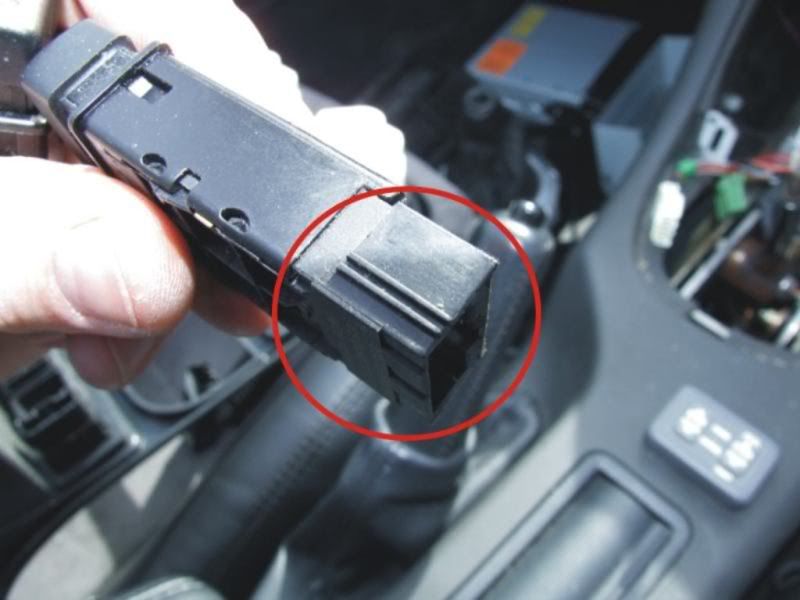
The centre console is held in by 5 spring clips and one plastic locator at the base.
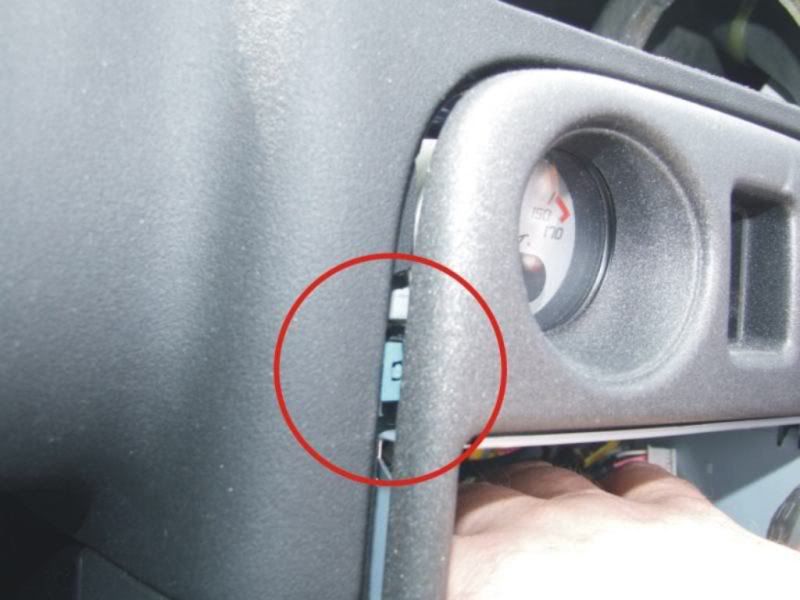
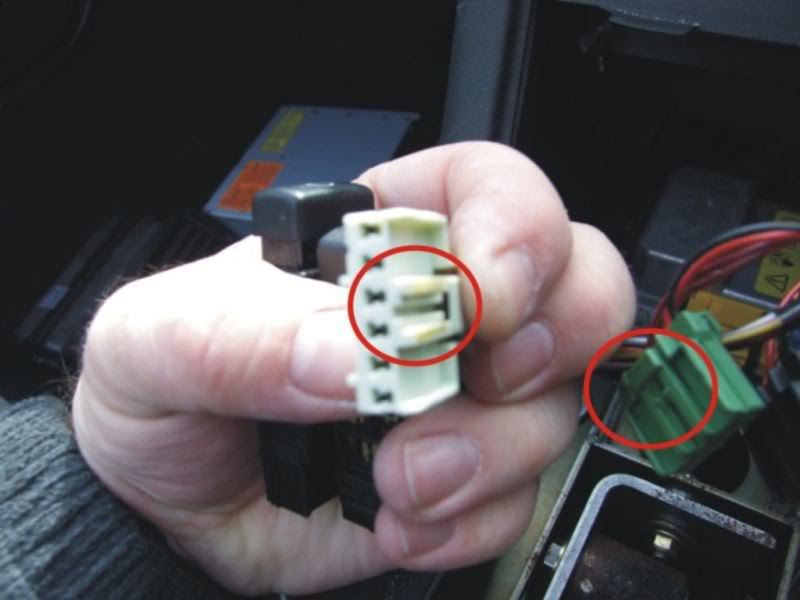
This is what the clips look like. The circled bit is the bit that you need to push with a screwdriver to release the clip.

Start with the top 3 clips. Put your hand in where the radio was (watch out for sharp edges) and gently pull until you create enough of a gap to expose the clips.
You then want to use a long narrow implement, such as a screwdriver, and push the release lug on the spring clip. If you do this correctly the clip should release while you are pulling on the console. You shouldn't need to lever the console out. In the picture the screwdriver is pushing on the centre of the clip and NOT levering the console.

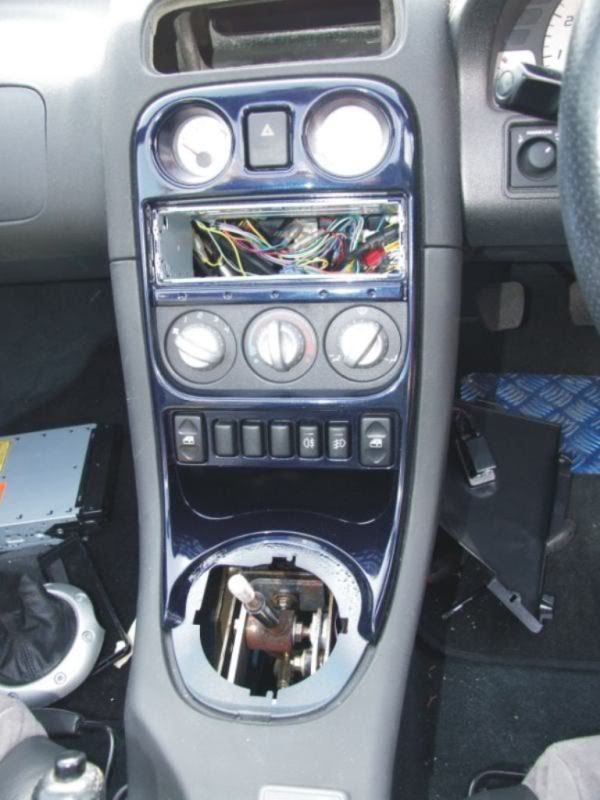
Next you should remove the gear knob and gaiter. The knob simply unscrews (unless you have an aftermarket one). The gaiter should just lever out as the silver plastic ring is only held in place by 4 plastic lugs. Again take care not to mark or damage the console.
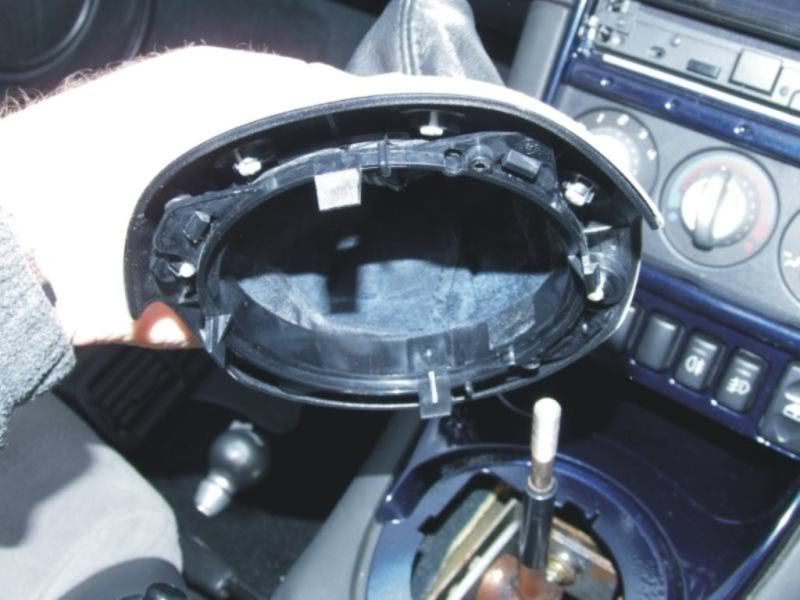
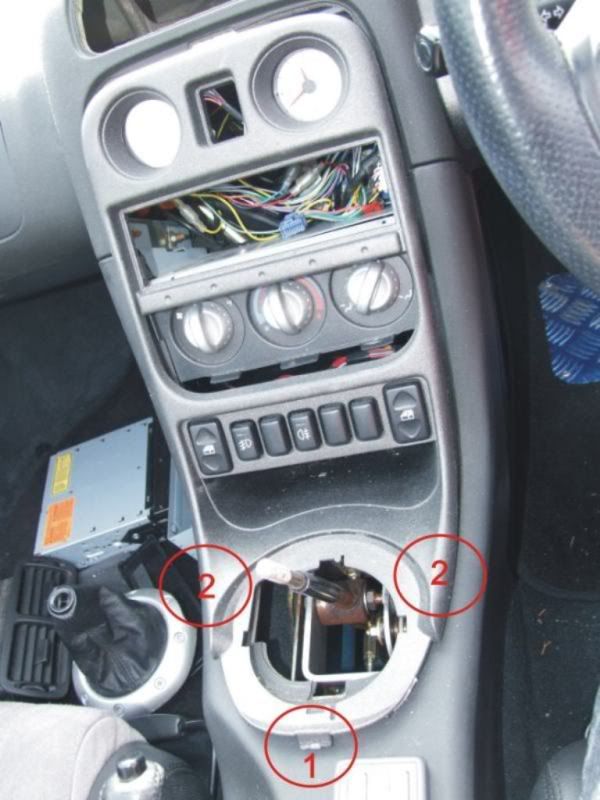
You can now lever the very bottom of the console (circle 1) so that the plastic lug comes free. Once this is out you can slide the bottom of the console towards you, releasing the 2 spring clips as you did for the top 3.
Put the gear lever into 4th to give a bit of clearance and move the console carefully towards you until you have enough clearance to access the electrical connections.
Carefully unclip and remove the 3 plugs from the top.
Small White = Oil Temp Gauge
Small Black = Clock
Large White = hazard switch

Now carefully remove the plugs from the window switches, fog light switches etc
2 large White plugs = windows (can't really mix them up)
Green plug = Front fogs
Blue plug = Rear fogs
Black plug = Not used on mine. Possibly rear window or A/C
They are keyed, so you shouldn't be able to mix them up.
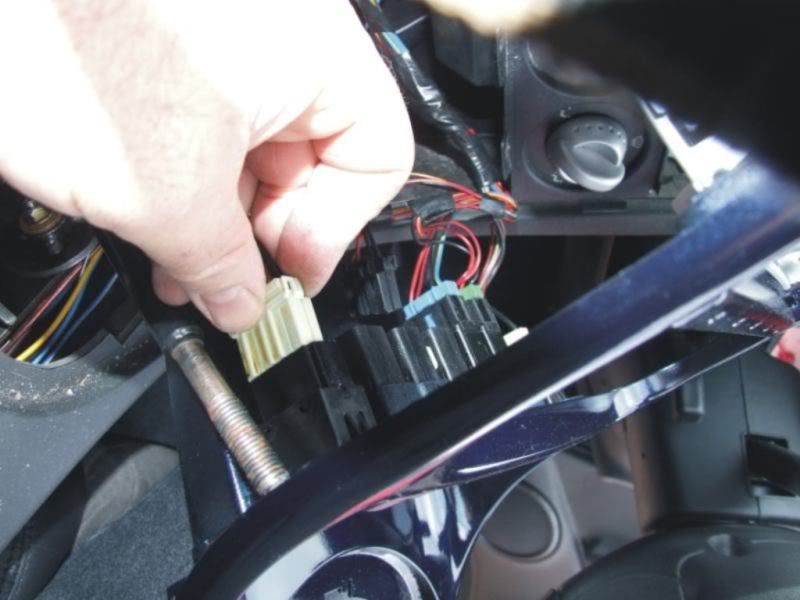
As with the upper plugs, you should unclip the plugs before removing them. You can see the lever that unclips on the side of these plugs. Just press these and pull the plug out. Pulling on the plug or wires without unclipping can damage the connections.
You can now remove the console. The picture shows the 2 lower clips and plastic lug. You can also see where they are normally located.
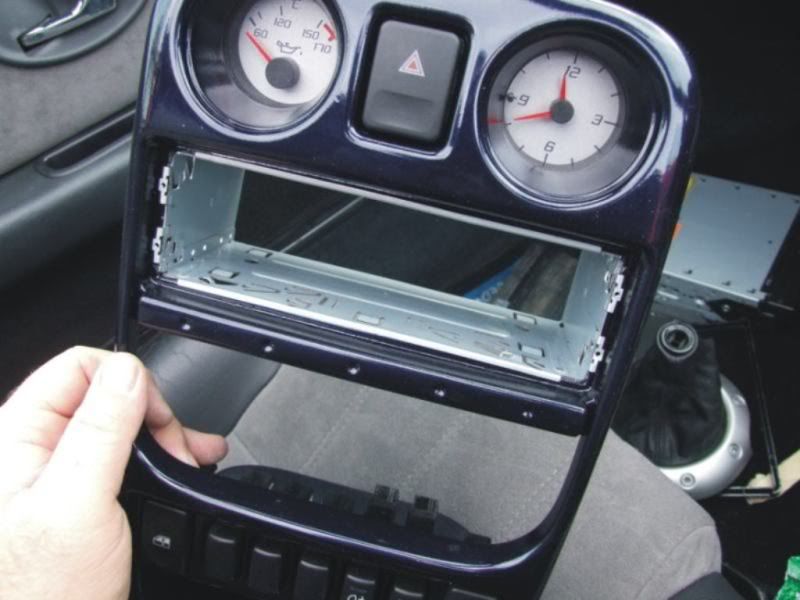
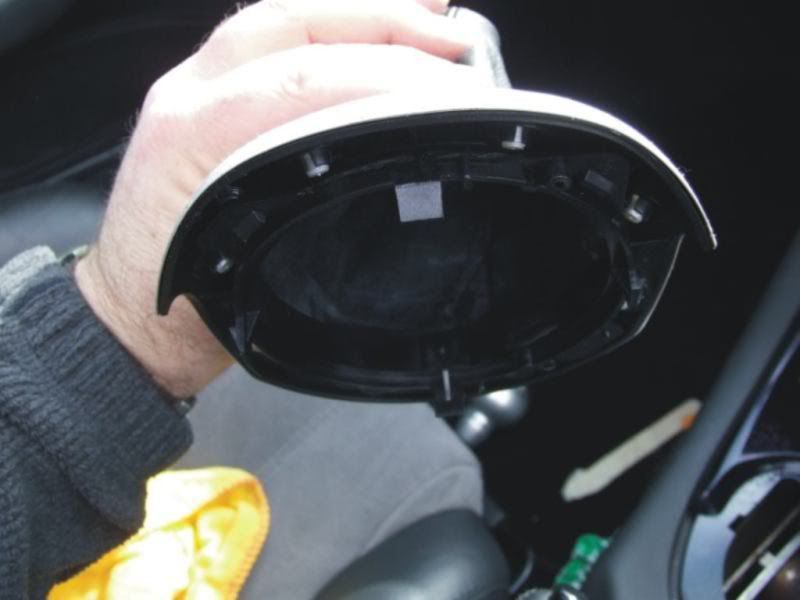
If you are replacing the console, like I did, or even swapping the gauge and clock over which is a popular mod as well, you will need to undo these 4 crosshead screws on the rear top of the console. This module holds the 3 upper clips and the gauge/clock.

You will also need to remove the radio/head unit cage from the old console and fit it in the new one. Normally it is just a case of unbending and bending some metal lugs.
If you are fitting a new console you will need to attach the Oil Gauge/Clock module, remove any switches and blanks from the old console and fit them into the new console. The switches simply push out from the back of the console and are fitted by pushing in from the front. The foglight switches etc are keyed and will only fit in their correct cutouts.
Now you are ready to refit the console.
Reconnect the plugs to the Oil Temp Gauge, Clock and Hazard switch at the top of the console.
Reconnect the window switches, fog light switches, and any other switches your car may have
Slide the bottom of the console in so that the 2 lower spring clips and the bottom plastic lug are correctly located. Then push the top of the console in until the 3 top clips locate.
Place the Gaiter back in place. I found it easiest to locate the top and left lugs in place and push the right and bottom lugs in place from underneath with a screwdriver.
Refit the radio/head unit and screw the gear knob back on.
And that should be it.
While the console was off I took the chance to move the fog light switches to the 2 nearest blanks to the driver’s seat.
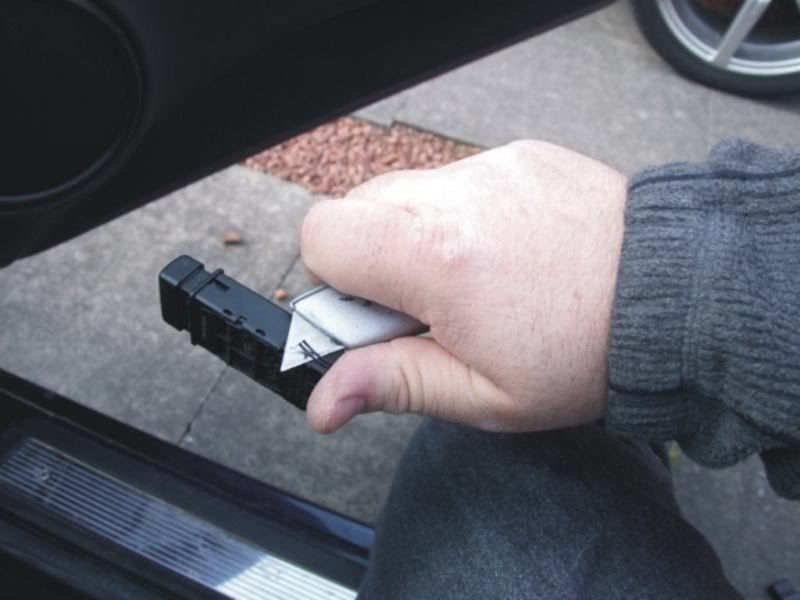
As mentioned before, the switches themselves are keyed
And will only locate into the correct space

This is overcome by removing the "key". I did this with a Stanley knife. The picture shows me cutting towards my hand, this is bad practice as if you slip you will cut yourself. This was the only way I could hold it and take a picture. Your hands, your choice.
So there you have it. Hopefully you have now removed and put back your centre console without any bits left over.
Please Log in or Create an account to join the conversation.
- Leigh Ping
-
 Online
- Moderator
-

- Posts: 6837
- Thanks: 1630
Replied by Leigh Ping on topic Re: Centre console. - How to Remove
Posted 12 years 9 months ago #29685Please Log in or Create an account to join the conversation.
- David Aiketgate
-
 Offline
- David
-

- mgf mk2 freestyle mpi 16" wheels, in Anthracite.
- Posts: 20218
- Thanks: 4407
Replied by David Aiketgate on topic Re: Centre console. - How to Remove
Posted 12 years 9 months ago #29687David
:shrug:
Please Log in or Create an account to join the conversation.
Yep. Having 3 elbows on each arm is an advantage when working on these cars.Leigh Ping wrote: Cheers for this Clive. It was a big help. I just wanted to bring the foglight switches over a bit the same as you did. But didn't really want to take the whole centre console out for it. Managed it by removing the footwell light panels, to access the rear of each switch, and turning my hand and wrist into an eel.
")
Please Log in or Create an account to join the conversation.
- gingermelly
-
 Offline
- Novice MGer
-

- Posts: 1
- Thanks: 1
Replied by gingermelly on topic Re: Centre console. - How to Remove
Posted 11 years 8 months ago #84937Please Log in or Create an account to join the conversation.
- Leigh Ping
-
Online
- Moderator
-
- Posts: 6837
- Thanks: 1630
Replied by Leigh Ping on topic Re: Centre console. - How to Remove
Posted 11 years 8 months ago #84939Please Log in or Create an account to join the conversation.
I like to think most parts of my cars can be linked backed to me through blood group and DNA. :yesnod:
Please Log in or Create an account to join the conversation.
- a Guest
- Visitor
-

- Thanks: 0
Please Log in or Create an account to join the conversation.
Question... can you fit a TF center dash to an F, asin, do all the plugs for the switches interchange so can i plug my 98 F wires into 2004 TF dash. Reason for asking is a mate is breaking a 160 sunsport and ive always fancied the later dash middle with the studded gear surround.
Thanks
Please Log in or Create an account to join the conversation.
As for thread resurrections......Well we've just had Orthodox Easter.....is this a holy quest?
I had a quick flick through both the F and TF workshop manuals and as a result, I don't think the connections are different.........at lest not much, if there is a difference it should be relatively easy to change.
Though I'm not sure if the cable lengths are different.
"Keep calm, relax, focus on the problem & PULL THE BLOODY TRIGGER"
Please Log in or Create an account to join the conversation.
- talkingcars
-
 Offline
- Moderator
-
- Posts: 6871
- Thanks: 1294
Question... can you fit a TF center dash to an F, asin, do all the plugs for the switches interchange so can i plug my 98 F wires into 2004 TF dash.
In short - it isn't a straight swap
Much of the electrical system changed between the mk1 F and the mk2 F (which has the same dash as the TF) so some rewiring will be needed.
Also I seem to remember that the heater controls changed at the same point.
Home to black Alfa Romeo 159 3.2 V6 Q4 ,green MGF VVC and red MG Maestro T16.
MG - the friendly marque.
Please Log in or Create an account to join the conversation.