
×
Advanced Search
×
Search Results
Searched for: suplex
06 Apr 2012 22:24

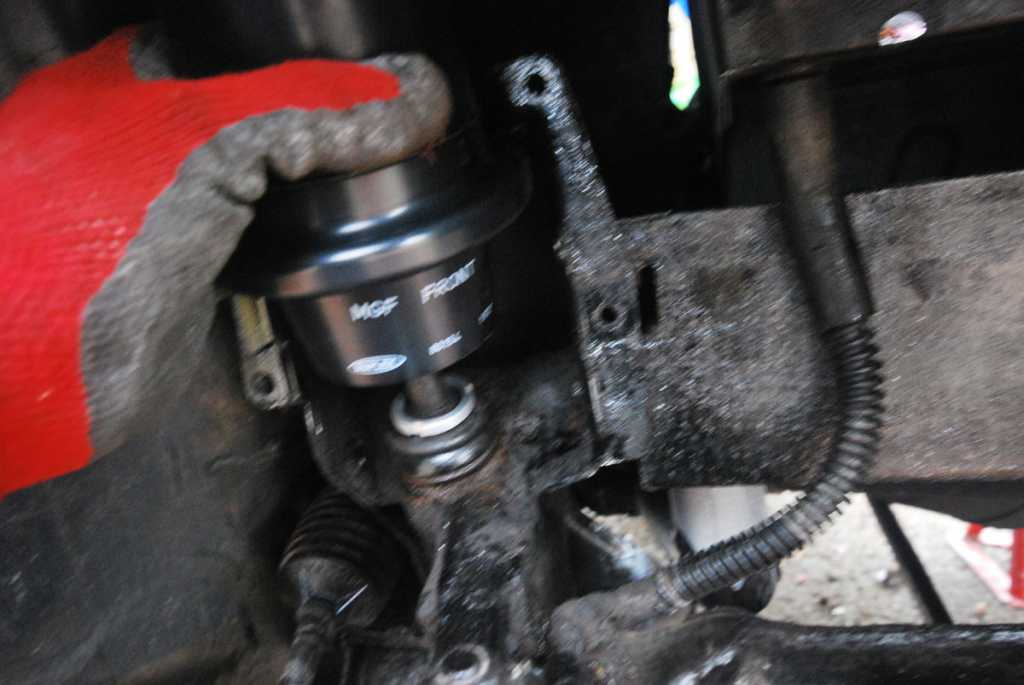
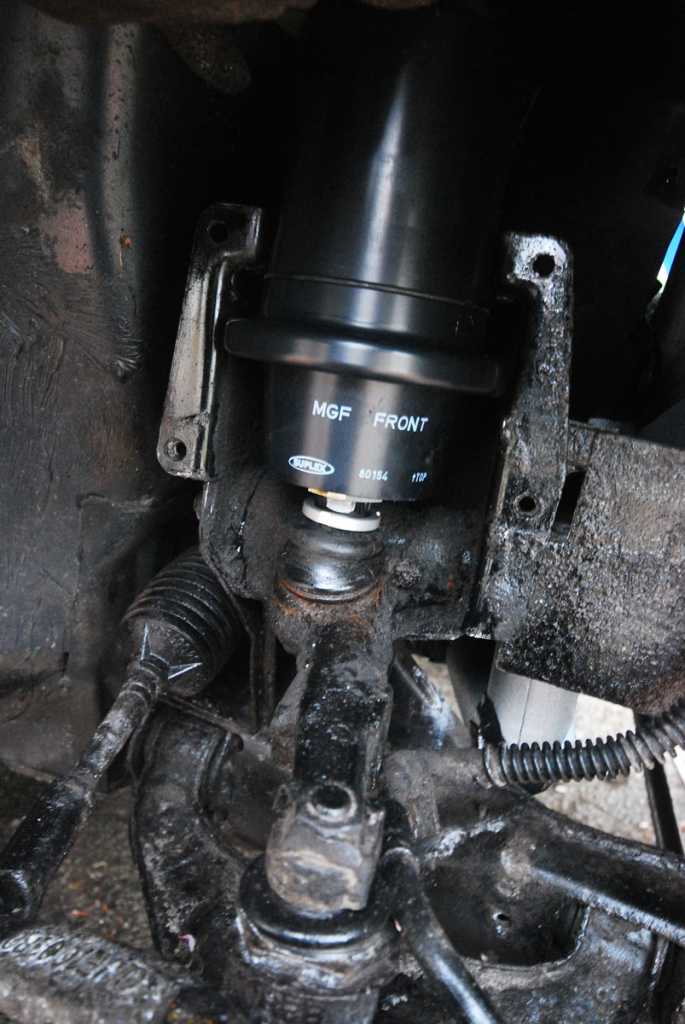
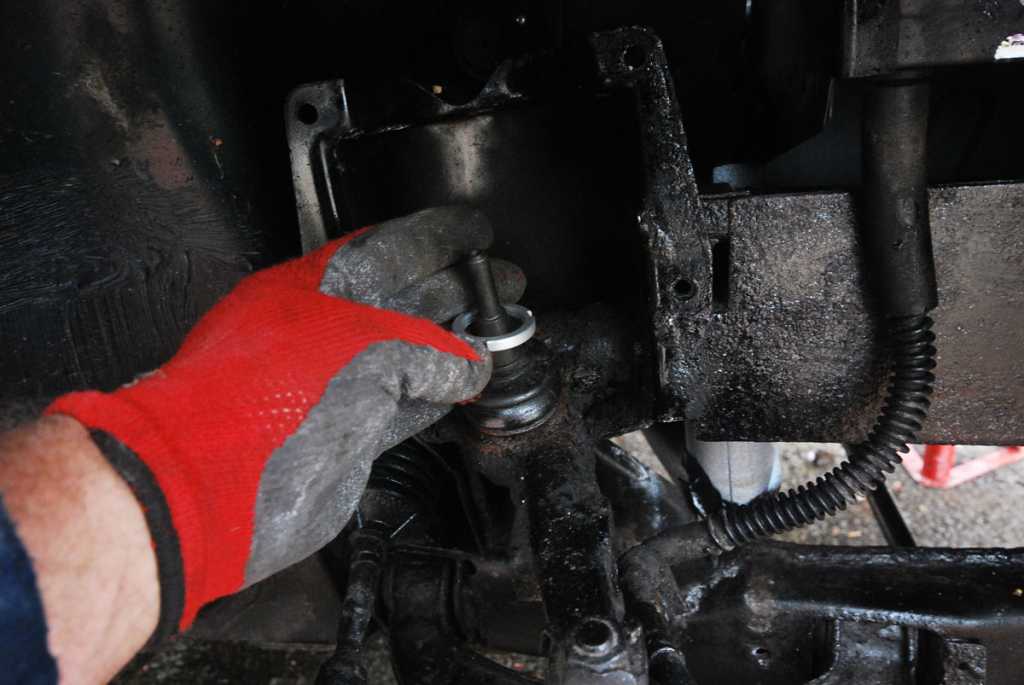
Now you are ready to mount the unit onto the pin.
Category: David Aiketgate's Guides
06 Apr 2012 22:22
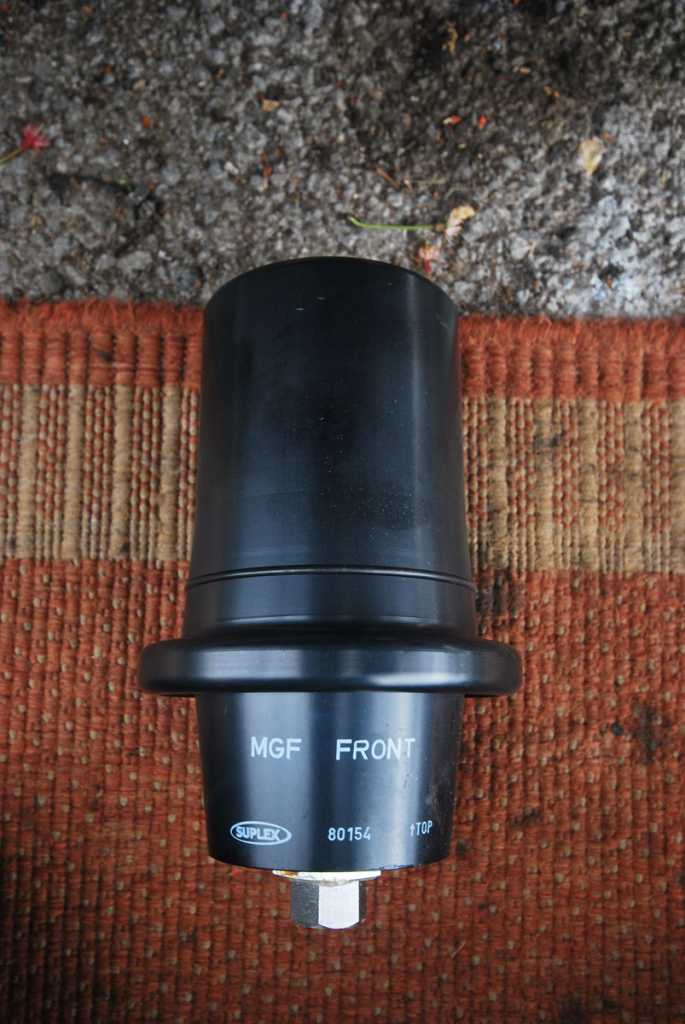
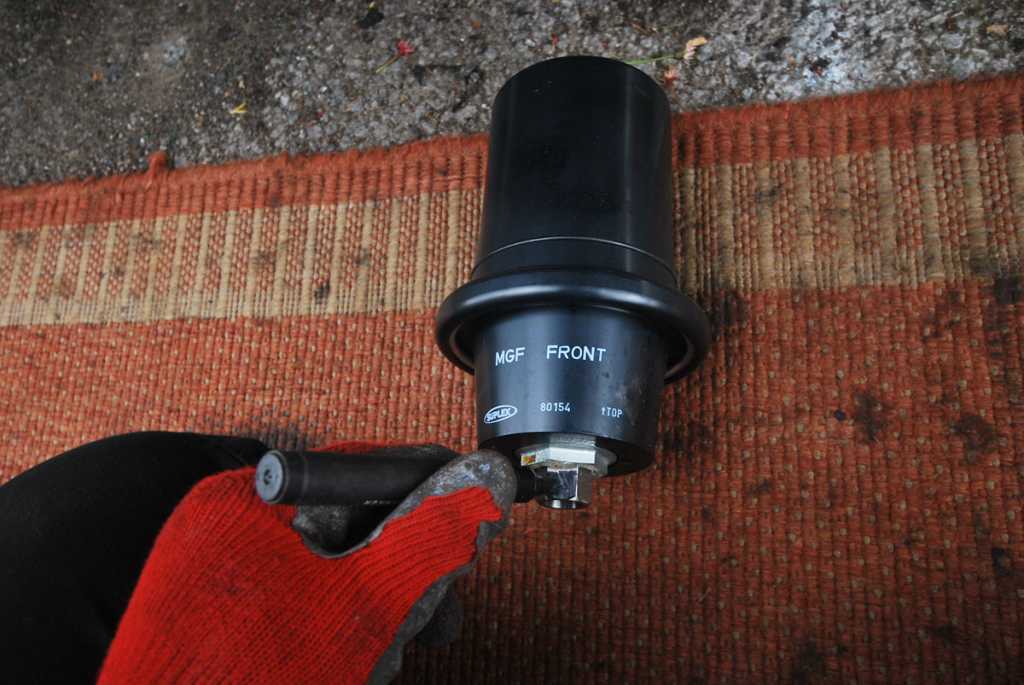
Next, get the appropriate suplex spring container, they are helpfully labelled Front or Rear!
You need mark the front flat of the adjuster nut, then wind it in until only 4mm protrudes.
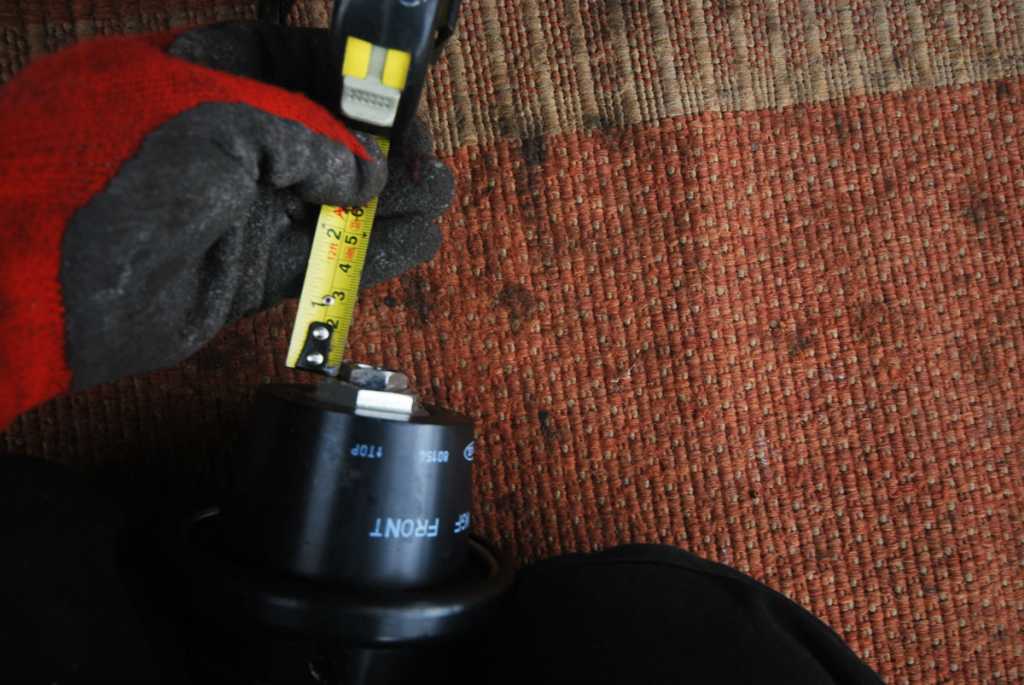
You need mark the front flat of the adjuster nut, then wind it in until only 4mm protrudes.
Category: David Aiketgate's Guides
06 Apr 2012 22:14
Now the fun part. ")
Remove the spring, and Suplex say remove the spacer if you don't want to keep your suspension height at 368mm(and why would you?) However I found that it was impossible to achieve a ride height over 350mm on the front without the spacer in place.
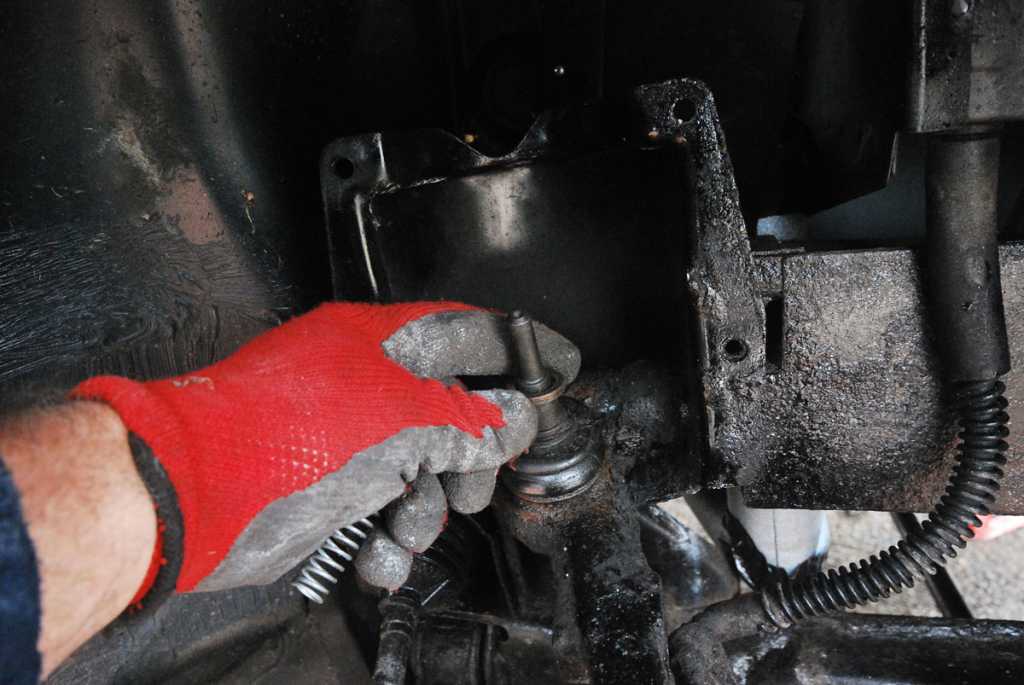
At this stage it would be a good idea to remove the knuckles and clean and re-grease them.
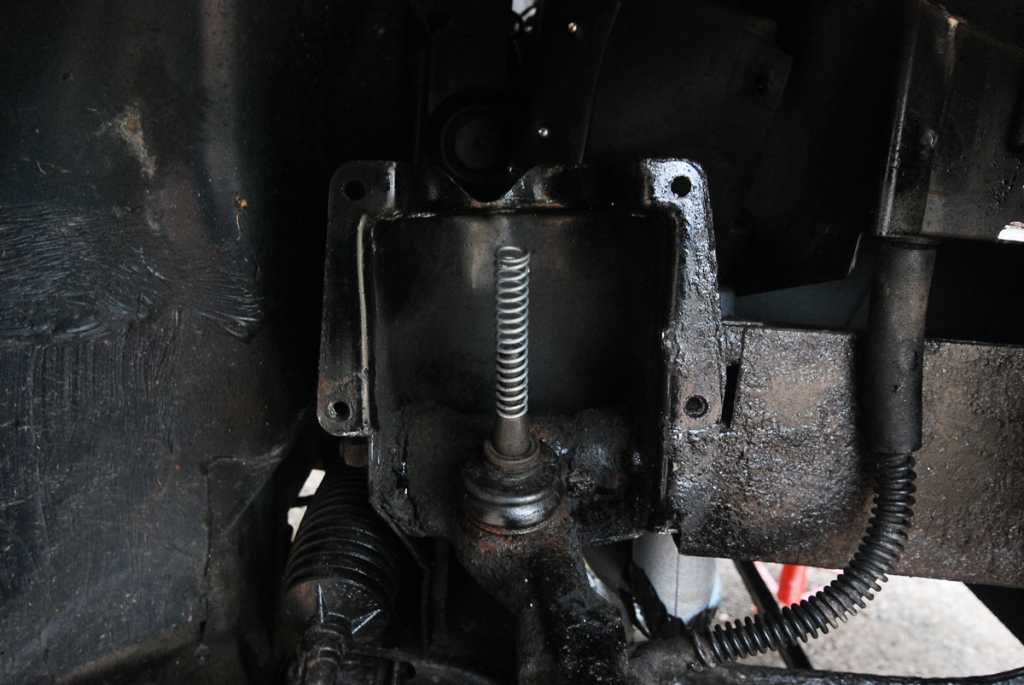
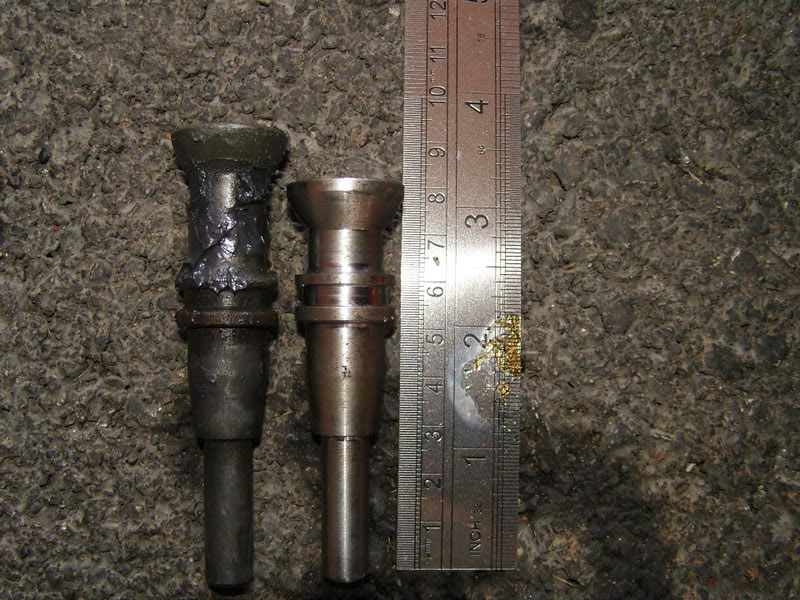
You can check if you have lowering pins fitted at this point. With standard knuckles, the pins are 90mm long. Lowering pins are 80mm long.
The knuckles are a push fit into the suspension arm, so can be gently levered out with a flat bladed screwdriver( Caution - the lower part you are prising out is only plastic)
Now clean out any remaining grease from the cup in the arm and add a dollop of high temp grease. I also took off the lower split ring to allow me to lift the rubber cover off the knuckle and inject grease into the knuckle joint.
Refit the cover and split ring before refitting the knuckle to the suspension arm. The lower plastic part is keyed to fit the cup in the arm.
I also pumped grease into the arm using the adjacent nipple.
Now you are ready to fit the Suplex kit.
Firstly, take the locking rings and place one over each pin.
(Failure to do so, will mean taking the kit to pieces again when you'd almost finished that corner...err, I imagine. )
)
Remove the spring, and Suplex say remove the spacer if you don't want to keep your suspension height at 368mm(and why would you?) However I found that it was impossible to achieve a ride height over 350mm on the front without the spacer in place.
At this stage it would be a good idea to remove the knuckles and clean and re-grease them.
You can check if you have lowering pins fitted at this point. With standard knuckles, the pins are 90mm long. Lowering pins are 80mm long.
The knuckles are a push fit into the suspension arm, so can be gently levered out with a flat bladed screwdriver( Caution - the lower part you are prising out is only plastic)
Now clean out any remaining grease from the cup in the arm and add a dollop of high temp grease. I also took off the lower split ring to allow me to lift the rubber cover off the knuckle and inject grease into the knuckle joint.
Refit the cover and split ring before refitting the knuckle to the suspension arm. The lower plastic part is keyed to fit the cup in the arm.
I also pumped grease into the arm using the adjacent nipple.
Now you are ready to fit the Suplex kit.
Firstly, take the locking rings and place one over each pin.
(Failure to do so, will mean taking the kit to pieces again when you'd almost finished that corner...err, I imagine.
)
Category: David Aiketgate's Guides
06 Apr 2012 21:57
It's only fair that you read
this
BEFORE thinking about this. In fact I will make this statement. To add to this, I will make the following recommendation after my experiences with this kit:- DO NOT FIT THIS KIT. THE QUALITY IS VERY DUBIOUS, AND THE DAMPERS THAT THEY INSIST YOU BUY ARE NOT FIT FOR PURPOSE. I would either go the 'swap to TF subframes' route or pay the extra and get the Australian system.
HERE is the Suplex supplied fitting instructions in PDF format
A lot of this has already been covered , so I will shamelessly use this excellent HOW TO to show how to de-pressurise the Hydragas system - by Aussie member IPEX-731BA5DD06
Now, The sphere removal procedure has been elegantly covered in this HOW TO by another Aussie - GIR, so I've stolen his photos and some of his descriptions, because it waspi... raining when I removed my spheres.
Suplex recommend doing one side at a time, but due to late arrival of the kit, I de-pressurised and stripped out both sides.
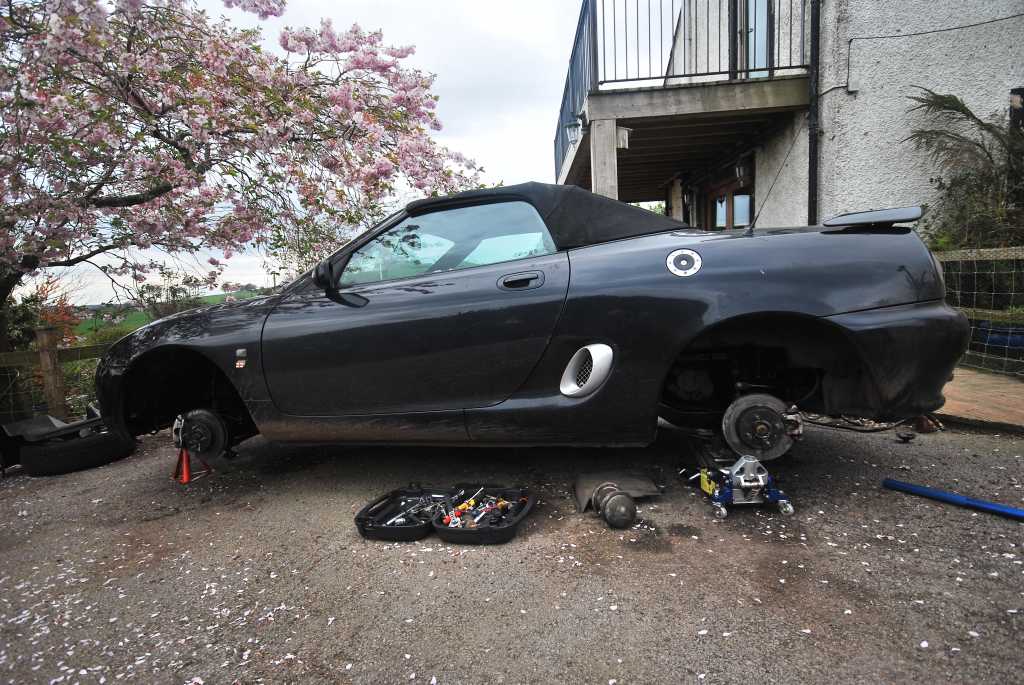
Remove front and rear wheel.
Front
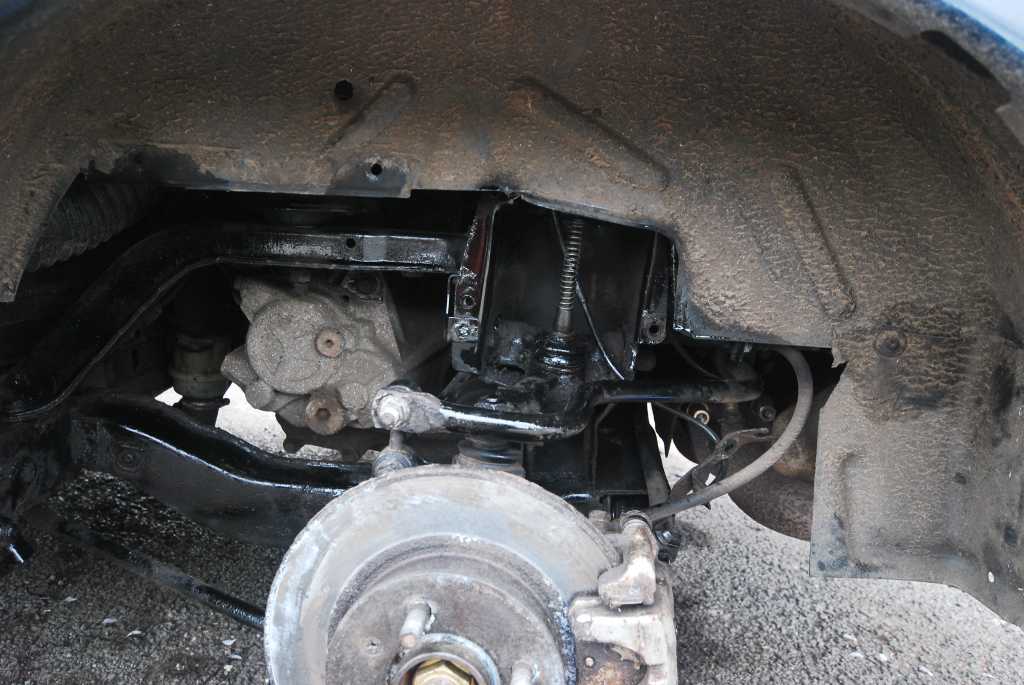
Remove the plastic wheel arch lining. It is secured by a number of metal screws around the edge as well as plastic screw clips.

To improve access to the hydragas bracket bolts, remove the damper first.
The bottom damper bolt is undone by a removing the 17mm nut while holding the 13mm bolt. This will be easier if you wire brush the threads and use releasing oil.

Remember the order of the fitting. Goes bolt, suspension, brake line bracket, spacer, washer, damper, concave washer, nut.
The top bolt is accessed on the passenger side by removing two bolts and moving the fuse box aside to allow greater room.

On the driver’s side unbolt and disconnect the horns.

Holding the rectangular top of the damper bolt with a 7mm spanner, undo the bolt with a 14mm spanner.
(sometimes you may find you need an allen key instead of the 7mm spanner)
With the damper removed it’s a straight forward process of removing the four 10mm bolts holding the Hydragas sphere mounting bracket. The bottom two bolts have fixed nuts behind the bracket, the 13mm securing nuts on the top two bolts are loose. If you have ABS there is a bracket held on by two of the bolts which also needs to be removed. It holds the ABS sensor wire.

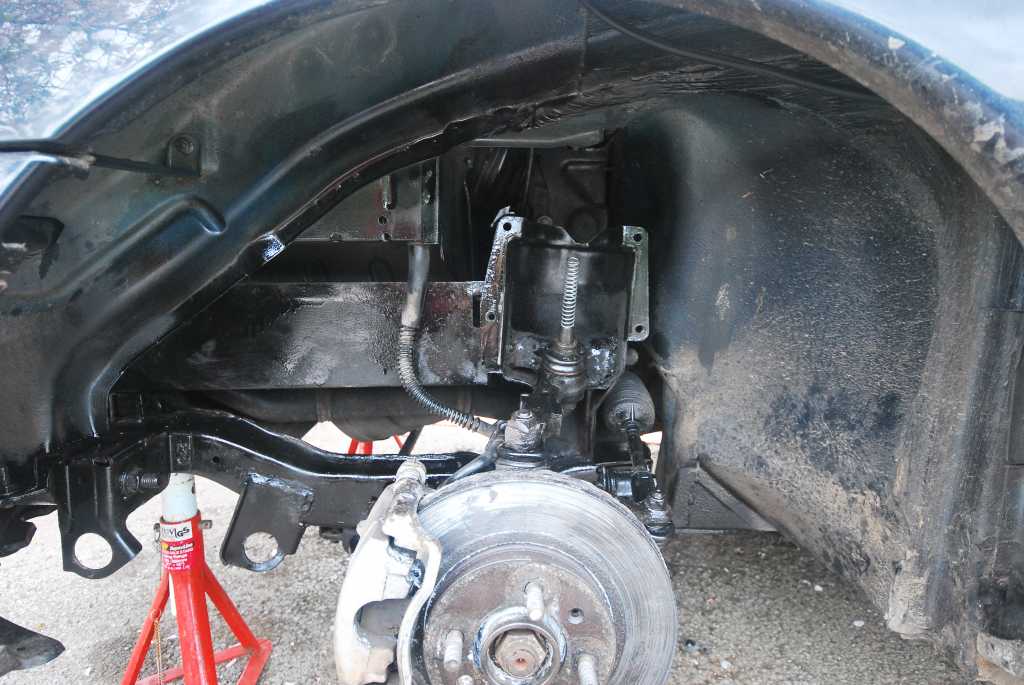
Now undo the hydragas pipe which enters the sphere. On the offside this is easily reached but I found the brake master cylinder was in the way on the nearside. I ended up removing the pipe from where it meets the pumping valve and removing the pipe tail with the sphere.

Once disconnected the displacer can be levered out of the mount.

Rear
The rear is much more difficult due to the limited access to the top two bolts and nuts on the sphere mounting bracket.
Remove the bottom damper bolt as per the front ones.

On the offside, the coolant bottle needs to be moved. It is secured by two bolts. Remove these and the top inflow pipe being careful not to spill coolant everywhere. Carefully move the bottle aside. This should allow access to the top bolt and the rear nuts of the sphere mounting bracket.


The nearside is more problematic. This involves removing the two bolts holding the ecu bracket. Remove two upper bolts on the bracket and slide the bracket upward so as to release the bottom rubber mount. You can now push the ecu away from the bulkhead and you can now access the nuts on the top bracket bolts.
Now, depending on your car, you may have a number of things still in the way. Depending on the air filter setup in your car, this may have to be removed.
Because I have a Viper CAF system I could access the necessary nuts and bolts without any further dismantling.

After removing the damper, you may wish to release the antiroll bar to allow extra suspension movement, though I found this not to be necessary.

With difficulty, remove the four 10mm bolts securing the sphere mounting bracket, (the 2 rearmost bolts also hold a bracket for the speed sensor cable) remembering the top two13mm nuts are not fixed, (I used a 1/4 drive ratchet on these) and remove the bracket.
As per the front, undo the hydragas pipe from the sphere. If you do not plan on removing the pipes completely it would be worthwhile securing them to something at this point so they don’t flap around.
The sphere can now be removed, I took both rears out through the wheel arches.
I now had this:-
Rear
Front
HERE is the Suplex supplied fitting instructions in PDF format
A lot of this has already been covered , so I will shamelessly use this excellent HOW TO to show how to de-pressurise the Hydragas system - by Aussie member IPEX-731BA5DD06
Now, The sphere removal procedure has been elegantly covered in this HOW TO by another Aussie - GIR, so I've stolen his photos and some of his descriptions, because it was
Suplex recommend doing one side at a time, but due to late arrival of the kit, I de-pressurised and stripped out both sides.
Remove front and rear wheel.
Front
Remove the plastic wheel arch lining. It is secured by a number of metal screws around the edge as well as plastic screw clips.
To improve access to the hydragas bracket bolts, remove the damper first.
The bottom damper bolt is undone by a removing the 17mm nut while holding the 13mm bolt. This will be easier if you wire brush the threads and use releasing oil.
Remember the order of the fitting. Goes bolt, suspension, brake line bracket, spacer, washer, damper, concave washer, nut.
The top bolt is accessed on the passenger side by removing two bolts and moving the fuse box aside to allow greater room.
On the driver’s side unbolt and disconnect the horns.
Holding the rectangular top of the damper bolt with a 7mm spanner, undo the bolt with a 14mm spanner.
(sometimes you may find you need an allen key instead of the 7mm spanner)
With the damper removed it’s a straight forward process of removing the four 10mm bolts holding the Hydragas sphere mounting bracket. The bottom two bolts have fixed nuts behind the bracket, the 13mm securing nuts on the top two bolts are loose. If you have ABS there is a bracket held on by two of the bolts which also needs to be removed. It holds the ABS sensor wire.
Now undo the hydragas pipe which enters the sphere. On the offside this is easily reached but I found the brake master cylinder was in the way on the nearside. I ended up removing the pipe from where it meets the pumping valve and removing the pipe tail with the sphere.
Once disconnected the displacer can be levered out of the mount.
Rear
The rear is much more difficult due to the limited access to the top two bolts and nuts on the sphere mounting bracket.
Remove the bottom damper bolt as per the front ones.
On the offside, the coolant bottle needs to be moved. It is secured by two bolts. Remove these and the top inflow pipe being careful not to spill coolant everywhere. Carefully move the bottle aside. This should allow access to the top bolt and the rear nuts of the sphere mounting bracket.
The nearside is more problematic. This involves removing the two bolts holding the ecu bracket. Remove two upper bolts on the bracket and slide the bracket upward so as to release the bottom rubber mount. You can now push the ecu away from the bulkhead and you can now access the nuts on the top bracket bolts.
Now, depending on your car, you may have a number of things still in the way. Depending on the air filter setup in your car, this may have to be removed.
Because I have a Viper CAF system I could access the necessary nuts and bolts without any further dismantling.
After removing the damper, you may wish to release the antiroll bar to allow extra suspension movement, though I found this not to be necessary.
With difficulty, remove the four 10mm bolts securing the sphere mounting bracket, (the 2 rearmost bolts also hold a bracket for the speed sensor cable) remembering the top two13mm nuts are not fixed, (I used a 1/4 drive ratchet on these) and remove the bracket.
As per the front, undo the hydragas pipe from the sphere. If you do not plan on removing the pipes completely it would be worthwhile securing them to something at this point so they don’t flap around.
The sphere can now be removed, I took both rears out through the wheel arches.
I now had this:-
Rear
Front
Category: David Aiketgate's Guides
06 Apr 2012 17:30
Currently the car is sitting too low. 330mm at the front 340mm at the back.
i'm going to aim for 345- 350 at the front 343-348mm rear, although Suplex recommend 355mm front, 353mm rears.
The ride feels much more compliant than the hydragas was on my car. Not having driven a brand new MGF, I don't know how the ride compares with a new hydragas set up.
It rides uneven surfaces much easier than before, and the steering actually feels lighter too.
There doesn't appear to be any noticeable increase in roll in cornering, but all these impressions are from a quick 5 miles to settle everything in.
Once I've fine tuned the ride height tomorrow, Ill go for a longer trial.
Category: MGF/TF Pitstop
Displaying 266 - 270 out of 341 results.
Time to create page: 3.174 seconds