
240 to 280mm Front Brake Disc Upgrade

This How To describes how I fitted the MGF Mania 280mm Front discs to my Mk1 MGF. This is the kit of parts that you get, apart from the pads, you need to supply those yourself.

I also fitted new pads despite the ones coming off only being a few thousand miles old. For the sake of £20 it wasn’t worth putting them back.
Tools Required
12mm ring spanner or socket
15mm ring spanner or socket
10mm Hex (Allen key) socket
Torque wrench
Brake cleaner
Copper grease
Loctite or similar thread locking product
Piston rewinding tool (or large lever)
Disc removing ‘kit’ (assorted 10mm nuts, washers and bolts) or large hammer
Wire brush
Time Required
This will depend on whether or not you hit any snags such as seized bolts, discs etc. It took me about 2hours for the first side but I was stopping to take photographs. I also had a problem in that the caliper slide pin bolts snapped and I had to drill them out. The second side took about 45 minutes I would allow an hour per side to be on the safe side.
Firstly, do the obvious:
1. Chock rear wheels.
2. Jack car up,
3. Stabilise on axle stands.
4. Remove the road wheel.
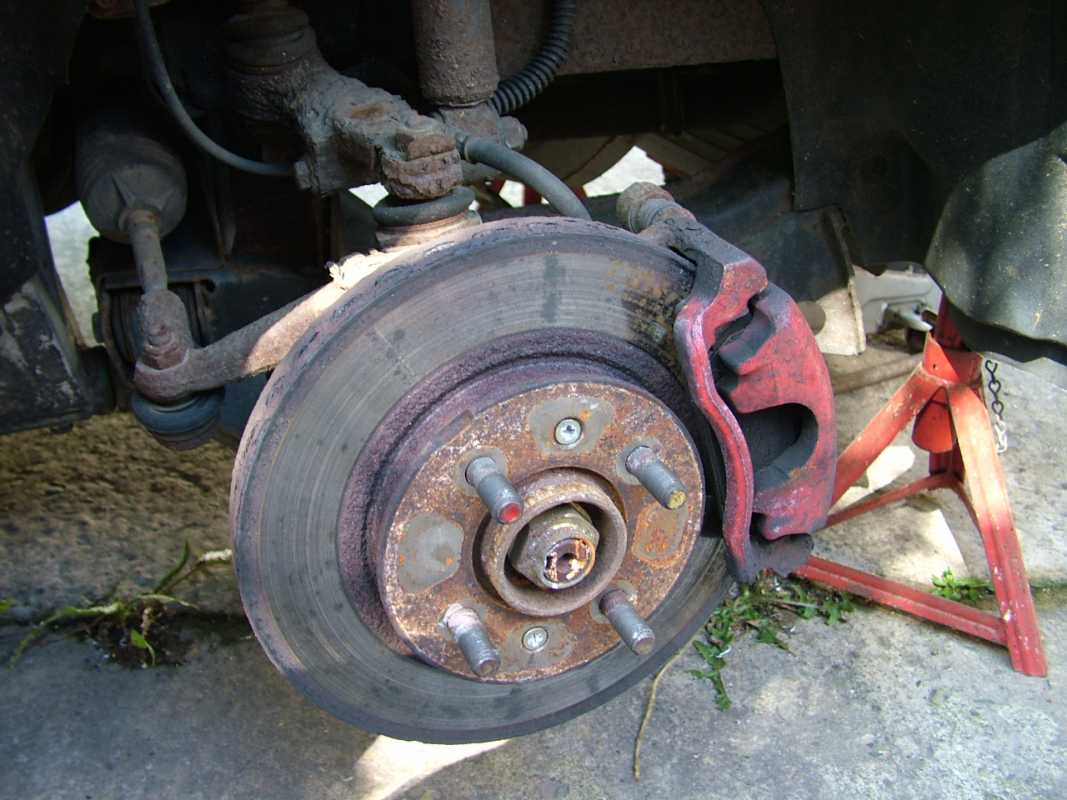
5. Undo caliper slide pin bolts (12mm)
6. Remove the caliper and tie up out of the way taking care not to strain the brake hose.
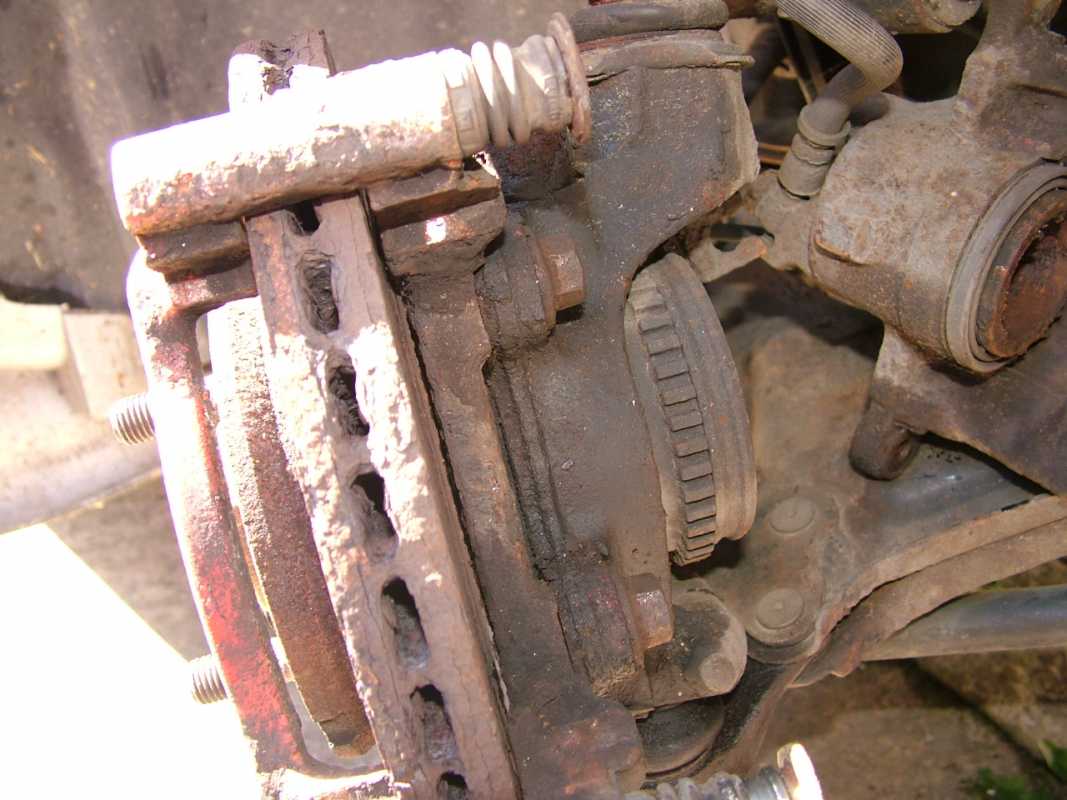
7. Remove old pads.
8. Caliper carrier bolts (15mm) now need to be removed.
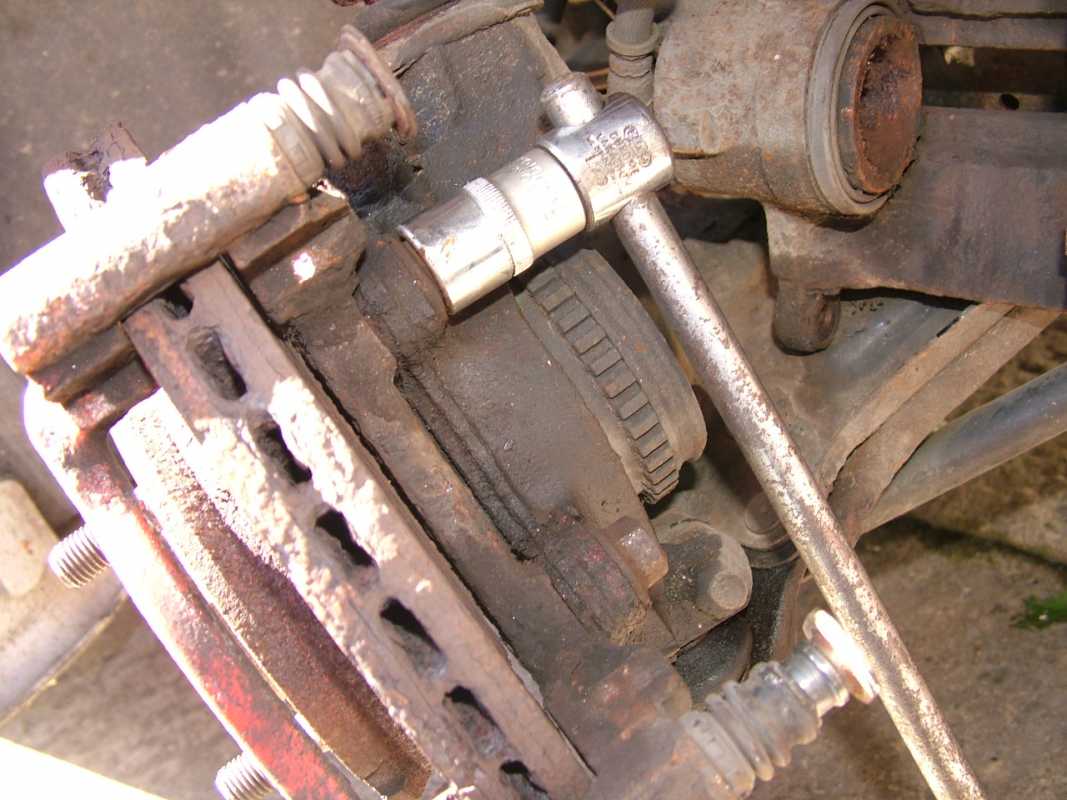
9. Caliper carriers were then removed and cleaned up using Brake Cleaner spray and wire brush. Mine were in a sorry state. Need to concentrate on the area that the pads sit in so that they are free to move.
10. Remove the retaining screws. I used an impact driver.
11. Remove the disc! I used the through bolt method described in the How To at:-
Brake Discs removal - How to remove rusted on discs
I’ve never had much success with the hammer technique.
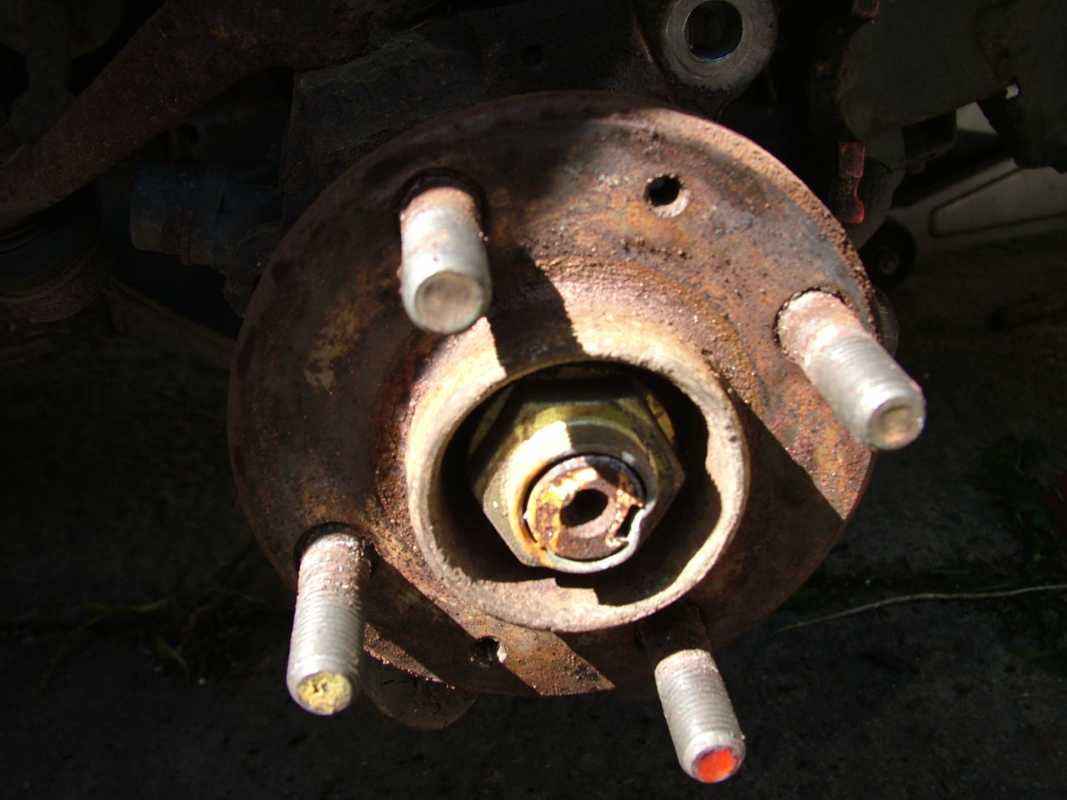
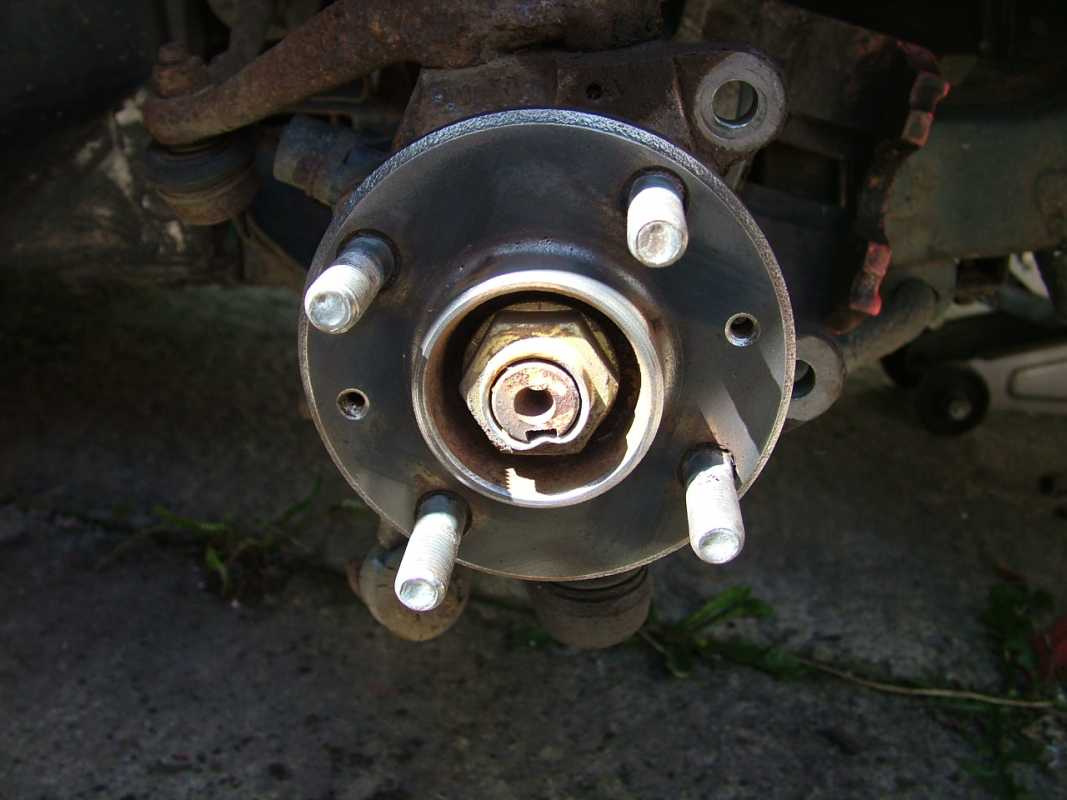
12. Clean the hub and mating faces thoroughly. I used a wire brush on a grinder.
Before
After
The advice from MF Mania is to only use copper grease on the studs and not on the hub itself so I followed that advice. I know others recommend applying copper grease to the hub as well so I’ll leave that to personal choice. I put it on the hub face when I did the rear discs so time will tell which should be done when it comes to getting the discs off next!
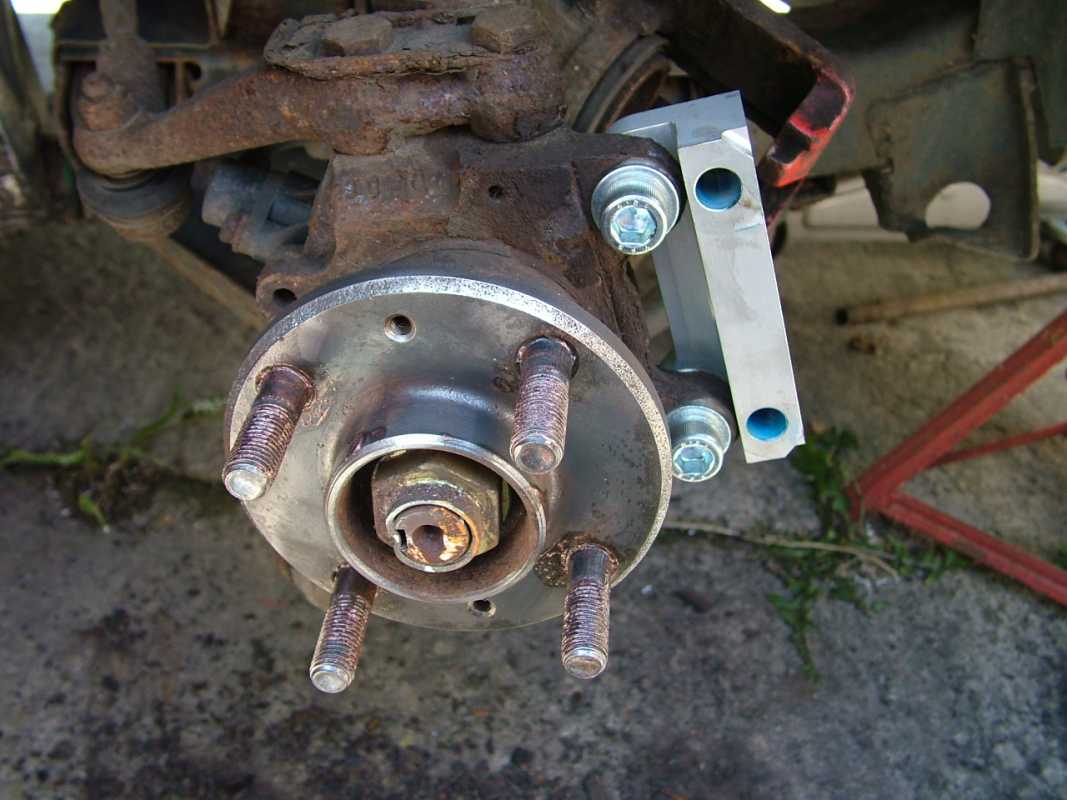
14. Fit the extender block to the original caliper holder holes using the shorter Allen bolts with a washer either side of the caliper holder. It is essential to use Loctite (other thread locking materials are available) on the threads as these bolts are BZP so won’t rust in place like the originals. Tighten to 85Nm.
15. Clean the new discs surfaces to remove the preserving oil. I used Brake Cleaner but any oil solvent (petrol perhaps? – take care) would do.
16. Fit the discs, checking for correct alignment as best you can. They are a tight fit over the studs but will go on by ‘wiggling’ the disc as you ease it on.
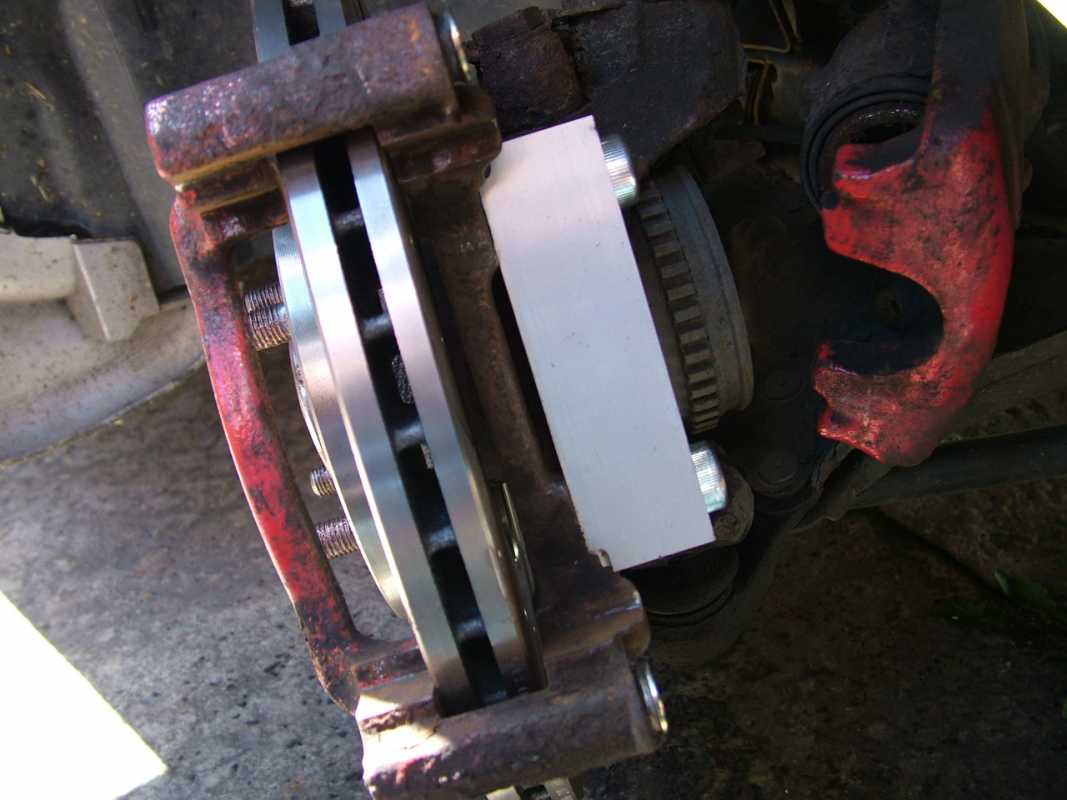
Note that if you have grooved/drilled/dimpled discs these are sided. This picture is of the off side wheel. Ideally, you should use a dial run out gauge but I don’t have one so had to rely on eye. When you get the caliper back on it’s easier to check any run out, especially when the pads are in.
I couldn’t replace the retaining screws because the screw hole was in the wrong place on the disc. Shouldn’t be a problem as the discs are held in place by the wheel nuts anyway..
17. Refit the caliper holder using the longer Allen bolts, again using Loctite or similar and tighten to 85Nm.
18. Fit the new pads removing the backing from the pad shims and using copper grease on the ends of the pads only. This is a MGF Mania recommendation. Others put grease on the backs of the pads as well. Your choice of which to follow.
19. Lever the caliper piston back using a large screwdriver so that the caliper will fit over the new pads. Check the brake fluid level first so that it doesn’t overflow the reservoir. If it’s a bit full, you may have to remove some before you start pushing the piston back.
20. Refit the caliper to the holder and tighten the slider pin bolts to 45Nm.
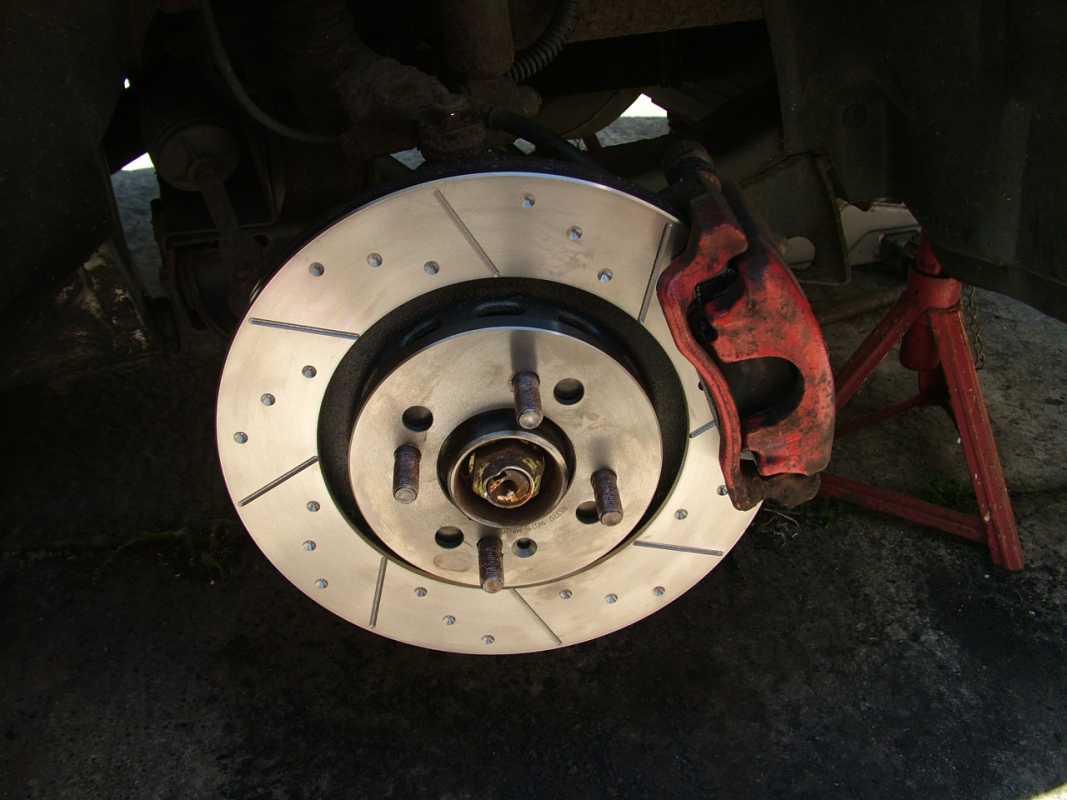
21. Check for run out of the disc again. This is not that easy as the disc is now fairly loose on the studs.
22. Re-fit wheel and tighten nuts to 70Nm. (Recommendation now is to tighten to 100Nm) This is when you can check alignment because you can feel the wheel rotating evenly through the pads.
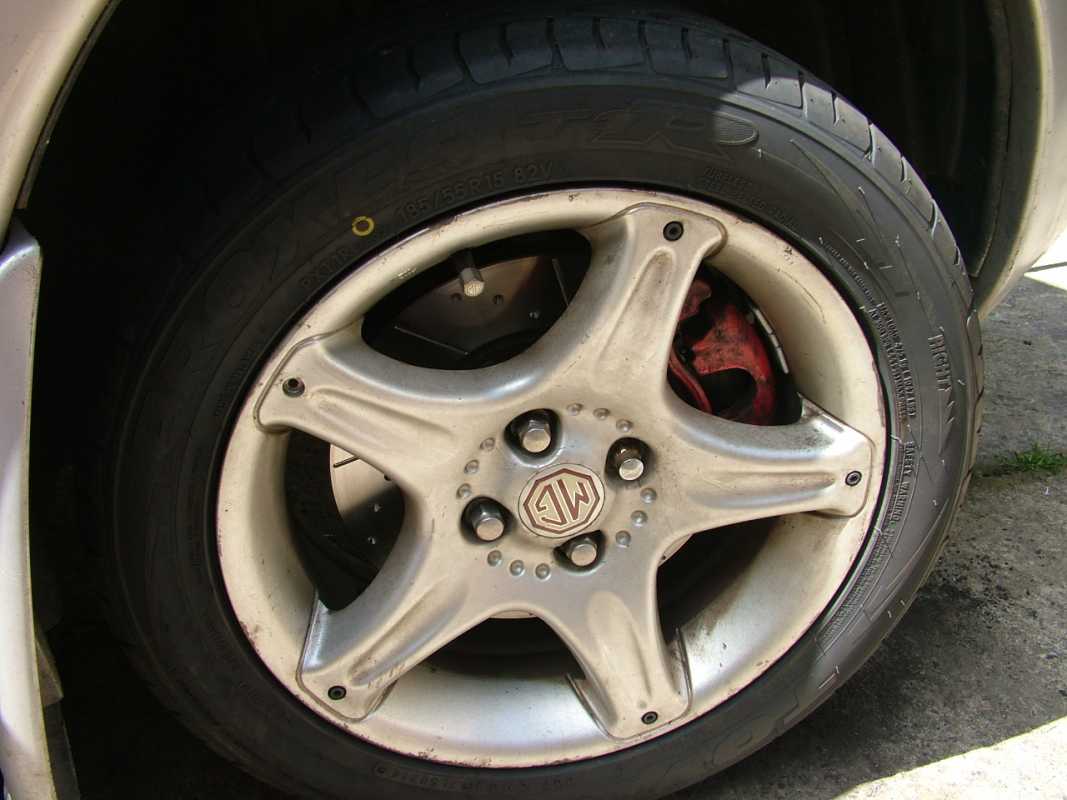
23. Road test being *very* careful and allowing for brakes not feeling 100%
24. The discs and pads need about 200 miles to bed in properly so it’s as well to avoid unnecessary hard braking during this time, though of course emergency braking is preferable to collision!
25. Job half done. Now repeat for the other side.
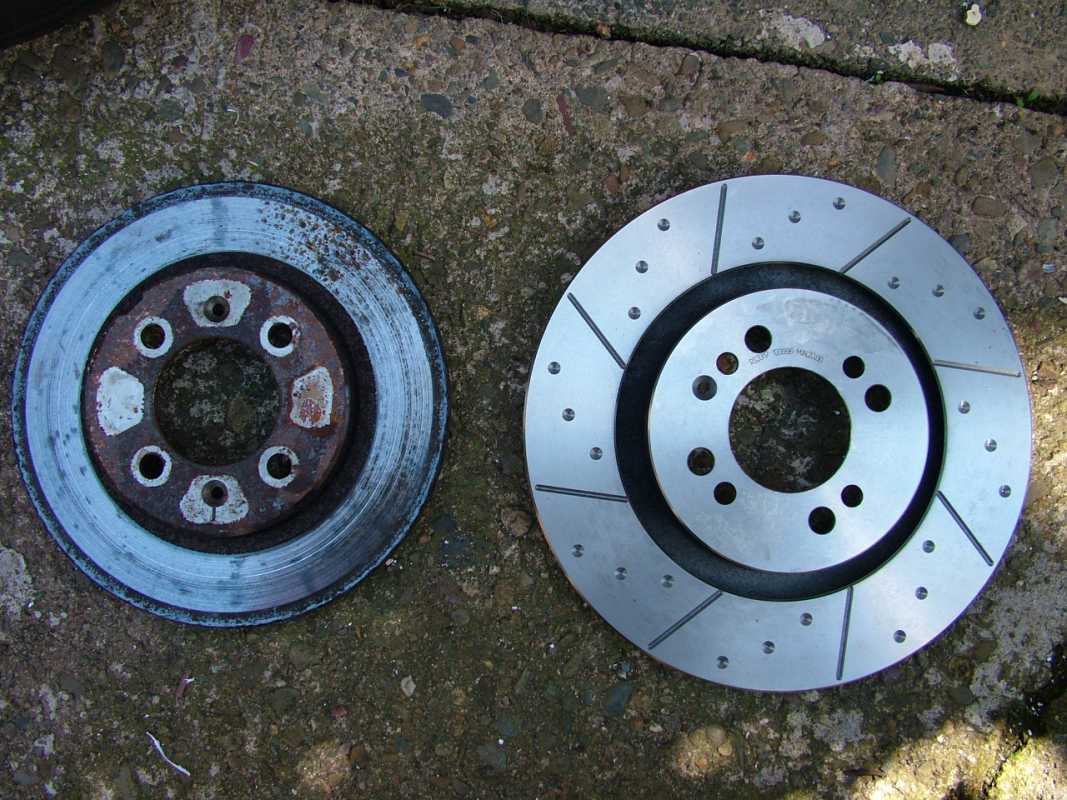
This shows the difference in size between the original 240mm and the new 280mm discs. Fairly significant!
The usual disclaimers apply - if you decide to follow this 'How To' and it all goes horribly wrong, don’t blame me

Robin
Please Log in or Create an account to join the conversation.

Replied by paulsmgf on topic 240 to 280mm Front Brake Disc Upgrade
Posted 12 years 1 month ago #144950Glad you chucked the old pads as they would be rubbish (already destroyed by your old discs outer edge )

Please Log in or Create an account to join the conversation.
Replied by cairnsys on topic 240 to 280mm Front Brake Disc Upgrade
Posted 12 years 1 month ago #144965Robin
Please Log in or Create an account to join the conversation.


Look forward to your report on the difference between stock and these once they are bedded in.


Please Log in or Create an account to join the conversation.
- The driving dutchman
-
 Offline
- Time served MGer
-

Registered
- Posts: 331
- Thanks: 88
Replied by The driving dutchman on topic 240 to 280mm Front Brake Disc Upgrade
Posted 12 years 1 month ago #144982Please Log in or Create an account to join the conversation.
Replied by cairnsys on topic 240 to 280mm Front Brake Disc Upgrade
Posted 12 years 1 month ago #144992PQD44 wrote: Great How To
Look forward to your report on the difference between stock and these once they are bedded in.
Already significantly better though I haven't tested with hard braking yet of course. Once bedded I think they'll be excellent and resolve an issue I've always had with the F - that of poor braking performance.
Robin
Please Log in or Create an account to join the conversation.
cairnsys wrote: .... resolve an issue I've always had with the F - that of poor braking performance.
Never a good sign when the best description of the brakes is ....adequate, just. :slapme:
Please Log in or Create an account to join the conversation.
Rendering Error in layout Message/Item: client authentication failed. Please enable debug mode for more information.
Please Log in or Create an account to join the conversation.
Replied by mgfmania on topic 240 to 280mm Front Brake Disc Upgrade
Posted 12 years 1 month ago #145052Re. 21. Check for run out of the disc again. This is not that easy as the disc is now fairly loose on the studs.
Sorry, I'd forgotten that most people only have MG domed nuts. Standard brake fitting procedure at 'The Farm' is to pull new discs on with open wheel nuts and check run-out
For anyone able to travel to Knutsford: We have agreed £50 per end fitting Front/Rear 280mm upgrade + any other necessary items, pads, etc. by Alan Crossley - Motorsports Preperation (www.ac-me.co.uk to be up and running soon!) or http://www.autotechcarrepairs.co.uk/ both are based on the same site as MGFMania
Regards
Peter
Please Log in or Create an account to join the conversation.


Start here with old disc removed.
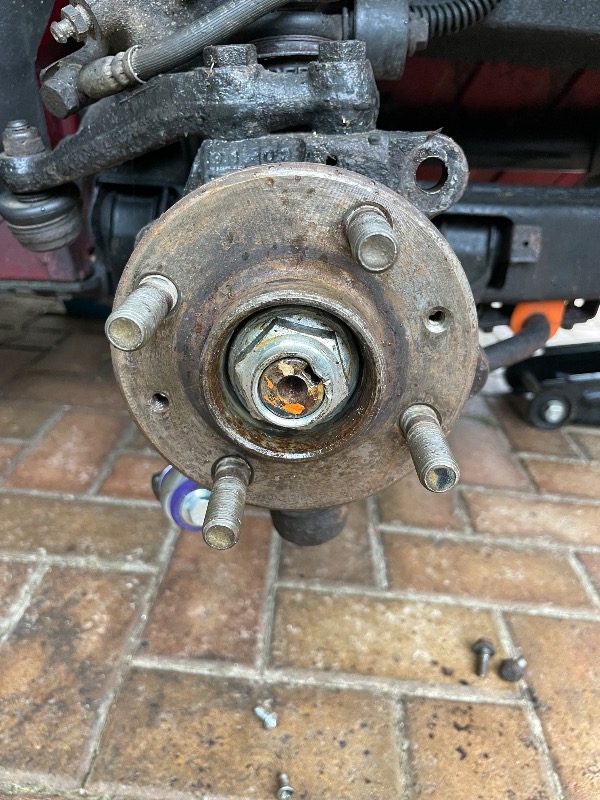
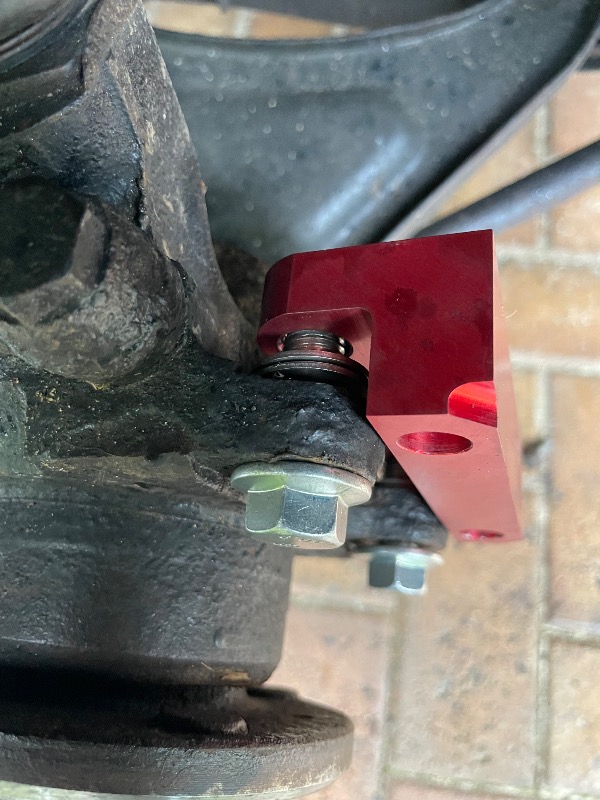
Fix the extender block using the two 40mm bolts supplied. On each bolt include 2 spacer washers between the block and the hub. The cap bolt has no washer. Use loctite or similar on the threads.
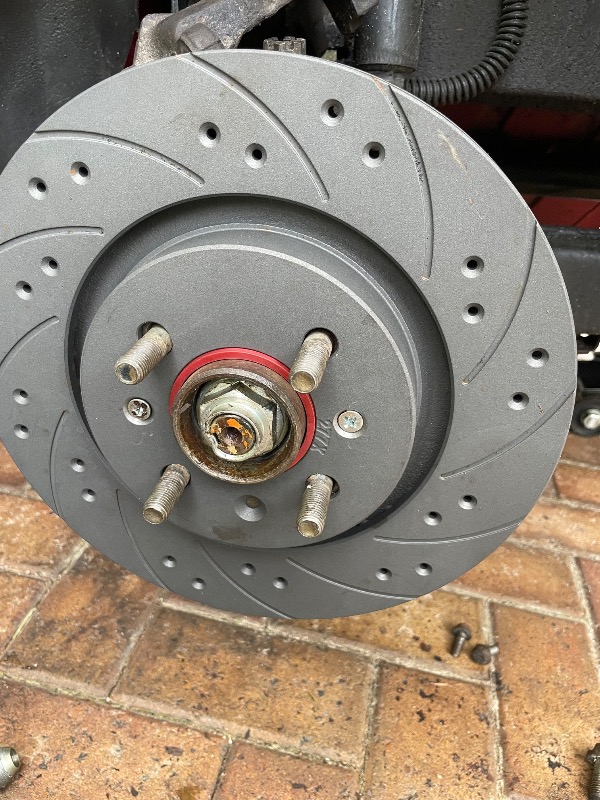
Fit the 280 mm disc/rotor supplied. Secure with the two screws supplied and include the red ring with the rounded side against the disc.
Fit the cleaned calliper carrier using the two 50mm allen headed bolts. Use loctite on the threads.
Disc run out can be roughly assessed at this point by rotating it and looking at the gap between the carrier and the disc. There should be a constant gap. Not many of us will have a dial gauge.
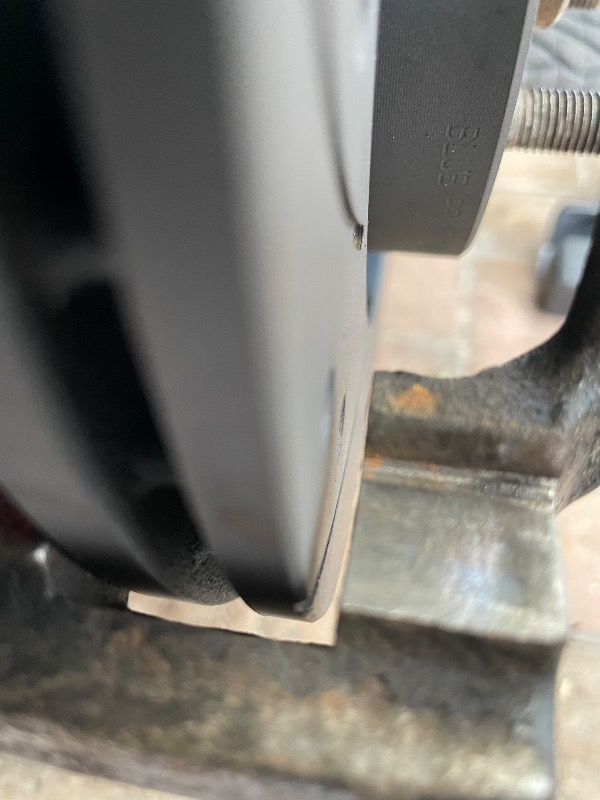
The calliper carrier must be clean especially where the brake pads sit. Also trial fit the pads and if needed file the pad ends as these can be a tight fit and will not slide freely. On the same theme the calliper carrier pins should have been pulled out and cleaned to ensure smooth operation.
Retract the calliper piston. Fit the pads into the carrier then refit the calliper.
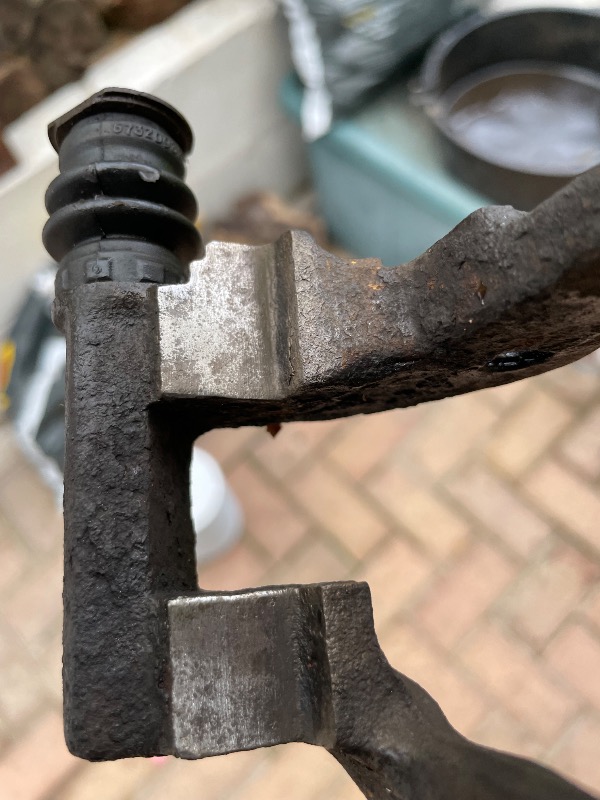
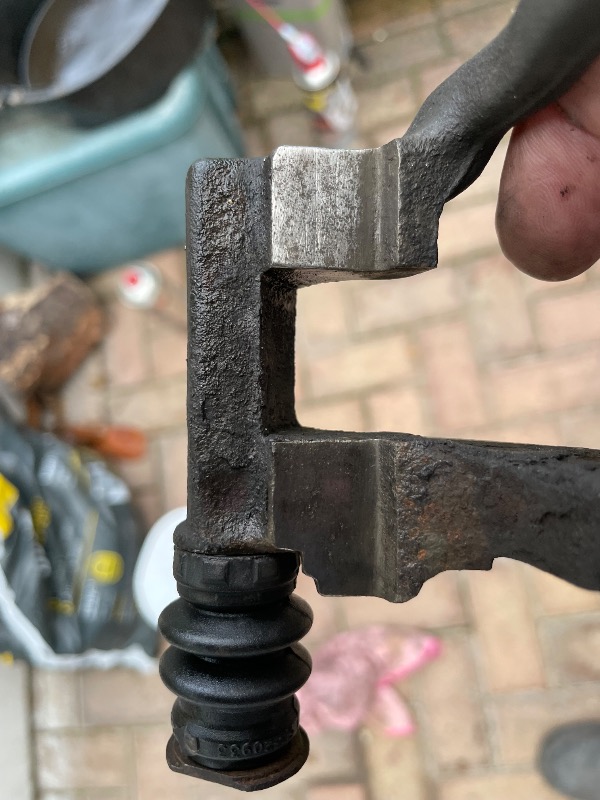
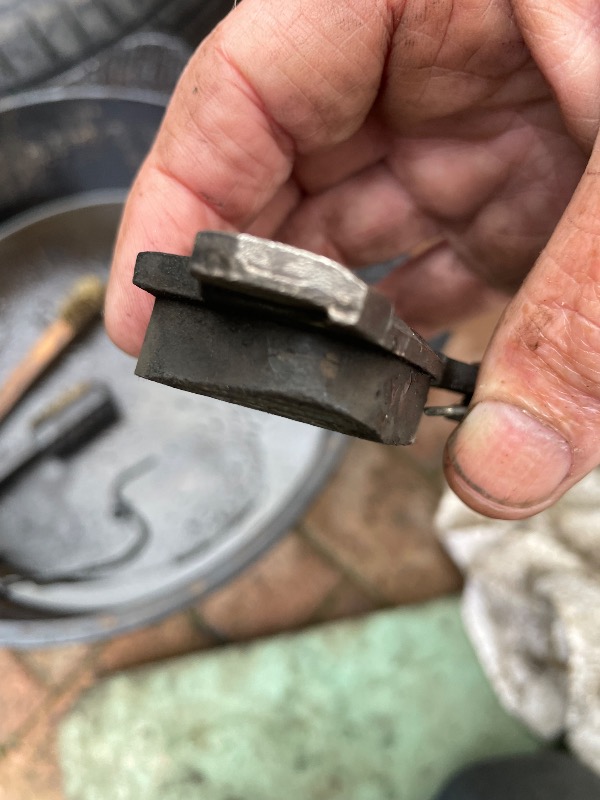
Use copper grease as preferred e.g. pad shims, hub/disc interface, carrier pins, pad ends/carrier contact points.
Test drive carefully.
Update: First dry day for a test drive. A qualified positive result as the “adequate stopping” is now upgraded to “confident stopping” with the original callipers/pads now acting on the outer area of the bigger disc. I’m happy to leave it there but even better results would be possible with bigger callipers/pads which use the full width of the new disc. Can this be done?
Please Log in or Create an account to join the conversation.
- Airportable
-
 Offline
- Master MGer
-

Site Supporter
- Posts: 3672
- Thanks: 912
Replied by Airportable on topic 240 to 280mm Front Brake Disc Upgrade
Posted 1 year 1 month ago #216158Thanks.
M
Please Log in or Create an account to join the conversation.

Replied by EllisoJo on topic 240 to 280mm Front Brake Disc Upgrade
Posted 1 year 1 month ago #216203That Mike Satur kit looks better quality than the otherwise similar kit I used about 2 years ago. The discs have the four new 3.75" PCD holes at the same angles as the100mm PCD originals. IMO, that makes use of the central locating ring ESSENTIAL, because location of the disc would otherwise be poor, on what are essentially racetrack shaped wheel-stud holes.
Satur has also provided two new tapered holes for the locating screws. The modified discs I was supplied with (by A.N. Other supplier) were 90degree offset from the 100mm P.C.D. holes. This results in two of the new holes coinciding with (and obliterating) the tapered screw locating holes. Also, my kit was NOT supplied with a central locating ring.
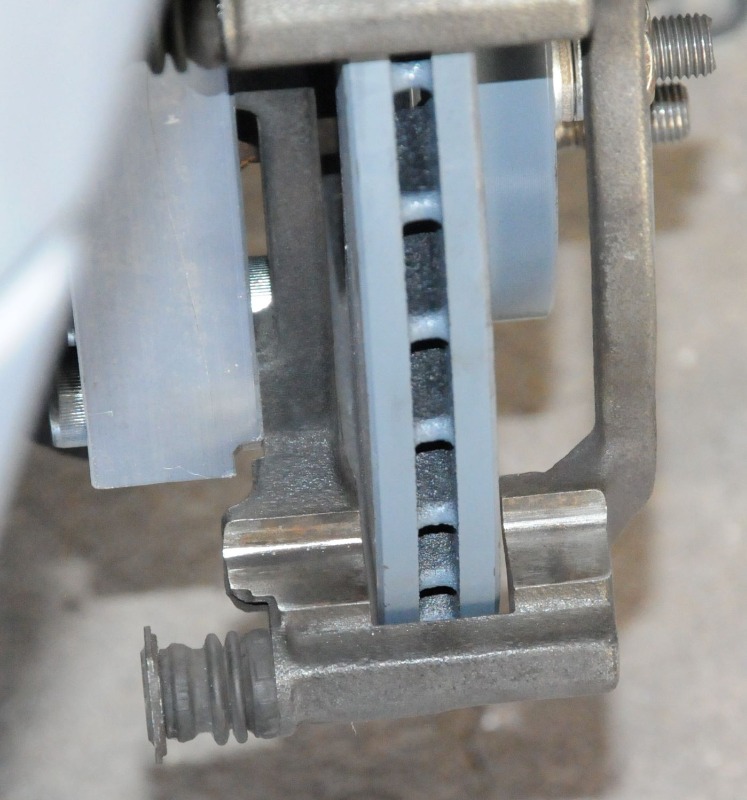
The other comment I would make are:1. I had to use TWO washers between the Al Alloy adaptor and the hub, to get the calliper carrier to align correctly with the disc. This was true O/S and nearside. Total 3 thin washers, 3 of your thick washers +2 intermediate size, from my own stock.2. Different thicknesses of washers were needed (top versus bottom bolts) to align the carrier with even spacing either side of the disc top-to bottom.3. I had anticipated the need to hold the disc tightly against the hub, so I had purchased 4 off M12x1.5 nuts, and I already had plenty of M12 washers.In the light of points 1 & 2 above, can I suggest that it would be helpful to provide 8 off (or at least 6 off) of each thickness of washer in the kit. I was fortunate in having plenty of left-over 12mm washers from a previous job, but many (most??) purchasers of the kit would not be so lucky.I am sure that the reference face which is where the calliper carrier locates as standard, (with OEM 240mm discs) is accurately machined, so that the carrier has equal gaps either side of the disc.
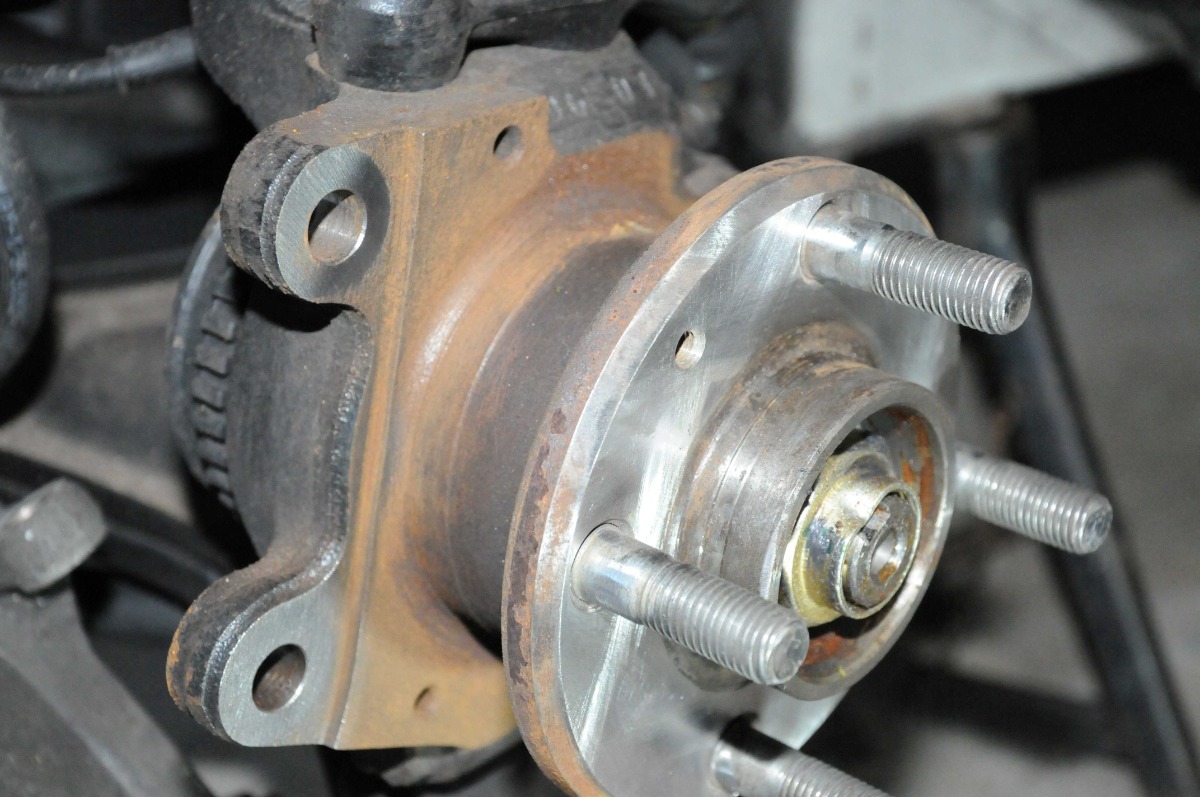
HOWEVER, all these kits allowing use of a 280mm disc have to use an offset bracket WHICH LOCATES ON THE OPPOSITE SIDE OF THE HUB. The location points are spot-faced patches, designed to give the standard bolts (FS112281L) a flat location. (See areas below circled in red)
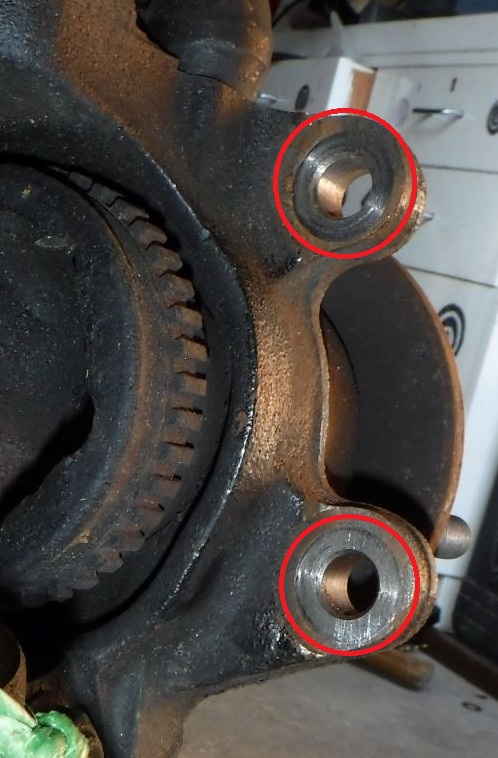
MG Rover saw no need for this surface to be accurately machined, as the depth of spot facing simply controls the depth of penetration of that carrier-to-hub screw. This means that we cannot ASSUME that bolting the offset bracket up to those spot-faced surfaces, using 1 or two washers, will give an even spacing of the calliper carrier around the disc. IT CERTAINLY DID NOT IN MY CASE!
I there fore advise care when using these 280mm conversions. Provided that the evenness of gaps, both top versus bottom, as well as inner versus outer are checked, no problem.
I also noticed a considerable improvement in braking effect after the larger disc conversion.
Please Log in or Create an account to join the conversation.