Sign In   Register

Topic

My mods so far: stage 2 9 years 8 months ago #148030

Loving the progress...

Are you fitting the lambo door kit he does too?

Doesn't he fit 67mm spacers (from memory) to fill the arches? I'm afraid I'd be worried about bearing life too with spacers like that on it

I can tell you 235/40/18 will fit in the back :broon:

I'd of thought (just me) 17" wheels would look best.. Think 16's would look lost..

What colour is it going?
Diesel Destroyer.. 'The bringer of dreams'
The following user(s) said Thank You: Denial

Please Log in to join the conversation.

My mods so far: stage 2 9 years 8 months ago #148033

Not sure if you're on FaceBook fella.. But Maxine Pfander posted pics of her car the other day..

Diesel Destroyer.. 'The bringer of dreams'
The following user(s) said Thank You: Denial

Please Log in to join the conversation.

Re:My mods so far: stage 2 9 years 8 months ago #148034

Jeez I'd love to be able to mod my bonnet for cooling and aerodynamics like that, or especially Clive's effort.


Sent from my iPad using Tapatalk HD
The following user(s) said Thank You: Denial

Please Log in to join the conversation.

Re:My mods so far: stage 2 9 years 8 months ago #148039

I wasn't aware of Maxine's car, i tried to do some digging around but was unable to find any info about it, Is there a build thread for her car somewhere? As for the lambo door kit i think i have answered this before, it's not in my plans at the moment, mainly down to cost and also because I'd like to get the exterior finished and then i'll be moving onto stage 3 and the interior. However when everything is done I would like to make the trip down to Ariel's place in Madrid again, with my car and i might get it done then. I'm not sure about the exact size of Ariel's spacers, I have done some research however and found a UK company that supplies custom spacers/hub adapters built to order. Again though my focus at moment is getting the exterior bodywork done. This brings me onto colour/paint, I've managed to narrow it down to a choice of 3 but will have to do some test sprays first before i make a final decision. Wheels are still proving a headache but i think your right and I will be going for 17"

Please Log in to join the conversation.

My mods so far: stage 2 9 years 8 months ago #148040

I sent Maxine a message on FB asking for some more pics but got no reply..

I don't know anything about her car.. And have only seen the one pic so far..

It is possible to buy 4x100 flanges from Elise parts.. To save running adapters.. And have your discs altered to suit..

I personally found the choice of 4x100 17's limited.. One of the reasons I went for 5x100 custom flanges.. Millions of options in 5x100

Has anyone local got 17's they could let you try on the car?

It's really coming on now.. Looks superb.. Can't wait to see it in finished paint
Diesel Destroyer.. 'The bringer of dreams'
The following user(s) said Thank You: Denial

Please Log in to join the conversation.

Last edit: Post by Diesel Destroyer.

My mods so far: stage 2 9 years 7 months ago #150066

So just a small update today, in my last post i was saying how work on finishing the sides of the car was on hold until my vent scoops arrived from South Africa. Well i'd like to say a big thank you to Wayne out in South Africa because they arrived today
:D I have to admit i was a bit apprehensive when i ordered them, but Wayne is a nice really guy, and he kept me updated throughout on progress and shipping. They will be fitted and painted when the car gets it full respray.


I have also got around to removing the aerial from the car, I don't really listen to the radio when driving and aesthetically i think it looks better without. Just need to weld a metal disc into the hole left now.


Finally for now, I have just started work on "blanking" the upper vents on the front bumper.


Attachments:

Please Log in to join the conversation.

My mods so far: stage 2 9 years 6 months ago #151583

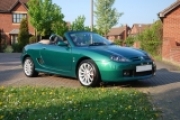
I do not consider myself a mechanic by any means, but as is inherent in all men I am dab hand hand at taking things apart. So finding myself yesterday filled with this spirit of adventure, and keen to try and make some progress. I set off to the bodyshop grabbed a socket set and went at it. My goal/mission for the day was to try and install this:


Purchased 5 months ago from ebay for a price of £80 it has been patiently sitting in its box at the bodyshop ever since.


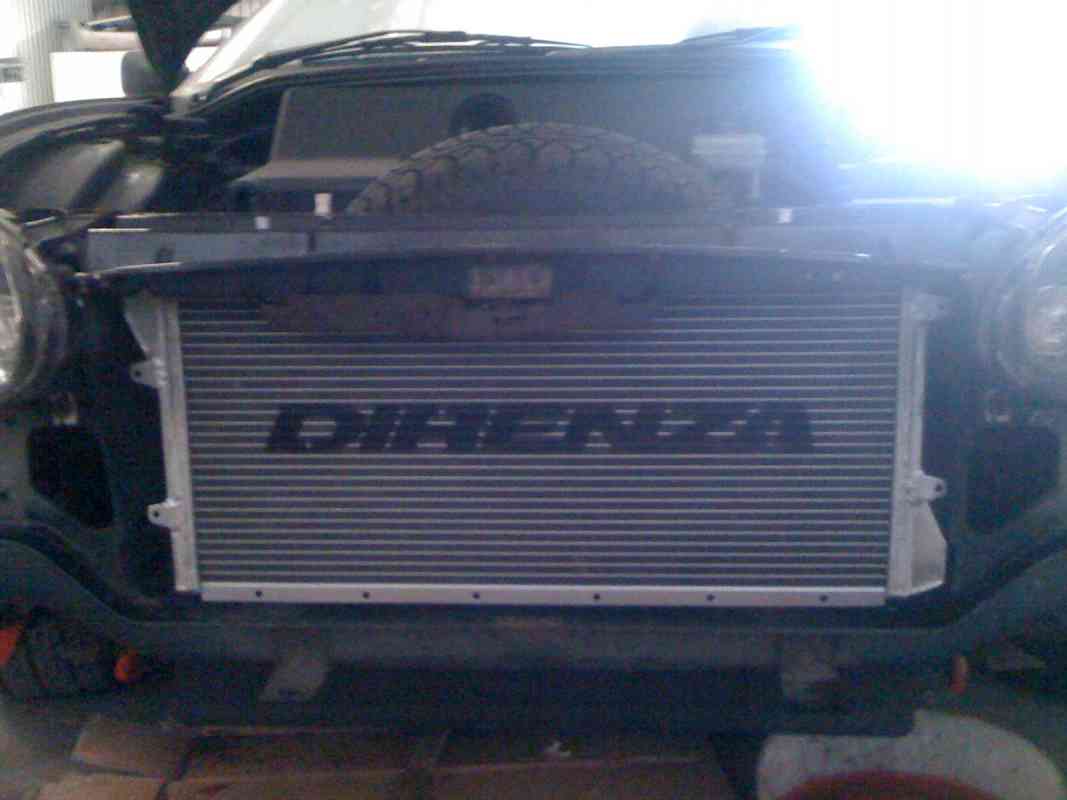
as you can see from the comparison pic above its almost double the size of the original radiator. Work begins! and 4 bolts later i have managed to remove the radiator mounting plates. I congratulate myself by going for a coffee and a smoke. Next to be removed is the "platform and weld assembly-bonnet locking" (thanks to rimmerbros for providing me with that name). So far so good and the small pile of rusted 10 mill bolts next to me is growing nicely. Headlights come off next so i can access the bolts on the front crash bar. Take off the 4 bolts on the passenger side and move to the drivers side. However something is wrong and i can't reach them, i can't even get a spanner over the bolts. Everything becomes clearer, when i realise that the reason i can't reach them, is because at some time in the past a previous owner has front ended the car. :hgf: The 3 "crumple zone pieces of metal" have collapsed slightly and are now covering 1 of the bolts i need to get to. I manage to take off the other 3 bolts and then have to result to a lump hammer and some good old fashion brute force.


Those of you adept at playing spot the difference will have observed a crush can at the bottom and one missing from the top. So thats another thing to add to the list of the parts to get. Anyway with that removed i now have full access to the old radiator, or so i thought. There i was thinking all i had to do was unscrew the jubillee clips holding the hoses on and job done. Except they aren't jubillee clips they are part number: PYC101380 they aren't made of a soft metal i can cut and they are rusted solid around the pipe. Removing these 2 clips proved to be the hardest part of the entire process. So much so that i was sorely tempted just to slash the hoses and be done with it! Another break for coffee and a cigarette and a much needed rant with the 2 owners of the bodyshop. Back to work and i finally manage to get the clips off. Off comes the fan and i attach it to the new radiator. Just enough time for me to put the new radiator in place before closing time and the long walk home in the rain. I worked out if i was paying myself £10 p/h with the cost of a replacement crash bar to buy I am at -£20 for the day.


Attachments:
The following user(s) said Thank You: Leigh Ping, Blow-in

Please Log in to join the conversation.

Last edit: Post by Denial.

My mods so far: stage 2 9 years 6 months ago #151588

Feel for you, sounds like a typical day working at my car too

Please Log in to join the conversation.

My mods so far: stage 2 9 years 6 months ago #151590

  • bensewell's Avatar
  • bensewell
  • Offline
  • Grand MGer
  • Grand MGer
  • A Bargain Spotter, Can-Do-er and eBay Addict!
  • Posts: 6036
  • Thanks: 750
With MG ownership becomes unknown timescales.

Please Log in to join the conversation.

Re:My mods so far: stage 2 9 years 6 months ago #151619

How was the metal work behind the radiator? Mine was scabby and needed some attention. Also, where is the foam under the radiator. And the rubber strips to the sides?


Sent from my iPad mini using Tapatalk

Please Log in to join the conversation.

Re:My mods so far: stage 2 9 years 6 months ago #151621

the metal work behind wasn't as bad as i thought it was going to be, i used a wire brush on the worst bits and have painted the whole surface with hammerite. You've lost me with the foam and the rubber strips, there wasn't anything like that when i removed the old radiator. Just the 2 rubbers on the mounting points at the bottom nothing else.

Please Log in to join the conversation.

Last edit: Post by Denial.

Re:My mods so far: stage 2 9 years 6 months ago #151623

Same on my F, just 4 rubber mounts.

Please Log in to join the conversation.

Time to create page: 0.268 seconds
© 2024 The-T-Bar.com All Rights Reserved. Hosted By SEBS IT