
HOW TO: Refurb a Spark Steering wheel


Replied by Red Devil on topic Re: HOW TO: Refurb a Spark Steering wheel
Posted 14 years 5 months ago #39502

Please Log in or Create an account to join the conversation.


Replied by bensewell on topic Re: HOW TO: Refurb a Spark Steering wheel
Posted 14 years 1 month ago #51159
Please Log in or Create an account to join the conversation.
- Rich in Vancouver
-
 Offline
- Senior MGer
-

Registered
- Posts: 1882
- Thanks: 666
Replied by Rich in Vancouver on topic Re: HOW TO: Refurb a Spark Steering wheel
Posted 14 years 1 month ago #51161One option may be to use an epoxy formula paint rather than a lacquer for increased life.
I have seen epoxies in spray bombs where you push in a plunger on the bottom of the can to mix the paint.
This type should give a very durable result.
The only drawback is that, once mixed you have to use all the paint. :pinch:


Please Log in or Create an account to join the conversation.
- Leigh Ping
-
 Offline
- Moderator
-

Registered
- Posts: 6840
- Thanks: 1634
Replied by Leigh Ping on topic Re: HOW TO: Refurb a Spark Steering wheel
Posted 14 years 1 month ago #51168Great isn't it!Rich in Vancouver wrote: That's a very well done How-To!
I like you new avatar pic Rich. Your car's looking good.
Please Log in or Create an account to join the conversation.
- Gadget2466
-
 Offline
Topic Author
Offline
Topic Author
- Time served MGer
-

Registered
- Posts: 281
- Thanks: 104
Replied by Gadget2466 on topic Re: HOW TO: Refurb a Spark Steering wheel
Posted 14 years 1 month ago #51182bensewell wrote: Just a thanks to this one. I'm in the territory of needing to remove my steering wheel and thought.... Hmm how do I do that? Your first couple of steps explain it easy peasy lemon squeezy
I am glad it was of use to you Ben.
just be very careful when removing the wheel, make sure it does not turn when undoing the centre nut.
Also if possible try to drive a way in a straight line to get the wheels straight, I thought mine were dead straight but when on the open road it is surprising how such a little deviation makes for a big difference when driving. I had to re-do mine.
Maybe place some chocks on the inside of the drivers wheel and outside of passenger wheel to stop them turning a little when you remove the centre nut.
You may be able to mark the centre spindle and back of wheel somehow to help alignment when refitting
The T-Bar How To section must be the best i have come across.
My MX5 owning friend is very impressed compared to his forum..........
Good Luck ,
Gary

Turned to the Darkside, K&N Apollo and extra bling fitted.52mm TB
Please Log in or Create an account to join the conversation.
Replied by bensewell on topic Re: HOW TO: Refurb a Spark Steering wheel
Posted 14 years 1 month ago #51190Please Log in or Create an account to join the conversation.
- Leigh Ping
-
Offline
- Moderator
-
Registered
- Posts: 6840
- Thanks: 1634
Replied by Leigh Ping on topic Re: HOW TO: Refurb a Spark Steering wheel
Posted 14 years 1 month ago #51206Glad to hear it. :woohoo:Gadget2466 wrote: The T-Bar How To section must be the best i have come across.
My MX5 owning friend is very impressed compared to his forum...
Please Log in or Create an account to join the conversation.
- Rich in Vancouver
-
Offline
- Senior MGer
-
Registered
- Posts: 1882
- Thanks: 666
Replied by Rich in Vancouver on topic Re: HOW TO: Refurb a Spark Steering wheel
Posted 14 years 1 month ago #51215Leigh Ping wrote:
Great isn't it!Rich in Vancouver wrote: That's a very well done How-To!
I like you new avatar pic Rich. Your car's looking good.
Thanks Leigh. The pic was taken at the Vancouver All British Field Meet last weekend.
I will post some event pics shortly.
Please Log in or Create an account to join the conversation.
Replied by bensewell on topic Re: HOW TO: Refurb a Spark Steering wheel
Posted 14 years 1 month ago #517831. Steering wheel going big time to the right
2. Indicators not clicking off.
So what did I do?
Undo everything and remove the wheel as you said.
There is a little plastic thing that controls the indicator clicker thingymabob which I forgot to put in.
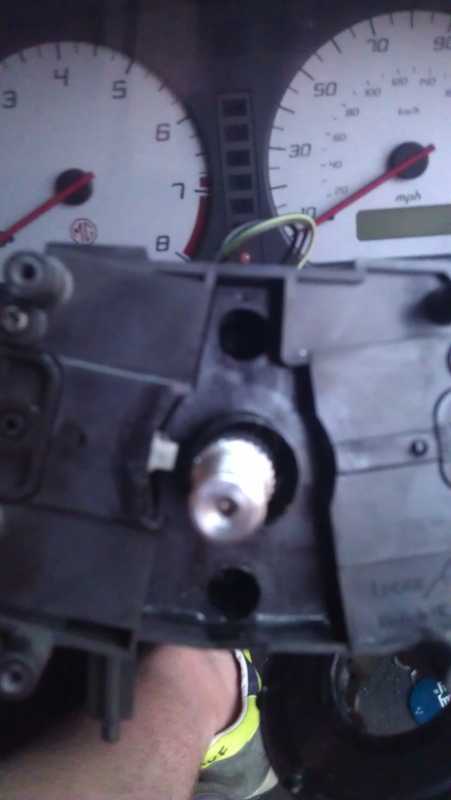
Then I found this and thought hmm? Thats how it works then.
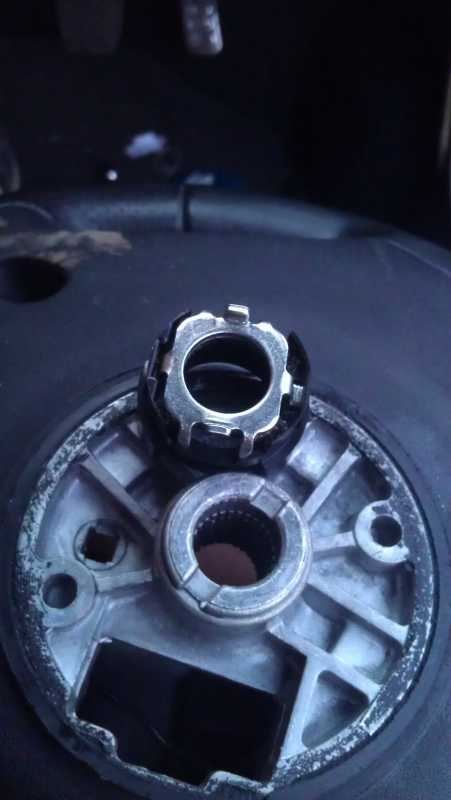
You see this plastic lug that is up? This is what sticks the indicator on.
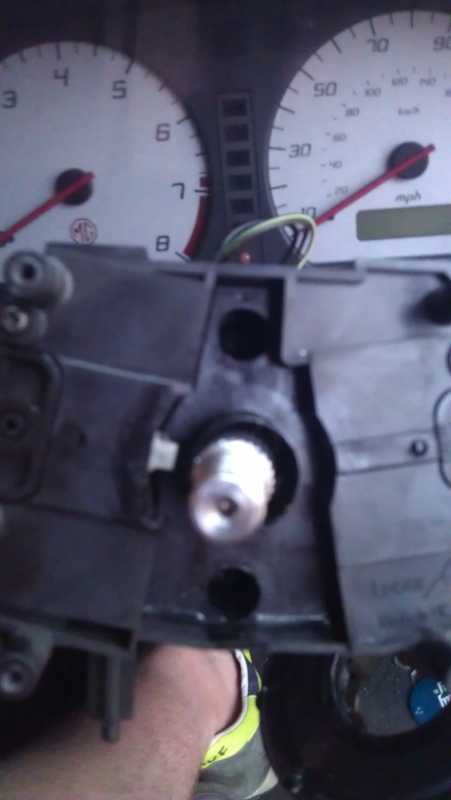
And this plastic thing flicks it off too.
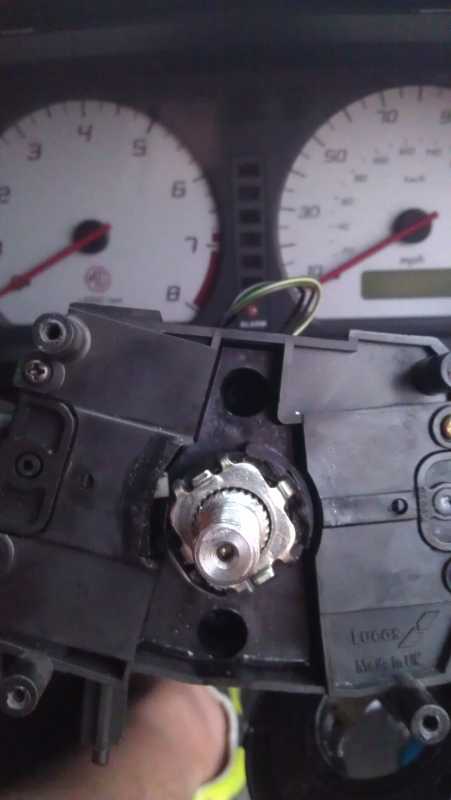
So just line it up as per the previous pics the metal goes into the notches and jobs a good un!
Please Log in or Create an account to join the conversation.