TF 15k servicing how to.
For those of you who like to do their own work, here is how to carry out a 15k service.
There is a servicing sheet available on Tony Thompson's site, here - MG Rover Maintenance Check Sheets.
First on the list is to replace the alarm fob batteries. Most people leave this until they start getting alarm problems, but it is worth doing so that you don’t get caught out in the middle of nowhere.
Look here on how to replace the alarm fob battery - Alarm Fob Battery Replacement Guide.
Next, check the handbrake adjustment. The handbrake should only come up 2 or 3 clicks and should hold the car securely.
If the handbrake has excessive play, feels bouncy when it is off, or the handbrake warning light flashes on when you go over bumps, then you may need to adjust the tension of the handbrake cable. These are also symptoms of a seized rear calliper, so check that the callipers are working correctly before adjusting. Jack the car up and ensure the rear wheels turn freely with the handbrake off.
You can adjust the handbrake tension by removing the arm rest and cubby box.

Look here for a how to on adjusting and/or replacing the handbrake cable - How to replace a handbrake cable guide.
Lamps horns and system warning indicators are self explanatory. Just operate them and check they work. Warning indicators should all illuminate when you first turn the ignition on.
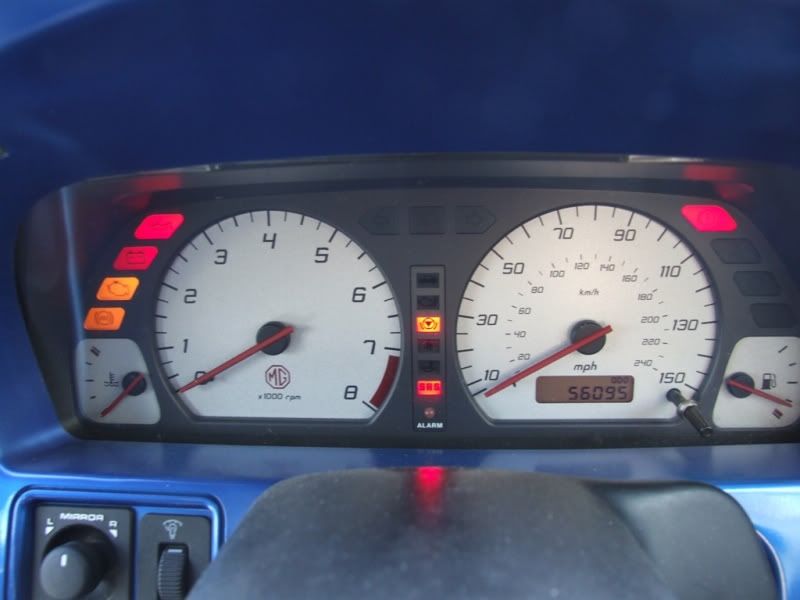
And most should go out after the engine has started. Also check the warning indicators for indicators, hazards, foglights, main beam etc.
Check the screen and washers. One of my washer jets was loose and not spraying properly so I replaced it with a new one (£5), although the favoured replacements now are the Citroen Xsara ones which fit and give a better spray pattern. The jet just unclips from underneath and the new one pushes into place after swapping the gasket from the old one. You can set the jets up by jamming a pin or paperclip into the squirter hole and turning the jet to the required position.
Both the seatbelts, fixings etc should be checked for operation. Slowly unwind the seatbelts, ensuring that it runs smoothly and doesn’t jam. Check for any cuts or damage and give the belt a yank to ensure that the fixings are secure. Now allow the seatbelt to fully retract, again making sure it runs freely. Once retracted quickly pull the seatbelt out and it should lock.
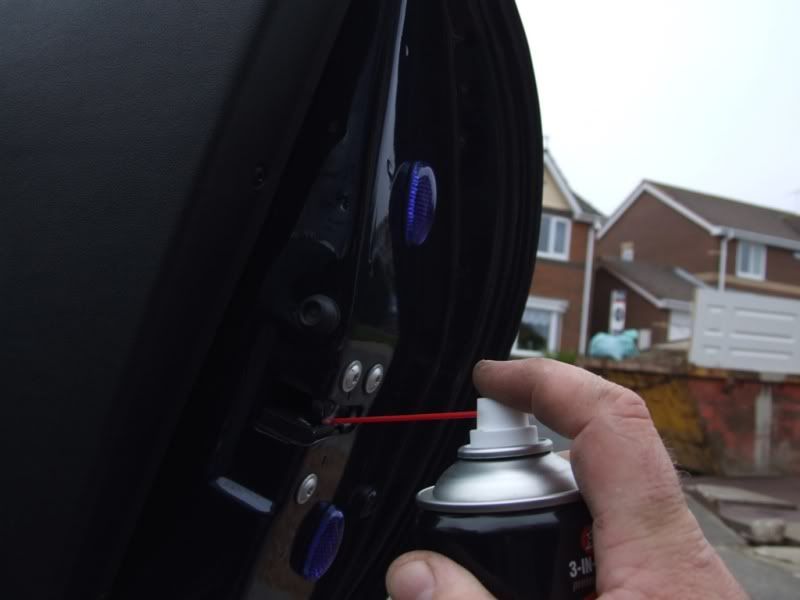
Next I used some spray grease to lubricate the boot/bonnet and door hinges and catches. This is important if you want trouble free operation. Most people do this job when something has stopped operating correctly. This is called corrective maintenance rather than preventive maintenance and can be more problematic and expensive.
Door Catch
Boot Catch


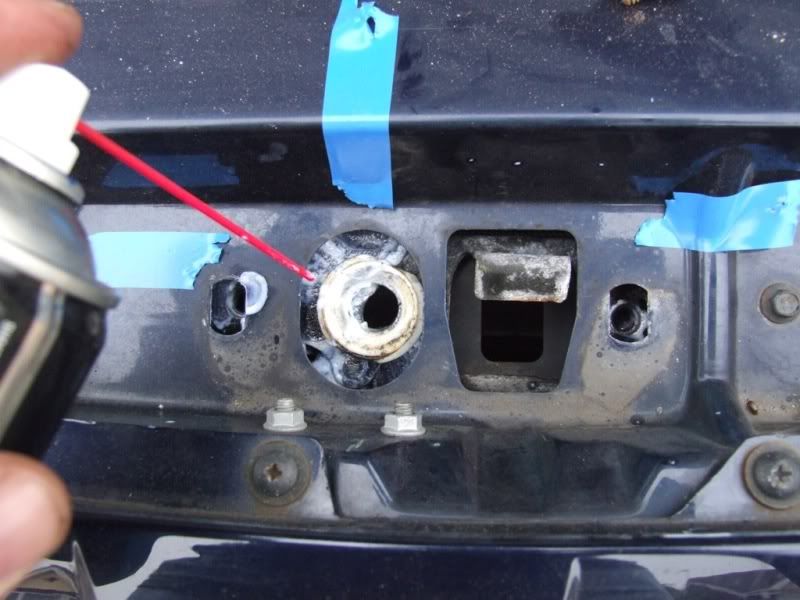
Bonnet Catch

Lower bonnet catch. This is showing the lower catch with the top plate removed. The blue tape is there so that I can put the catch back together in the same place. This is worth doing as you could end up spending a fair bit of time setting the catch back up again. Give a good squirt of grease around inside left, as this is where the cable release from the boot operates the catch. If this seizes you can have a lot of problems getting in to your bonnet.
I also lubricated the bonnet hinges. Unfortunately the grease I am using is white and the hinges are visible with the bonnet closed. I therefore had to wipe some off.
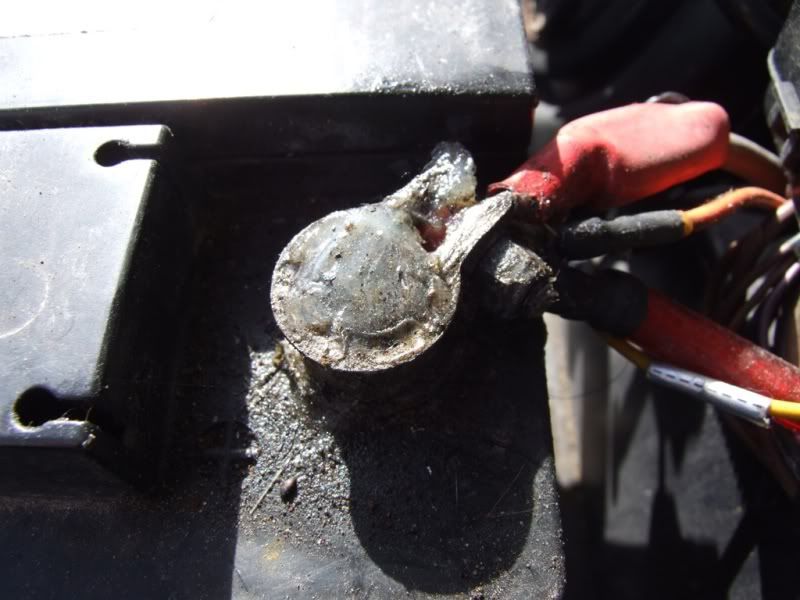
Check the battery for leaks and/or physical damage. Check the terminals and chassis connection and grease with a battery terminal grease or (dare I say it) Vaseline to prevent further corrosion.

Check fluid levels, especially the brake, clutch and windscreen wiper fluid. If low then top up with the correct fluid.
New DoT4 brake/clutch fluid and any suitable windscreen squirter fluid, taking into account the temperature and time of year.
The brake, clutch and windscreen squirter tank can be found under the bonnet. If you have a Stepspeed Sports automatic car, there is no clutch and therefore, no clutch fluid reservoir.

The brake fluid header tank is near the nearside wing close to the battery.
Check that the level is between the min and max marks. If not, then top up with suitable DoT4 fluid.


And similarly with the clutch fluid.

The squirter bottle can be found just behind the spare wheel.

Next, move to the engine bay.
To get full access you need to remove the engine inspection cover.
It is possible to remove the cover without removing the t-bar and wind stop, but it can be a bit fiddly if you have the speaker boxes fitted and you have to use some force to slightly bend the inspection cover. I prefer to remove the windstop, T-bar etc.
Fold the roof back and remove the wind stop
Now fold the roof forward and undo the clips that hold the rear of the hood to the car body (At least unclip the hood to windscreen clips when you do this as it releases a bit of tension).
and fold the rear part of the hood forward. Remember to avoid creases in the window when folding. If you cannot get the rear hood to stay up by itself you can tie it up.
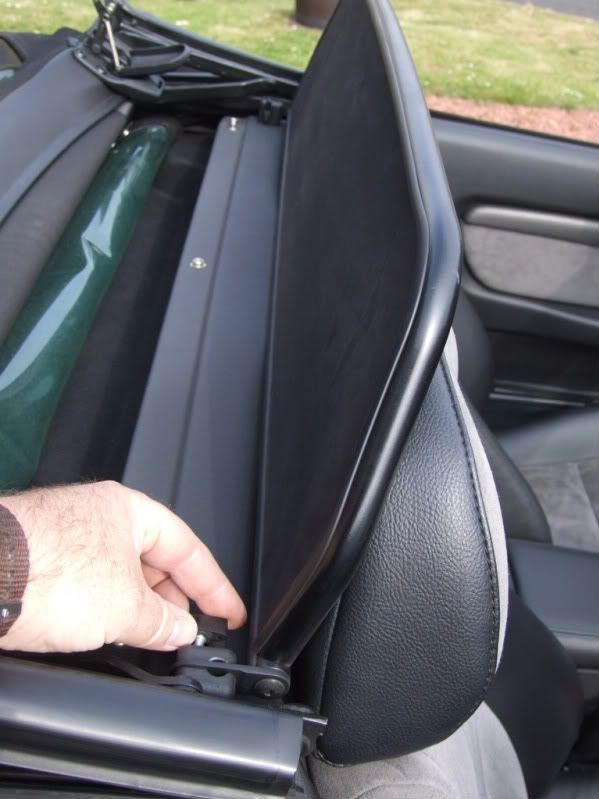
Next remove the wind stop brackets using an allen key

and the 3 cross head screws from the top of the T-bar cover.

The cover then pulls forward (you will have to move the seats forward first). There are 2 plastic push in fasteners at each end of the cover and two at the top of the arm rest. These simply pull out when you pull the cover forward, or break off if my experience is anything to go by. I am now sick of gluing them and I am going to use black plastic screws to hold in place. You may also need to pull the door seal off at each side to release the cover.
Pull the cover forward out of the way and rest on the seats.
Next you need to remove the two 10mm bolts (one at each end) holding the speaker pods to the body, and place out of the way.
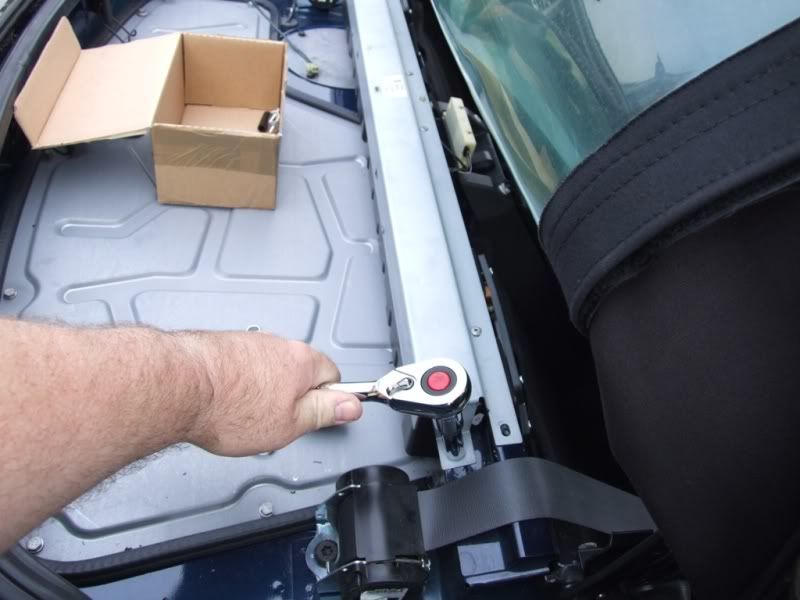
The box in the picture is for holding any screws and bits removed. I really recommend this as it saves you hours of searching for bits.
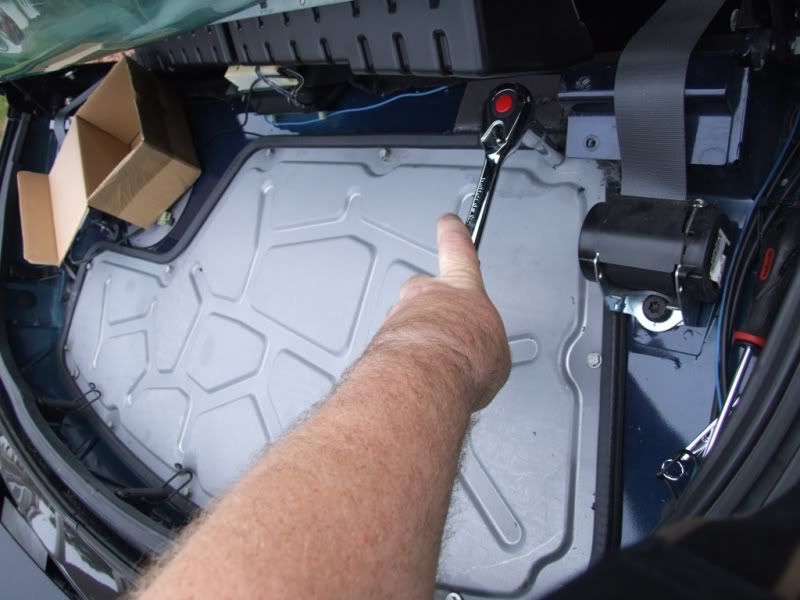
Next remove the parcel shelf cover

and the soundproofing

and remove the inspection panel
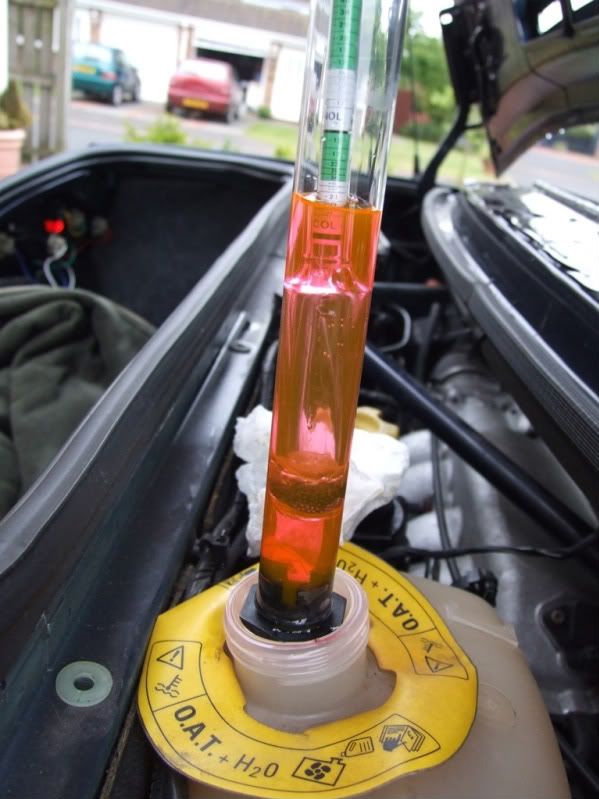
Check all of the visible hoses for damage and leaks.
I haven't pressure checked the system as I haven't got the equipment to do it.
I did check the engine coolant was of a correct mixture and it checked out to -23 degrees using a hydrometer.
Check the auxiliary belts for damage and correct tension. On most cars this just means the alternator belt, but if you have aircon it needs a little more checking.
This is more important than it seems. If the alternator belt fails it usually shreds up and can foul the timing belt. This can cause the timing belt to jump a few cogs and can destroy your engine. A £10 alternator belt is better than £1k plus for a new engine.
Access to the alternator belt is through the offside rear wheel arch. Jack up the car, place on axle stands and remove the wheel.

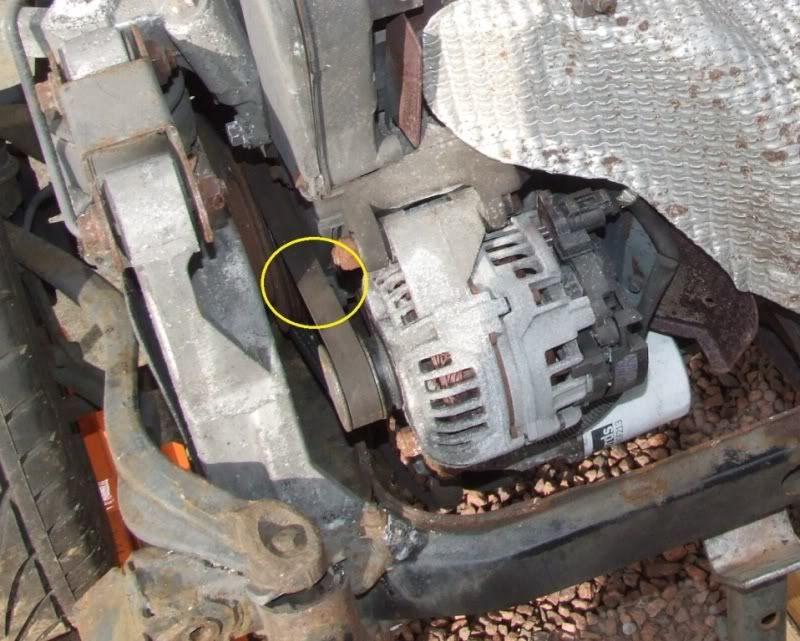
Also remove the cover that protects the alternator and belt.

You can now make out the alternator belt.
Check for damage, ageing, cracking and oil contamination. If there are any signs of these then you should fit a new belt. Also check the belt tension.
One sign of a loose belt is a squealing noise when you rev the engine.
The belt should not move more than 5 – 8mm deflection at this point.
If you need to change the tension/belt or alternator, have a look here - How to change an alternator guide.
If you have a OBD code reader etc, now is the time to dust it off and see if there are any recorded fault codes. Check the codes and follow up any problems that might exist.
Next comes the oil change
Take the car for a nice long drive until the engine is at working temperature. This will help the oil drain easier due to it being thinner.
WARNING. In the next steps the oil will be extremely hot and old oil is carcinogenic. For those of you who don't know, this means that it can cause cancer. So take appropriate precautions to avoid exposure to the engine oil.
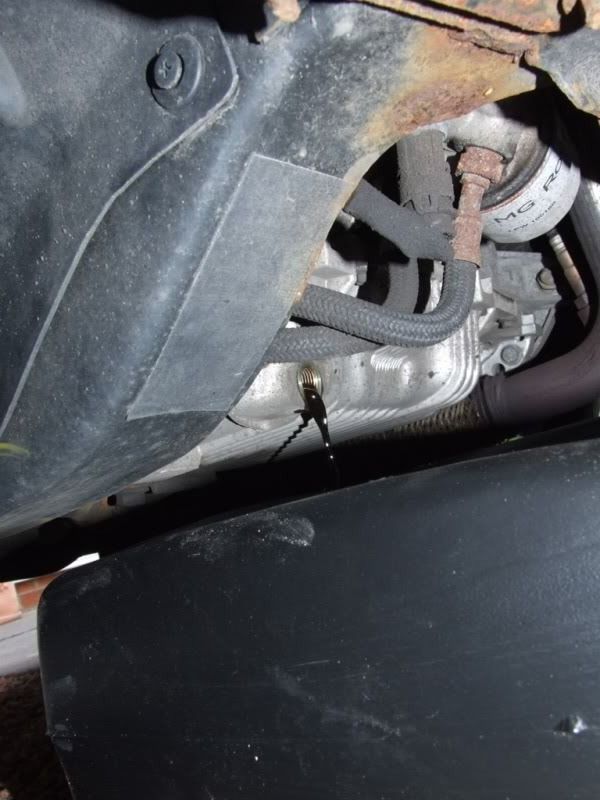
Ensure the car is on level ground, place a suitable container under the sump and remove the sump plug. Also remove the filler cap (yellow) on the top of the engine. This will allow the oil to drain faster.
The sump plug is located at the bottom front offside of the engine
Allow all of the oil to drain from the sump.
Now refit the sump plug USING THE OLD WASHER.
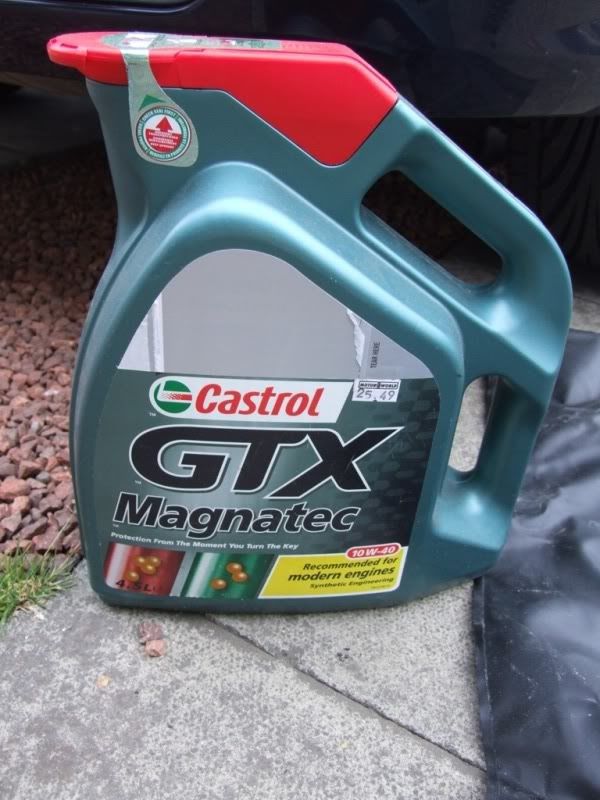
Now fill up the engine with oil through the rocker cover filler. Only the best quality oil for me
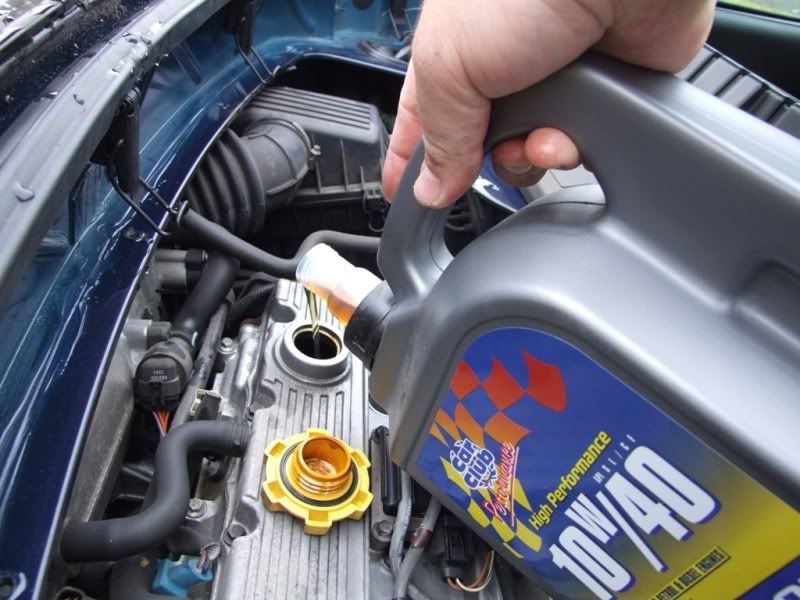
Seriously though, the next step is optional. Fill the engine with a cheap oil of the correct viscosity and run the engine until it is at working temperature.
Switch off the engine and drain the oil again. This will flush the engine and help remove old oil and sludge. You can buy proper flushing oil with detergents that remove deposits etc, but some people think that the detergents may remove layers and sludge that is holding your engine together. You can be too clean.
Once the oil has drained, pour the remainder of the oil into the filler and watch the drain. Clear oil should start coming out.
Once drained, refit the sump plug WITH THE NEW WASHER.
Now jack the car up and either use an axle stand or place a substantial piece of wood that will take the weight of the car under the rear offside wheel. Lower the car onto the jack or wood.

NEVER work under a car with just the jack supporting it, it is dangerous and could collapse with you under it.
This will give you easier access to the oil filter, which is just above the sump plug.
Place a drip tray under the oil filter, remembering that the filter contains a substantial amount of hot, old engine oil.
Using a strap wrench, or filter removal tool, remove the oil filter.


Prepare the new oil filter by smearing a small amount of new engine oil around the rubber seal. This will aid sealing.

Fit the new filter hand tight and then an extra 3/4 of a turn.
Remove any axle stands, jacks etc so that the car is level and fill the engine with new oil. This is the real stuff
Once the engine is filled to the correct level start the engine and let it run for a few minutes. This allows the empty oil filter and engine to fill. Switch off the engine, leave for 5 mins and top up the oil, checking the level on the dipstick

At this point you should check your wheel bearings, drive shafts, gaiters, remove wheels and check tyre tread depths etc, check brake pad wear. When checking pads be sure to check ALL pads as the inner pads tend to wear faster than the outer pads on some brakes.
With the car on axle stands and the wheel off the ground, grab the wheel in the 9 oclock and 3 oclock position and rock the wheel, do the same in the twelve and six positions. You should have no movement.
This shows play in the rear offside wheel.
This could be caused by worn links, bushes or wheel bearings and was causing the car to wander at speed.
In this case it was a worn wheel bearing that needed replacing. If you need to change the wheel bearing then have a look here - Rear hub replacement guide.
Check under the car and around the engine bay for evidence of fuel, oil or any other fluid leaks. Also check your suspension and steering components for signs of damage and leaks.
Examine you exhaust and heat shield for deterioration.
Now refit the engine inspection hatch and associated components.
Check your tyre pressures.

And tread depth
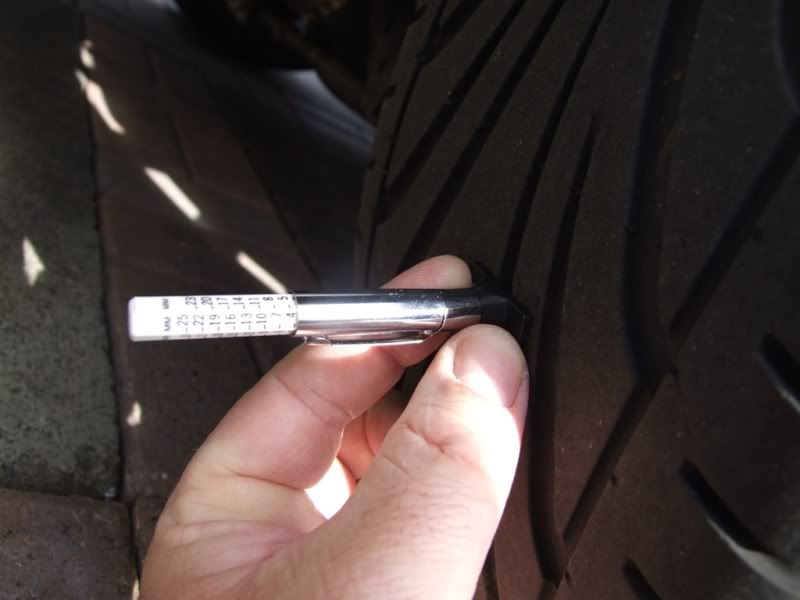
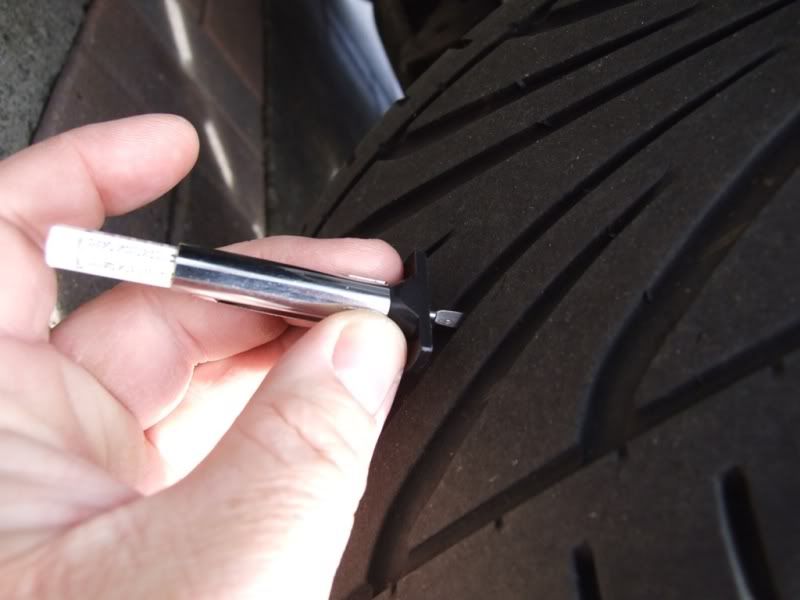
With the legal minimum being 1.6mm.
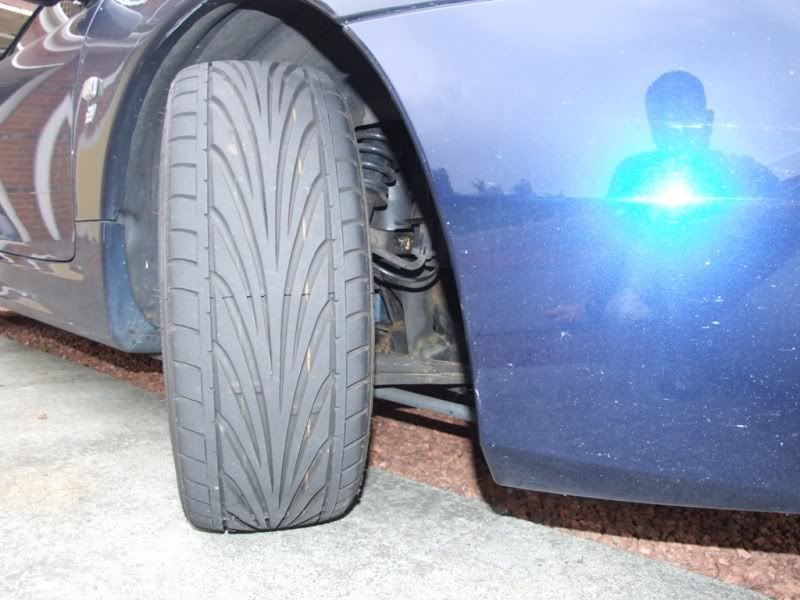
Also check the tyres for damage and cracking of the sidewalls as some members have had experience of tyres failing due to cracked sidewalls.
Lastly, you should carry out a corrosion check. You may have noticed on some of the oil change pics that the rear subframe had a fair bit of surface corrosion. I have now covered this using a spraycan of Waxoil which should sort that out.
That is the servicing completed
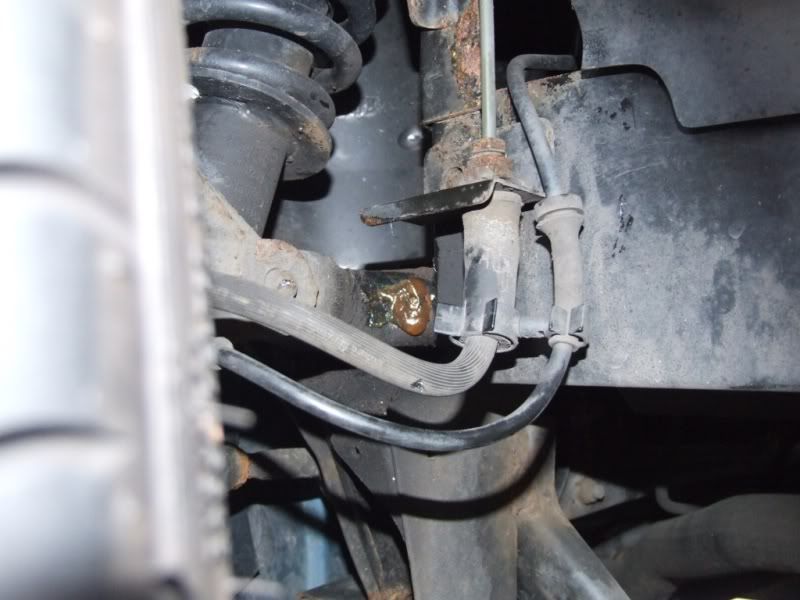
One thing that isn't mentioned on the servicing sheet is the suspension grease points. You will need a grease gun for this and some general purpose LM grease. Push the gun onto the grease nipple and inject a few squirts of grease (I did 5 on each). The TF only has nipples on the front suspension.
I hope this helps people. The usual disclaimers apply etc
There is a servicing sheet available on Tony Thompson's site, here - MG Rover Maintenance Check Sheets.
First on the list is to replace the alarm fob batteries. Most people leave this until they start getting alarm problems, but it is worth doing so that you don’t get caught out in the middle of nowhere.
Look here on how to replace the alarm fob battery - Alarm Fob Battery Replacement Guide.
Next, check the handbrake adjustment. The handbrake should only come up 2 or 3 clicks and should hold the car securely.
If the handbrake has excessive play, feels bouncy when it is off, or the handbrake warning light flashes on when you go over bumps, then you may need to adjust the tension of the handbrake cable. These are also symptoms of a seized rear calliper, so check that the callipers are working correctly before adjusting. Jack the car up and ensure the rear wheels turn freely with the handbrake off.
You can adjust the handbrake tension by removing the arm rest and cubby box.
Look here for a how to on adjusting and/or replacing the handbrake cable - How to replace a handbrake cable guide.
Lamps horns and system warning indicators are self explanatory. Just operate them and check they work. Warning indicators should all illuminate when you first turn the ignition on.
And most should go out after the engine has started. Also check the warning indicators for indicators, hazards, foglights, main beam etc.
Check the screen and washers. One of my washer jets was loose and not spraying properly so I replaced it with a new one (£5), although the favoured replacements now are the Citroen Xsara ones which fit and give a better spray pattern. The jet just unclips from underneath and the new one pushes into place after swapping the gasket from the old one. You can set the jets up by jamming a pin or paperclip into the squirter hole and turning the jet to the required position.
Both the seatbelts, fixings etc should be checked for operation. Slowly unwind the seatbelts, ensuring that it runs smoothly and doesn’t jam. Check for any cuts or damage and give the belt a yank to ensure that the fixings are secure. Now allow the seatbelt to fully retract, again making sure it runs freely. Once retracted quickly pull the seatbelt out and it should lock.
Next I used some spray grease to lubricate the boot/bonnet and door hinges and catches. This is important if you want trouble free operation. Most people do this job when something has stopped operating correctly. This is called corrective maintenance rather than preventive maintenance and can be more problematic and expensive.
Door Catch
Boot Catch
Bonnet Catch
Lower bonnet catch. This is showing the lower catch with the top plate removed. The blue tape is there so that I can put the catch back together in the same place. This is worth doing as you could end up spending a fair bit of time setting the catch back up again. Give a good squirt of grease around inside left, as this is where the cable release from the boot operates the catch. If this seizes you can have a lot of problems getting in to your bonnet.
I also lubricated the bonnet hinges. Unfortunately the grease I am using is white and the hinges are visible with the bonnet closed. I therefore had to wipe some off.
Check the battery for leaks and/or physical damage. Check the terminals and chassis connection and grease with a battery terminal grease or (dare I say it) Vaseline to prevent further corrosion.
Check fluid levels, especially the brake, clutch and windscreen wiper fluid. If low then top up with the correct fluid.
New DoT4 brake/clutch fluid and any suitable windscreen squirter fluid, taking into account the temperature and time of year.
The brake, clutch and windscreen squirter tank can be found under the bonnet. If you have a Stepspeed Sports automatic car, there is no clutch and therefore, no clutch fluid reservoir.
The brake fluid header tank is near the nearside wing close to the battery.
Check that the level is between the min and max marks. If not, then top up with suitable DoT4 fluid.
And similarly with the clutch fluid.
The squirter bottle can be found just behind the spare wheel.
Next, move to the engine bay.
To get full access you need to remove the engine inspection cover.
It is possible to remove the cover without removing the t-bar and wind stop, but it can be a bit fiddly if you have the speaker boxes fitted and you have to use some force to slightly bend the inspection cover. I prefer to remove the windstop, T-bar etc.
Fold the roof back and remove the wind stop
Now fold the roof forward and undo the clips that hold the rear of the hood to the car body (At least unclip the hood to windscreen clips when you do this as it releases a bit of tension).
and fold the rear part of the hood forward. Remember to avoid creases in the window when folding. If you cannot get the rear hood to stay up by itself you can tie it up.
Next remove the wind stop brackets using an allen key
and the 3 cross head screws from the top of the T-bar cover.
The cover then pulls forward (you will have to move the seats forward first). There are 2 plastic push in fasteners at each end of the cover and two at the top of the arm rest. These simply pull out when you pull the cover forward, or break off if my experience is anything to go by. I am now sick of gluing them and I am going to use black plastic screws to hold in place. You may also need to pull the door seal off at each side to release the cover.
Pull the cover forward out of the way and rest on the seats.
Next you need to remove the two 10mm bolts (one at each end) holding the speaker pods to the body, and place out of the way.
The box in the picture is for holding any screws and bits removed. I really recommend this as it saves you hours of searching for bits.
Next remove the parcel shelf cover
and the soundproofing
and remove the inspection panel
Check all of the visible hoses for damage and leaks.
I haven't pressure checked the system as I haven't got the equipment to do it.
I did check the engine coolant was of a correct mixture and it checked out to -23 degrees using a hydrometer.
Check the auxiliary belts for damage and correct tension. On most cars this just means the alternator belt, but if you have aircon it needs a little more checking.
This is more important than it seems. If the alternator belt fails it usually shreds up and can foul the timing belt. This can cause the timing belt to jump a few cogs and can destroy your engine. A £10 alternator belt is better than £1k plus for a new engine.
Access to the alternator belt is through the offside rear wheel arch. Jack up the car, place on axle stands and remove the wheel.
Also remove the cover that protects the alternator and belt.
You can now make out the alternator belt.
Check for damage, ageing, cracking and oil contamination. If there are any signs of these then you should fit a new belt. Also check the belt tension.
One sign of a loose belt is a squealing noise when you rev the engine.
The belt should not move more than 5 – 8mm deflection at this point.
If you need to change the tension/belt or alternator, have a look here - How to change an alternator guide.
If you have a OBD code reader etc, now is the time to dust it off and see if there are any recorded fault codes. Check the codes and follow up any problems that might exist.
Next comes the oil change
Take the car for a nice long drive until the engine is at working temperature. This will help the oil drain easier due to it being thinner.
WARNING. In the next steps the oil will be extremely hot and old oil is carcinogenic. For those of you who don't know, this means that it can cause cancer. So take appropriate precautions to avoid exposure to the engine oil.
Ensure the car is on level ground, place a suitable container under the sump and remove the sump plug. Also remove the filler cap (yellow) on the top of the engine. This will allow the oil to drain faster.
The sump plug is located at the bottom front offside of the engine
Allow all of the oil to drain from the sump.
Now refit the sump plug USING THE OLD WASHER.
Now fill up the engine with oil through the rocker cover filler. Only the best quality oil for me
Seriously though, the next step is optional. Fill the engine with a cheap oil of the correct viscosity and run the engine until it is at working temperature.
Switch off the engine and drain the oil again. This will flush the engine and help remove old oil and sludge. You can buy proper flushing oil with detergents that remove deposits etc, but some people think that the detergents may remove layers and sludge that is holding your engine together. You can be too clean.
Once the oil has drained, pour the remainder of the oil into the filler and watch the drain. Clear oil should start coming out.
Once drained, refit the sump plug WITH THE NEW WASHER.
Now jack the car up and either use an axle stand or place a substantial piece of wood that will take the weight of the car under the rear offside wheel. Lower the car onto the jack or wood.
NEVER work under a car with just the jack supporting it, it is dangerous and could collapse with you under it.
This will give you easier access to the oil filter, which is just above the sump plug.
Place a drip tray under the oil filter, remembering that the filter contains a substantial amount of hot, old engine oil.
Using a strap wrench, or filter removal tool, remove the oil filter.
Prepare the new oil filter by smearing a small amount of new engine oil around the rubber seal. This will aid sealing.
Fit the new filter hand tight and then an extra 3/4 of a turn.
Remove any axle stands, jacks etc so that the car is level and fill the engine with new oil. This is the real stuff
Once the engine is filled to the correct level start the engine and let it run for a few minutes. This allows the empty oil filter and engine to fill. Switch off the engine, leave for 5 mins and top up the oil, checking the level on the dipstick
At this point you should check your wheel bearings, drive shafts, gaiters, remove wheels and check tyre tread depths etc, check brake pad wear. When checking pads be sure to check ALL pads as the inner pads tend to wear faster than the outer pads on some brakes.
With the car on axle stands and the wheel off the ground, grab the wheel in the 9 oclock and 3 oclock position and rock the wheel, do the same in the twelve and six positions. You should have no movement.
This shows play in the rear offside wheel.
This could be caused by worn links, bushes or wheel bearings and was causing the car to wander at speed.
In this case it was a worn wheel bearing that needed replacing. If you need to change the wheel bearing then have a look here - Rear hub replacement guide.
Check under the car and around the engine bay for evidence of fuel, oil or any other fluid leaks. Also check your suspension and steering components for signs of damage and leaks.
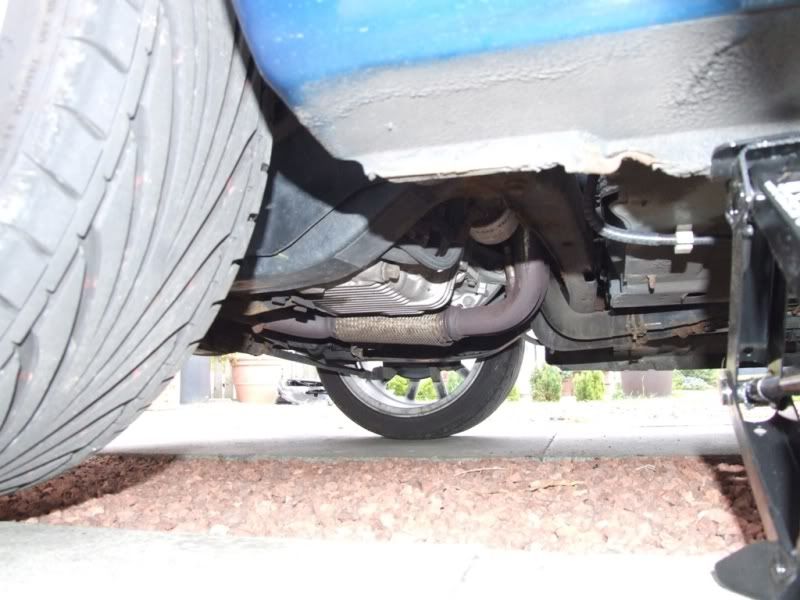
Examine you exhaust and heat shield for deterioration.
Now refit the engine inspection hatch and associated components.
Check your tyre pressures.
And tread depth
With the legal minimum being 1.6mm.
Also check the tyres for damage and cracking of the sidewalls as some members have had experience of tyres failing due to cracked sidewalls.
Lastly, you should carry out a corrosion check. You may have noticed on some of the oil change pics that the rear subframe had a fair bit of surface corrosion. I have now covered this using a spraycan of Waxoil which should sort that out.
That is the servicing completed
One thing that isn't mentioned on the servicing sheet is the suspension grease points. You will need a grease gun for this and some general purpose LM grease. Push the gun onto the grease nipple and inject a few squirts of grease (I did 5 on each). The TF only has nipples on the front suspension.
I hope this helps people. The usual disclaimers apply etc
Last Edit:14 years 5 months ago
by cjj
Last edit: 14 years 5 months ago by Leigh Ping.
The following user(s) said Thank You: psymon, David Aiketgate, PQD44, Leigh Ping, KentJohn, Yellow Peril, Blow-in, bandit, cairnsys, c.steffan and 4 other people also said thanks.
Please Log in or Create an account to join the conversation.
Time to create page: 0.376 seconds