There may be several reasons why you would want to remove the front subframe on your car.
You may need to replace or repair the subframe.
You may want to clean and paint it
Or you might want to get access to the bodywork underneath.
Firstly, you need to put the car somewhere where you can safely work and somewhere that you have room to carry out the task. Once you have started this task it will be difficult to move your car until finished, so choose location wisely.
You should start by removing the front bumper and wheel arch liners.
A how-to on this can be found here. http://www.the-t-bar.com/en/forum/22-cjjs-guides/186-front-bumper-how-to-remove.
You shouldn’t need to remove the armature that sits behind the bumper, but I removed mine as I was doing other work too.
Next you need to disconnect the car battery. Before you do this, make sure the car is unlocked and you have all the necessary codes for your car radio etc.
Make sure all loads are switched off, such as ignition, lights etc.
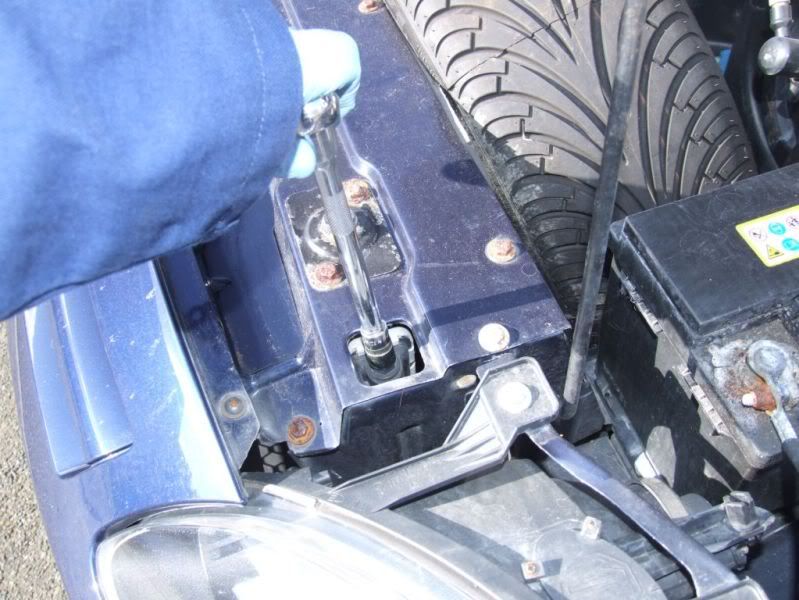
Now loosen and remove the negative terminal from the battery
ALWAYS REMOVE THE NEGATIVE TERMINAL FIRST.
If you try removing the positive terminal first and the spanner were to touch any metalwork, you would create a large discharge of the battery resulting in damage/heat and possible injury to yourself.
Once the negative terminal has been removed, loosen and remove the positive terminal connection. This connection is one end of a thick cable that travels down, through the subframe and alongside the underfloor coolant pipes back to the starter motor.
As well as the battery terminal, you need to disconnect the cable that goes to the underbonnet fuse box.
Open the fusebox and locate where the cable is connected to the bus bar.
The cable is connected by a crimp which is screwed onto the bus bar by a posi headed screw. The last one, top right, in this pic.
The cable comes into the box from underneath. Unscrew the connection
And pull the cable free
Now you need to unclip the cable tie that holds the top of the main cable. Using a small screwdriver, you should be able to prise it out of the hole in the bodywork.
Once released, pull the cable down from underneath until it is free from the subframe and bodywork.
Try to push the cable back under the car so that it doesn’t get trapped when jacking the car up.
As the coolant pipes from the radiator to the underfloor pipes are in the way, you will need to drain the coolant
To drain the system, there isn't really a proper drain to use.
First take the coolant expansion tank cap off.
This will help the coolant drain faster.
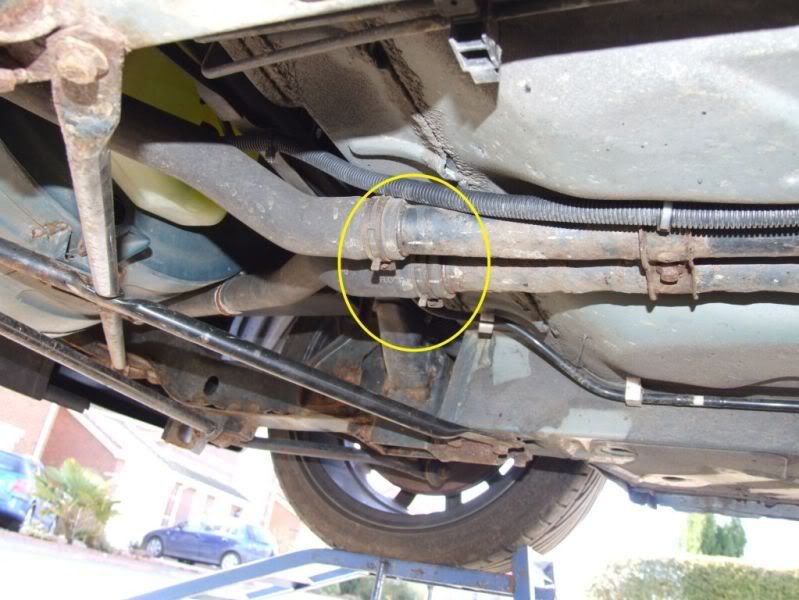
The best place to drain the coolant off is at the front end of the under floor coolant pipes. Remove the clips by pressing the ends together and sliding them along the pipe away from the connection. The rubber hose will be stuck on the metal pipe after years of sitting in place. I loosened them by gripping them with mole grips, or similar, and turning until the seal is broken.
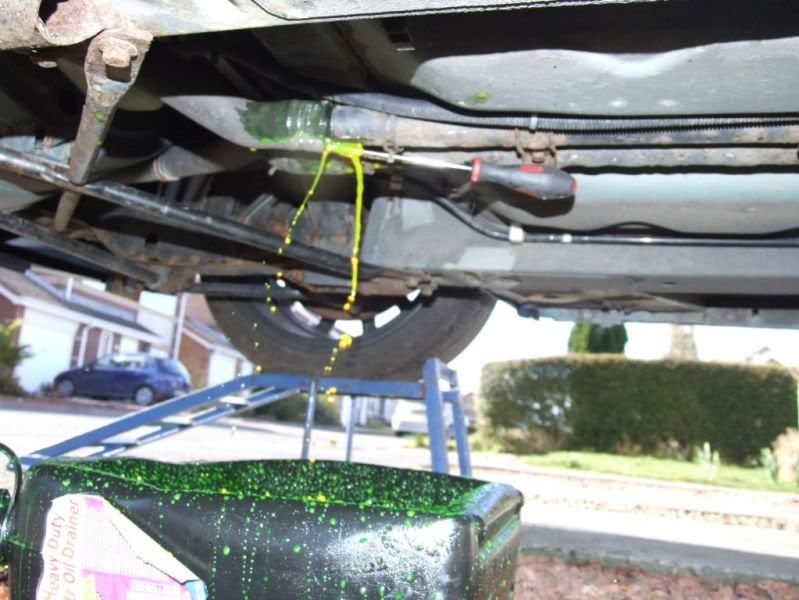
Rather than pulling the hose straight off and getting soaked I slid a screwdriver down the inside of the hose to create a small bleed.
Now just leave that to drain. Check once in a while to make sure that the container doesn't overflow.
Be careful as it is easy to get the coolant in your eyes. Obviously I didn't, being the professional that I is. I said I didn't, right. And it stings, er, or so I heard somewhere.
You can aid the draining by opening the bleed points.
There is one at the top nearside of the radiator. Be very careful when opening this one as it is only plastic and often shears off. If it does shear off then one of the ways to remove the remaining threaded portion is to heat up a screwdriver end to F hot and melt it into the plastic bolt, let it cool and screw it out.
While you are under the bonnet, remove the plastic cover on the bulkhead and you will see another bleed point for the heater matrix. Make sure that you have the heater set to hot to allow the coolant to drain.
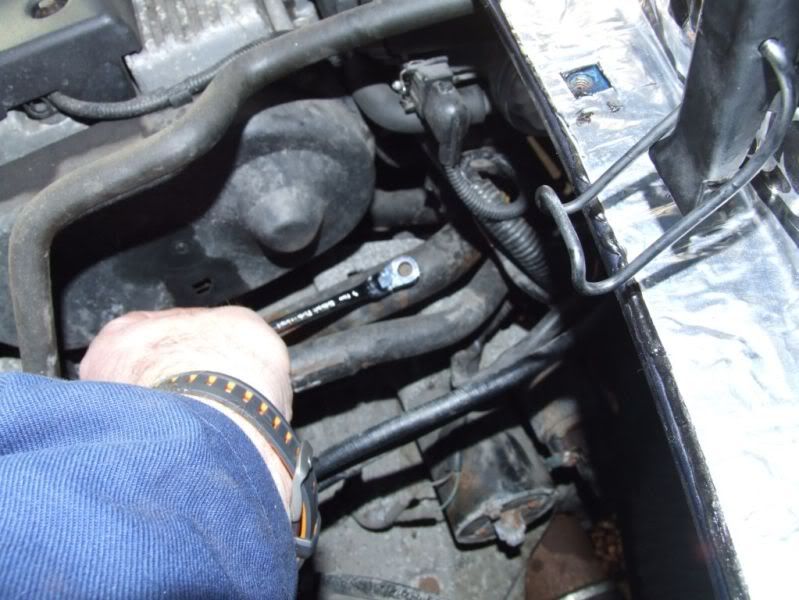
And one in the engine compartment, above the starter motor.
Once all the coolant is drained you can remove the rubber hoses from the underfloor pipes.
You remove the clips by using a pair of mole grips or similar to squeeze the 2 tabs together which loosens the clamp. Now slide it free of the hoses.
The rubber hoses may be difficult to remove from the pipes. Try twisting, and if that doesn’t work, work a small screwdriver between the hose and the pipe and work it round to break the seal. Be careful not to damage the rubber hose.
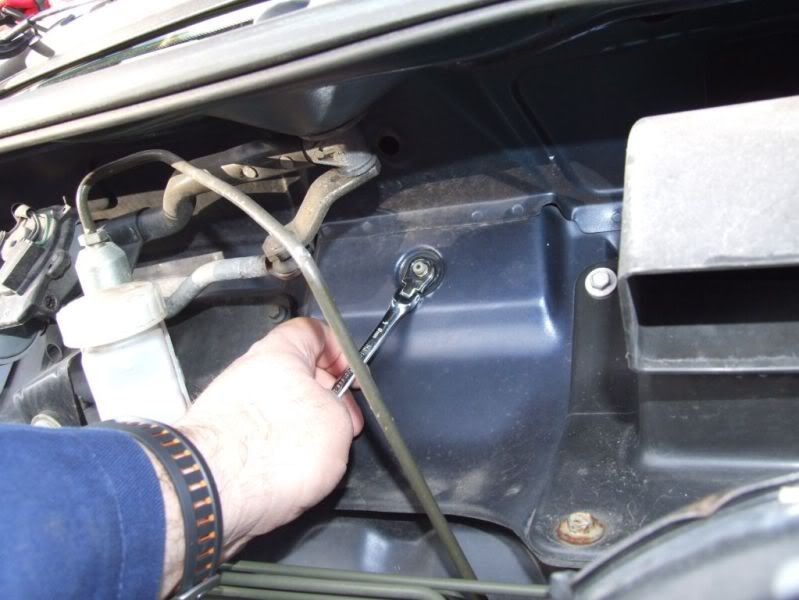
Next, from inside the car, centre the steering, go to the bottom of the steering column and locate the single 10mm bolt.
Undo the bolt and remove it. This uncouples the steering column from the steering rack.
The steering rack is now free from the column.
This now leaves the brakes.
On the top of each inner wing, you will find the ABS sensor connection.
The offside connector is clipped in just beside the horns.
Unclip the connector and pull apart.
The lower part of the cable is also clipped to the bodywork, just under the plastic cover. Release this clip.
And pull the cable down and clear.
The nearside connection is just under the underbonnet fuse box.
Disconnect and unclip this in the same way.
Finally, we need to disconnect the brake pipes to the top of each flexi brake line.
You need to unscrew and disconnect the union above the bracket.
Be ready to catch the brake fluid that will drain out of the pipes. I put a plastic bag around the ends.
One last thing to unclip is the tube that comes from the bottom of the washer bottle. This is clipped to the subframe by 2 clips near the offside turret. I missed this and it was only notice when removing the subframe. Tube was a bit stretched, but not damaged.
Now that all of the ancillaries and cables are disconnected, we need to unbolt the subframe from the body.
There are 5 points of connection in total, 2 at the front, 2 at the rear and one in the centre, holding the cross bars centre to the bottom of the spare wheel well.
The 2 at the front have 2 bolts holding each to the body and the 2 at the rear have 4 bolts each and the centre is one bolt.
You might want to apply some release oil and leave overnight.
Remove all of the bolts
The front subframe is now independent of the body, the only thing keeping it all together is the weight of the car acting down on the subframe.
Chock the rear wheels to ensure that the car doesn’t roll when the jacking is carried out.
Using wood, or similar, to spread the load; use a jack to start raising the body. Position the wood rear of the subframe mounts but make sure that the weight will be evenly spread and nothing will be trapped or bent.
Raise the body slowly while checking around the front subframe to ensure that there is nothing still attached or likely to become trapped. Check the steering rack is free from the steering column.
The subframe will tilt forward as the weight of the body is removed.
Jack the car up in stages and use axle stands to take the weight, adjusting where necessary. Never work on just the jack.
Once the body is high enough to clear the subframe turrets, the subframe can be wheeled forward to clear the body.
The subframe is now clear and ready to work on.
If you have taken your subframe off then it is now worth doing a bit of a corrosion check and clean up before it goes back on.
I also cleaned out the threads and fixed any snapped off bolts.
If you are leaving the subframe off for more than a short job, you might want to lower the front of the car back down onto axle stands or wood to make it less likely to fall.
I will be doing a how-to on refitting the subframe, but it is basically the reverse of removing.
This is only a guide of how I removed the subframe. I cannot be held responsible for any omissions, or injuries caused while following this guide.


")