
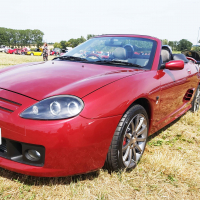
Daytime running lights (COB LED Halo's) for the TF
- SundanceUK
-
 Offline
Topic Author
Offline
Topic Author
- Senior MGer
-

- MG TF 160 owner in Staffordshire
- Posts: 1098
- Thanks: 594
Rendering Error in layout Message/Item: Render ebay item Applications from this IP address are limited in the number of calls they can make.. Please enable debug mode for more information.
Please Log in or Create an account to join the conversation.
- sworkscooper
-
 Offline
- Senior MGer
-
- Posts: 1476
- Thanks: 448
Replied by sworkscooper on topic Daytime running lights (COB LED Halo's) for the TF
Posted 6 years 3 months ago #184927
Sundance , 5 stars for this excellent how to .
John
John
by sworkscooper
The following user(s) said Thank You: SundanceUK
Please Log in or Create an account to join the conversation.
Replied by pgew on topic Daytime running lights (COB LED Halo's) for the TF
Posted 6 years 3 months ago #184969
Hi Sundance - I noticed the red bolts under the bonnet - what are they - the originals rust and the replacements sold on ebay sometimes are the wrong size and those red ones are smart! Have you thought of fitting the progressive indicator LEDs front and rear - like Audi's have - also on ebay from China at pence...
by pgew
Please Log in or Create an account to join the conversation.
- SundanceUK
-
Offline
Topic Author
- Senior MGer
-
- MG TF 160 owner in Staffordshire
- Posts: 1098
- Thanks: 594
Replied by SundanceUK on topic Daytime running lights (COB LED Halo's) for the TF
Posted 6 years 3 months ago #184980The red bolts are actually red anodised cup washers. Again sourced from e-bay, I used them in conjunction with stainless countersunk bolts and self-tappers to replace the rusting standard screws that were originally fitted. Five, six and eight millimetre ones are needed for the under bonnet hardware. I will check out the progressive indicator LED's, but I do have 3 lens rear lights fitted, so not sure if they will be suitable.pgew wrote: Hi Sundance - I noticed the red bolts under the bonnet - what are they - the originals rust and the replacements sold on ebay sometimes are the wrong size and those red ones are smart! Have you thought of fitting the progressive indicator LEDs front and rear - like Audi's have - also on ebay from China at pence...
Sundance
by SundanceUK
Please Log in or Create an account to join the conversation.
Replied by pgew on topic Daytime running lights (COB LED Halo's) for the TF
Posted 6 years 3 months ago #184999
Thank you for that. Adam Elphick and I bought the gizmos for the fronts but haven't got round to fitting them yet (including cooking the lenses), and not sure re MOT, unless they are supplementary to the OEs I guess.
by pgew
Please Log in or Create an account to join the conversation.
Time to create page: 1.657 seconds