The all new Illuminated side vent 'how to guide'
The all new Illuminated side vent 'how to guide' was created by Sithmaull
Posted 11 years 9 months ago #151168This guide will show you how to add illuminated side intake vents to your mgf/tf which look great at night.
There are three different ways to do this depending on the outcome you desire.
Method 1: wire to sidelights, this will allow you to have them illuminated constantly when your lights are on, police may not like this option so i have to say this is for off road use only.
Method 2: Wire to interior mirror, this will allow the illumination when the car is unlocked and will extinguish when the interior mirror lights do.
Method 3: (method shown and the easiest) Wire to footwell lights, this will illuminate when the footwell lights come on and will fade out when the footwell lights go out.
Working on Method 3, heres the step by step guide to fitting.
Tools you will need...
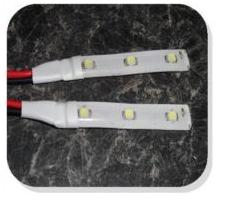
2 x 5cm 3 LED waterproof strip lights. (£2.75 Free P+P on ebay) Choice of colours avaliable so pick your favourite.
1 x good length of speaker or 12v wire, 5m should be ample.
male and female bullet or spade connectors (£2 for 50 on ebay)
wire stripping & crimping tool (can use a knife and pliers though).
philips screwdriver
small flatblade screwdriver
drill or other method of creating a small hole, screwdriver will work as your only cutting through thin plastic.
Time to complete, depends on how fast you work but i took about 30 mins to do both sides.
Heres what the led strip lights look like, i choose red and they come with about 12cm of wire on which is plenty to work with. They should come with 3m double sided tape on the rear to attach to vent. Total size of strip ex wire is 4cm x 1cm, they are also very flexible so will bend around curves.

Step 1
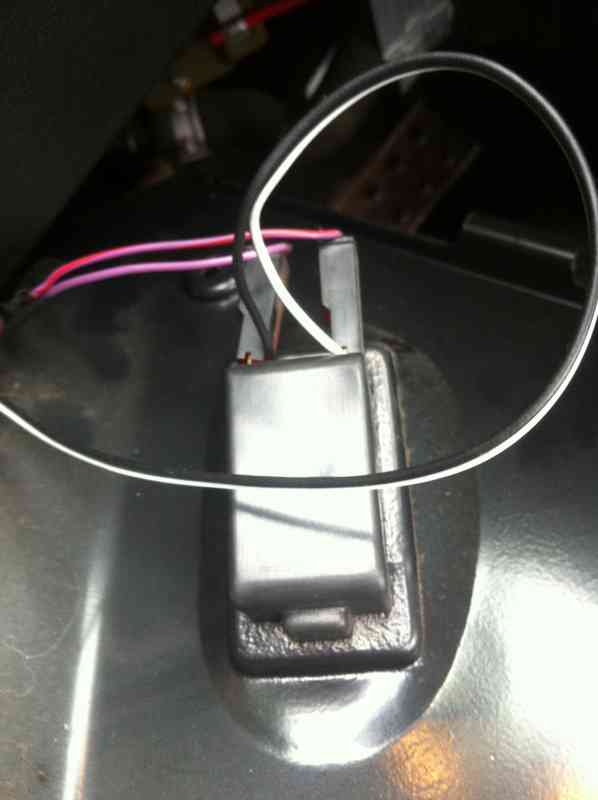
Pull down hood and remove footwell light cover, strip one end of the wire you bought and twist. unplug the footwell light and slide one wire into each of the footwell light connectors and put back together. Shoud look like this...
Step 2
Reassemble footwell light and begin to run the wire under the carpet either under the centre console or around the outside of the carpet along the door, you just need to get the wire behind the seat so its upto you which method you choose. Pull seat forward and wind the seat back forward to give you more room to work.
Step 3
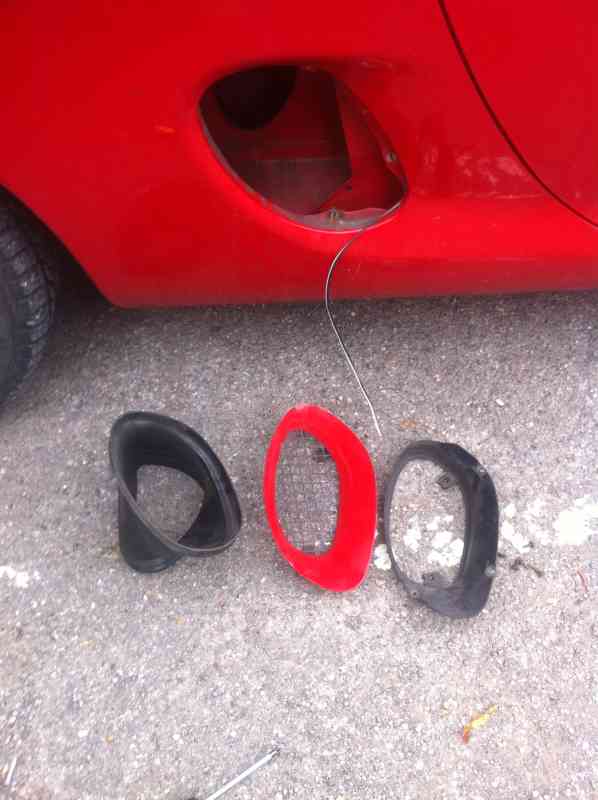
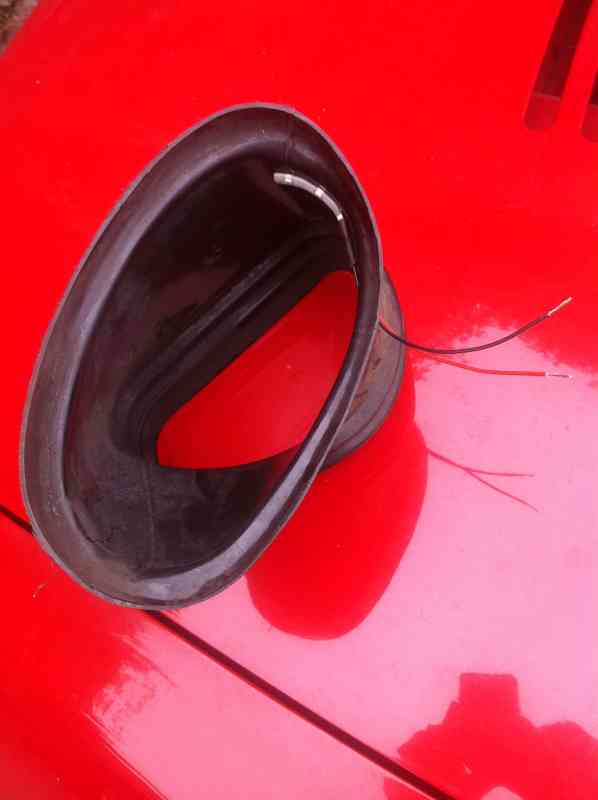
Remove side vents, its 2 philips screws to remove the vent cover then a further 3 inside to remove the inner tube, theres anoter further tube inside this that you need to remove but it just pretty much falls out. Remeber how this all goes back together.
Step 4
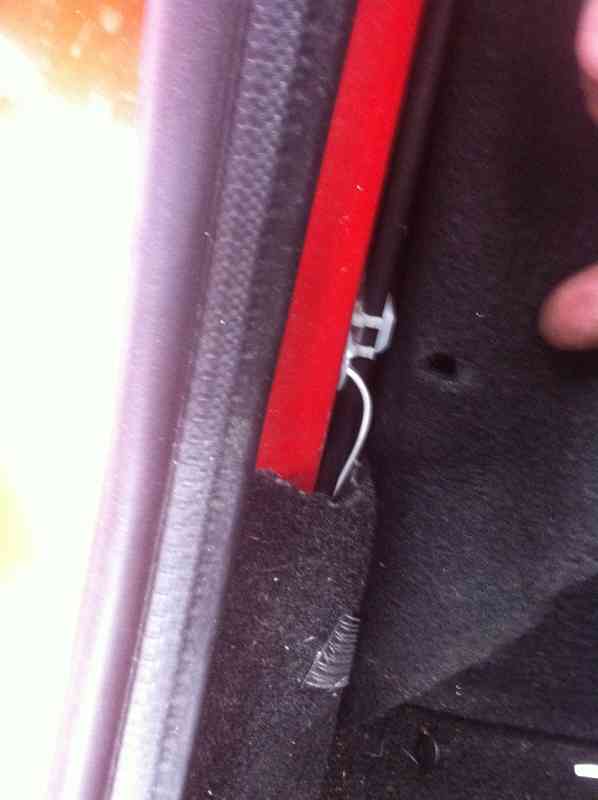
Pull away the carpet from the frame behind the seat, there will be plastic lugs holding it in place, you just need to access the one about half way up. Using your flatblade screwdriver push through the inside of the white plastic clip and wiggle around a bit allowing you to get the wire through. Push all of your excess wire through, if you put your hand inside the vent you should be able to grab the wire and pull it out. Reassemble carpet and replace seat to original position.
Step 5
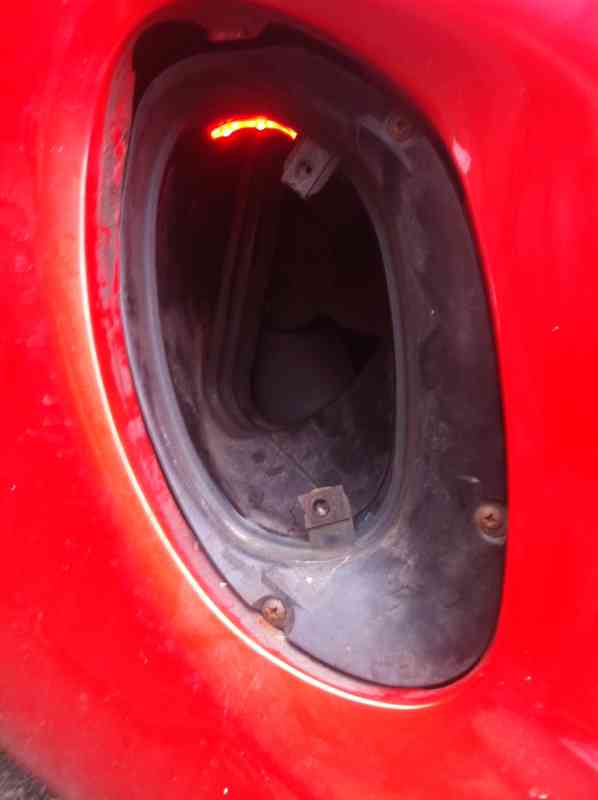
Create a small hole on the first piece of trim inside the vent at the top, clean the plastic vent and attach the led light facing down, push wire through the hole and attach bullet connectors, this is where the wire criming tool comes in handy but you can use pliers to just crush the end of the connector, a little tug should ensure its a good connection. Do the same with the exposed wire now coming from the vent itself.

Step 6
Attach the connectors toghether and open the door to allow the footwell lights to come on, this should also make the leds illuminate, if they dont then simply swap the wires over at the connectors and this should cure the problem.
Step 7
Put vent back together and tuck excess wire into the vent, you can cut the excess off before attaching the connectors but i left it on just incase. Now all you have to do is wait for night time and admire your handy work.
Please Log in or Create an account to join the conversation.
Replied by Sithmaull on topic The all new Illuminated side vent 'how to guide'
Posted 11 years 9 months ago #151169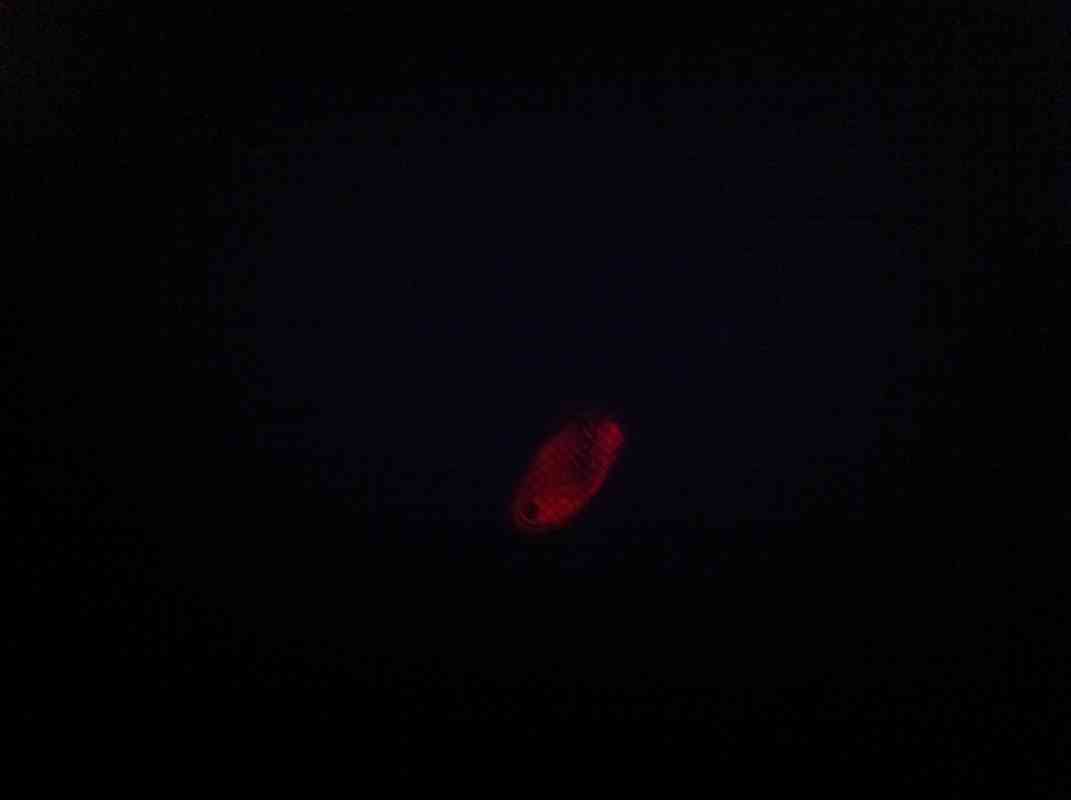
Please Log in or Create an account to join the conversation.
Replied by bensewell on topic The all new Illuminated side vent 'how to guide'
Posted 11 years 9 months ago #151174Please Log in or Create an account to join the conversation.
- David Aiketgate
-
 Offline
- David
-

Super Users
- mgf mk2 freestyle mpi 16" wheels, in Anthracite.
- Posts: 20627
- Thanks: 4583
Rendering Error in layout Message/Item: client authentication failed. Please enable debug mode for more information.
Please Log in or Create an account to join the conversation.
- Leigh Ping
-
 Offline
- Moderator
-

Registered
- Posts: 6840
- Thanks: 1634
Replied by Leigh Ping on topic The all new Illuminated side vent 'how to guide'
Posted 11 years 9 months ago #151428
Please Log in or Create an account to join the conversation.
Replied by Sithmaull on topic The all new Illuminated side vent 'how to guide'
Posted 11 years 9 months ago #151435Please Log in or Create an account to join the conversation.
- Leigh Ping
-
Offline
- Moderator
-
Registered
- Posts: 6840
- Thanks: 1634
Replied by Leigh Ping on topic The all new Illuminated side vent 'how to guide'
Posted 11 years 9 months ago #151437Sithmaull wrote: So is this worthy of the highly valued "how to" section?
Look under 'Lighting'.
Well done, you've made it. :woohoo:
Please Log in or Create an account to join the conversation.
Replied by bensewell on topic The all new Illuminated side vent 'how to guide'
Posted 11 years 9 months ago #151481John and Sue will be very happy now they can get their xmas tree lights put around the air intakes.
And maybe a nodding rudolph on the parcel shelf.
Please Log in or Create an account to join the conversation.
Replied by xr3tf on topic The all new Illuminated side vent 'how to guide'
Posted 11 years 9 months ago #151489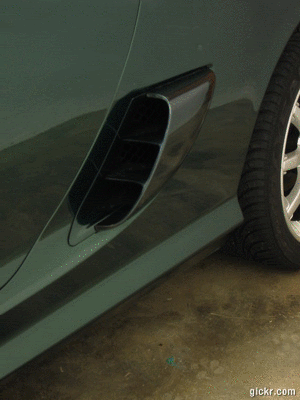
Turbo or Nothing
Please Log in or Create an account to join the conversation.
- adamelphick
-
 Offline
- Moderator
-
Registered
- Posts: 3168
- Thanks: 572
Replied by adamelphick on topic The all new Illuminated side vent 'how to guide'
Posted 11 years 9 months ago #151490
Please Log in or Create an account to join the conversation.
Replied by bensewell on topic The all new Illuminated side vent 'how to guide'
Posted 11 years 9 months ago #151496Please Log in or Create an account to join the conversation.
- jaydoginvasion
-
 Offline
- Apprentice MGer
-

Registered
- Posts: 13
- Thanks: 4
Replied by jaydoginvasion on topic Re:The all new Illuminated side vent 'how to guide'
Posted 11 years 9 months ago #151568Please Log in or Create an account to join the conversation.