Sign In   Register

Topic

75th Anniversary 9 years 3 weeks ago #157620

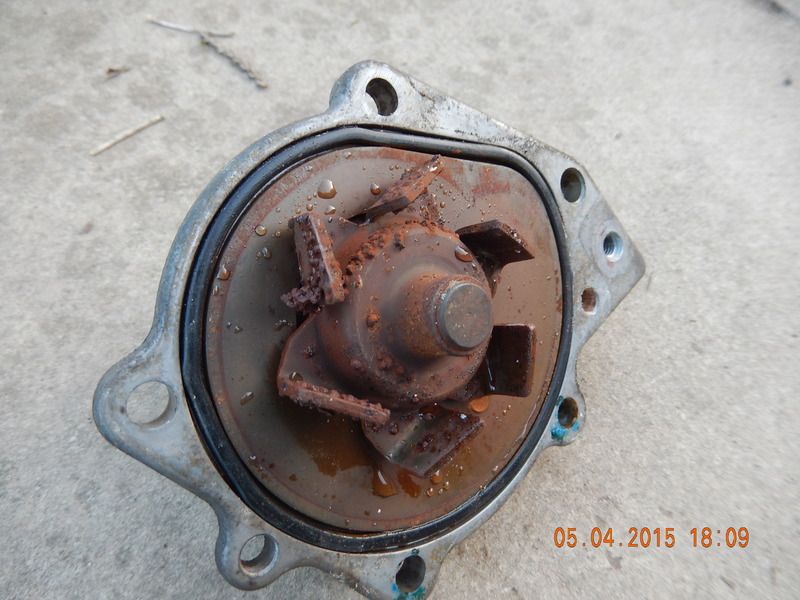
The water pumps looks like it's done hardly any work just covered in that rusty crud:-


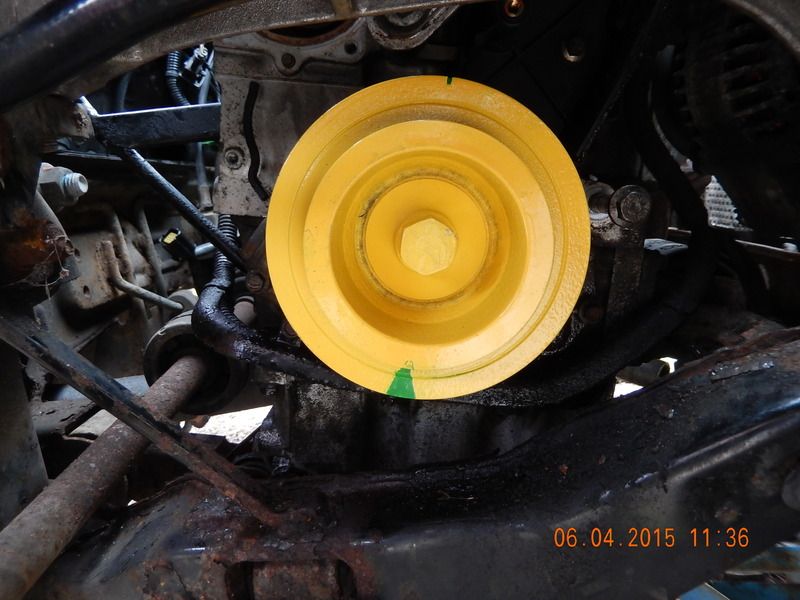
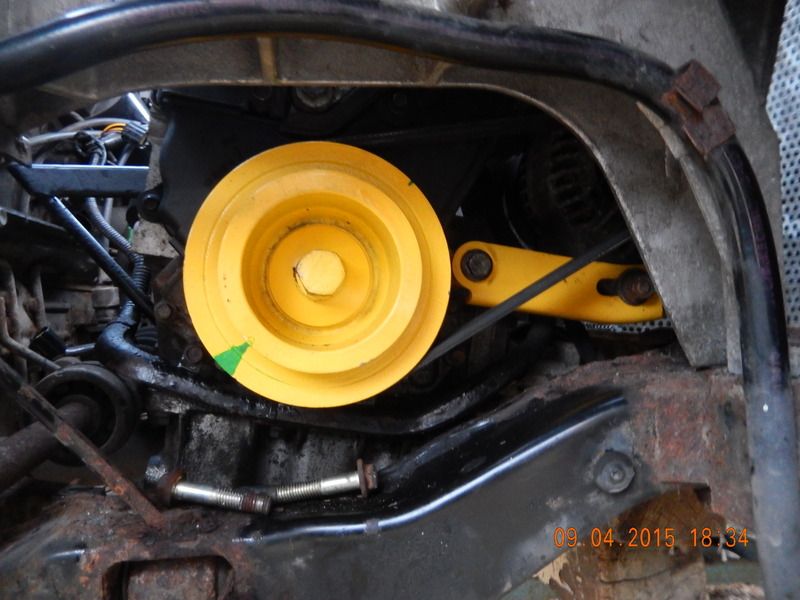
So am assuming it was replaced along with the H/G and done little mileage since. As it's out it seems daft not to put a new one in so am ordering a complete kit ... Cam Belt, tensioner and water pump. Meanwhie have cleaned and painted the crak shaft pully and highlighted the timing notch:-


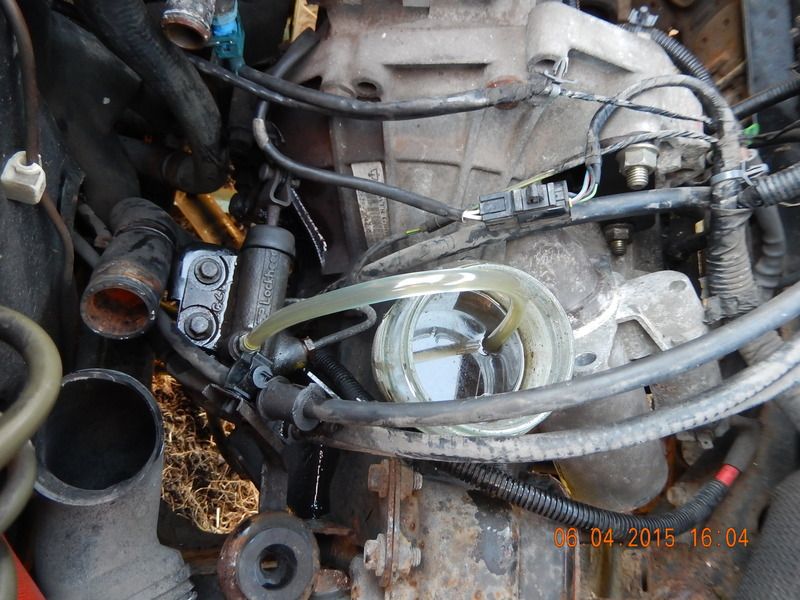
With a larger wedge mark pointing towards to notch. Much easier to pick out now I think you will agree. Oh yes the bolt and cup washed got painted as well. Got the clutch slave from the Donor VVC fitted then bled through. Gave the clutch release arm a good dose of spray grease and the clutch appears to be workign and it's nice and light. The clutch arm was seized but that was freed up last weeks ad has had several doses of Plusgas and not spray grease to help protect it. Used the new Eazibleed kit ........................... first time out of the box for this one which I bought a couple of years back now. My original Eazibleed was kanckered but it was over 30 years old. The Eazibleed made short work of flushing the old mucky fluid through along with the air. Am going to modify a brake resevoir cap so the Eazibleed can be used to do the same on the brakes.

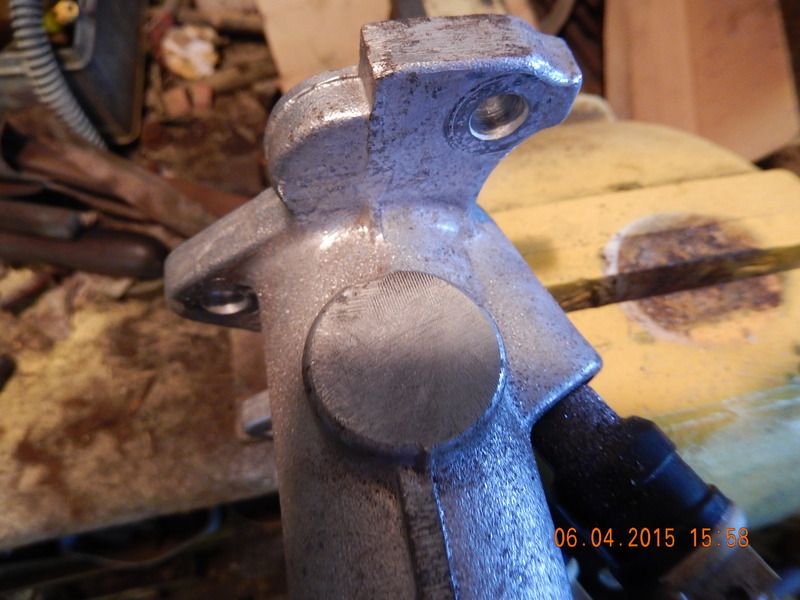
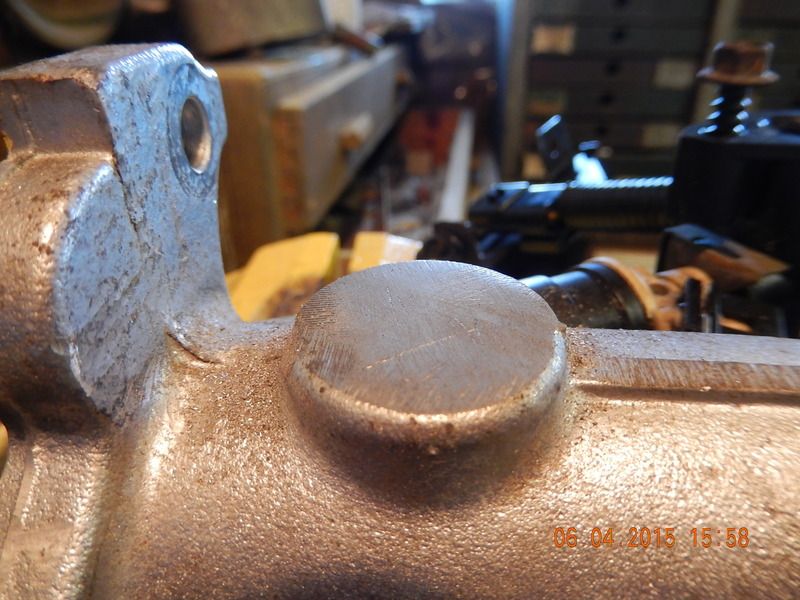
Took the alloy lower inlet manifold to the bench and clamped it in the vice. The filed the boss on the side flat and drilled a pilot hole through.


That had a large casting line through it before.

When the new 10x1.25mm tap arrives will dril it tapping size and tap the hole for the Inlet Temp sensor. The sensor will be sealed by a fibre washer meant fo an SU carb and that will be the TF 135 manifold ready for use on the 118 bhp Mpi B) .

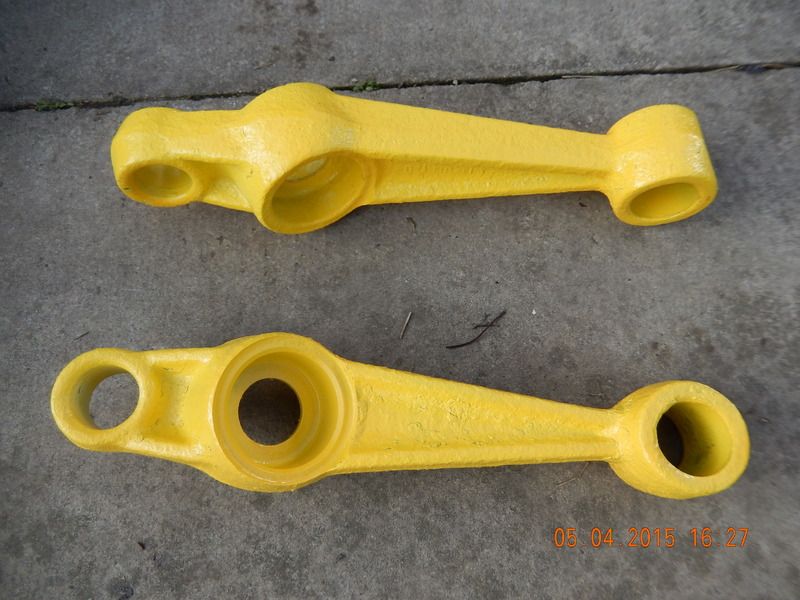
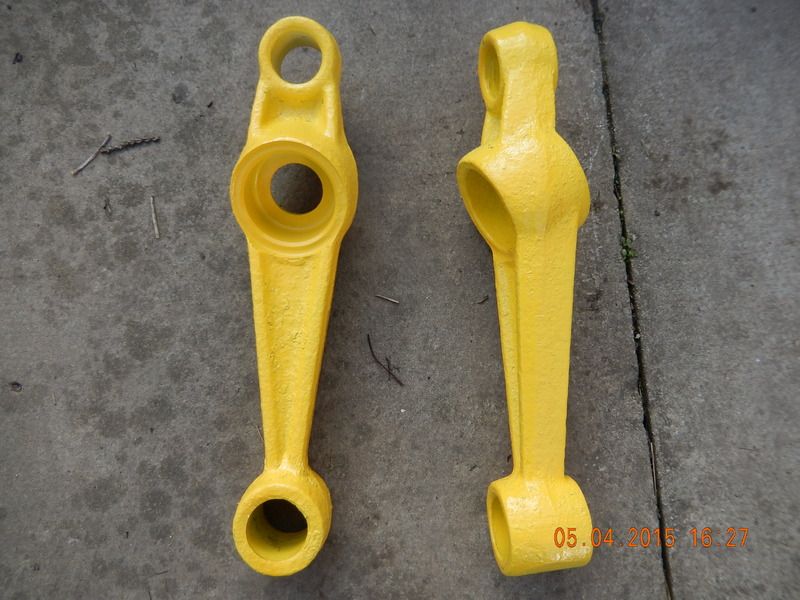
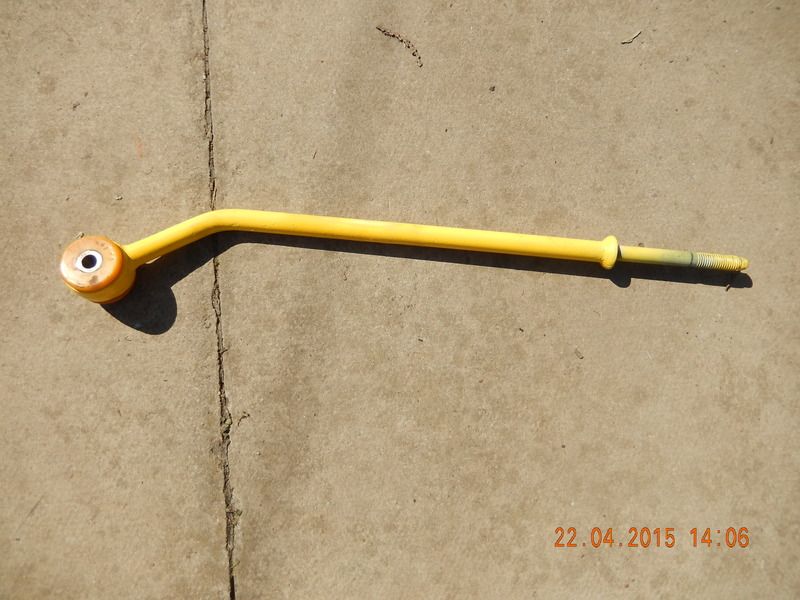
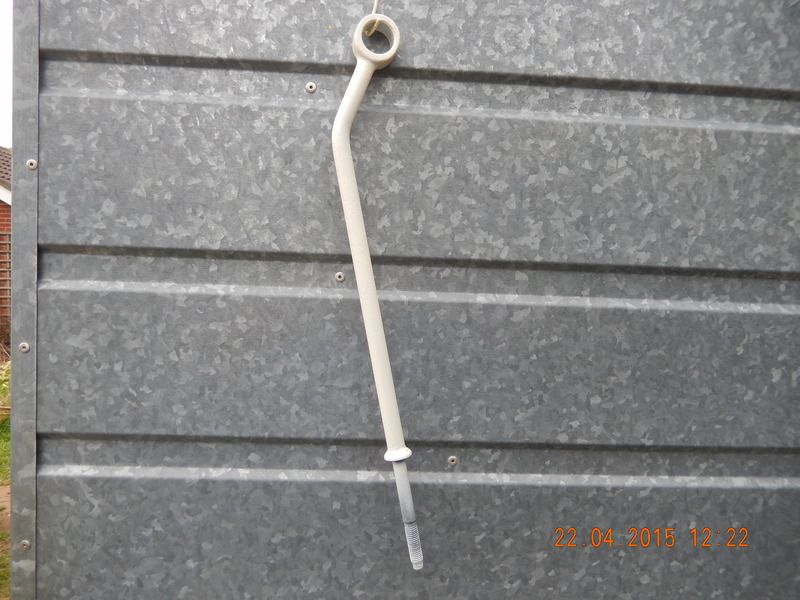
On the rear suspension which is needing new bushes it seems I took the lower radius arms off the Dono VVC rear sub frame and derusted them. primed then painted ready for the new bushes:-


Have not ordered any bushes as yet as we don't know which others are needed but will be ordering new compliance washers and nuts thats for sure. Oh yes connected up the steering column today and that's when another little hiccup reared it's ugly head ................................... as I turned the wheel from lock to lock heard this snapping sound :oops: Oh dammit what was that? First thought was the air bag coupler so removed the air bag and steering wheel to find someone had been here before playing around. The sound was the pegs for the indicator cancelling thingy which had not been aligned correctly when the steering wheel was put back on before. Managed to straighten them out and got it put back in the correct position and the indicators cancel as they should. Will have to wait until we get power back in her before we can check everything else.

Now I wonder why they had the wheel off? We keep finding little things like this and more often than not when we do it's knackered due to what I can only see and incompetance. Anyone want to bet there is a SRS light up???? Better check those connections under the seats methinks ;) .

So next it's finish stripping the radius arms out, track control arms and tie bars ......................................... assumign I can get teh eye bolts at the front of the sub frame undone............................... Ho Hum!!!!! :bang:
The following user(s) said Thank You: cairnsys

Please Log in to join the conversation.

75th Anniversary 9 years 3 weeks ago #157626

Nice progress.

Home to black Alfa Romeo 159 3.2 V6 Q4 ,green MGF VVC and red MG Maestro T16.

MG - the friendly marque.
The following user(s) said Thank You: Plezier

Please Log in to join the conversation.

75th Anniversary 9 years 2 weeks ago #157748

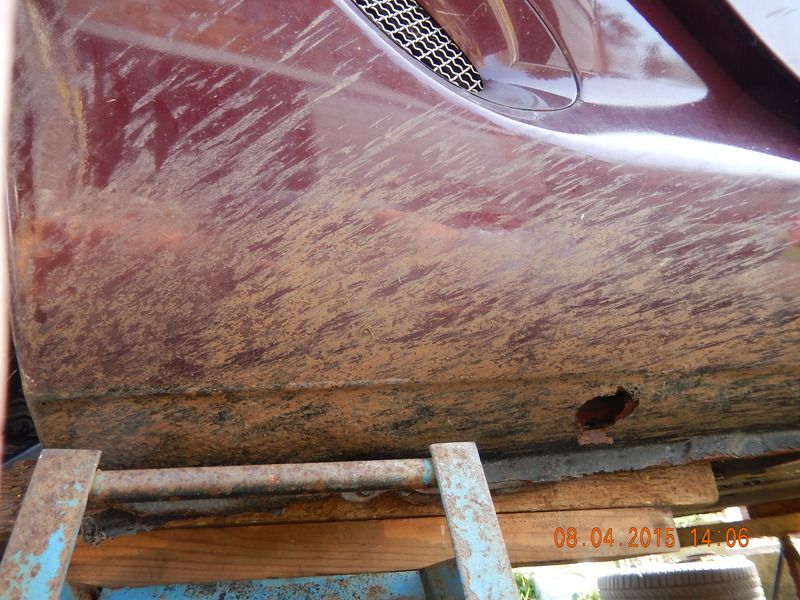
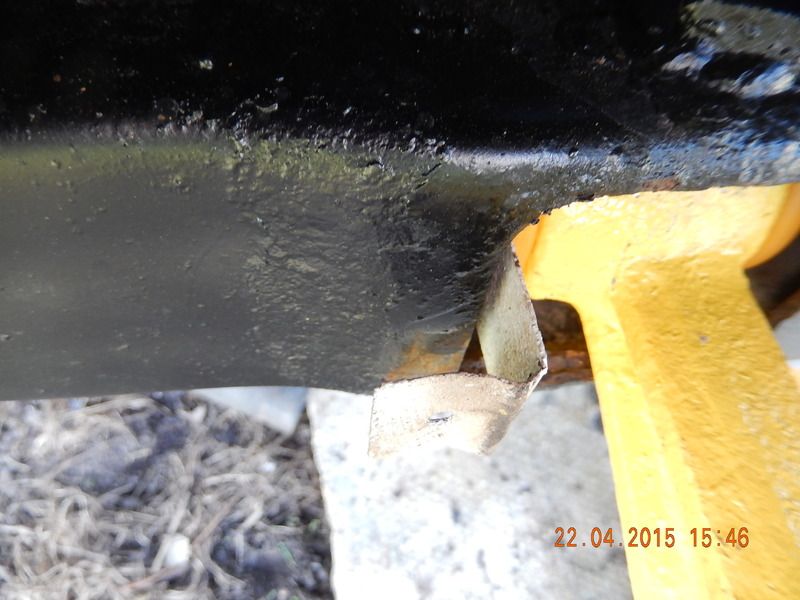
Thank you .................................. I also thought we were doing quite well then reality struck :bang: . While laying on the floor undoing the suspension bolts at the bottom of the O/S/R hub I glanced along the sill ................................................................. :omg: there was a large blister which when pressed was soft so I opened it up with a wood chisel:-


It looks like the passenger side sill is not too good either so the restoration bill just shot up and despending just how far the rot has spread it might be another £300-£400 as it might mean respraying rear quarters :slapme: :bang: .

Oh well this is what we have managed to achieve in the last week....................................................... Picked up a Gates Cam Belt kit and an FIA water pump from the local factors and got them fitted. The cam belt prooved to be a right nightmare but we eventually got it timed up correctly and she now has her cam belt covers back on and the alternator belt fitted and tensioned:-


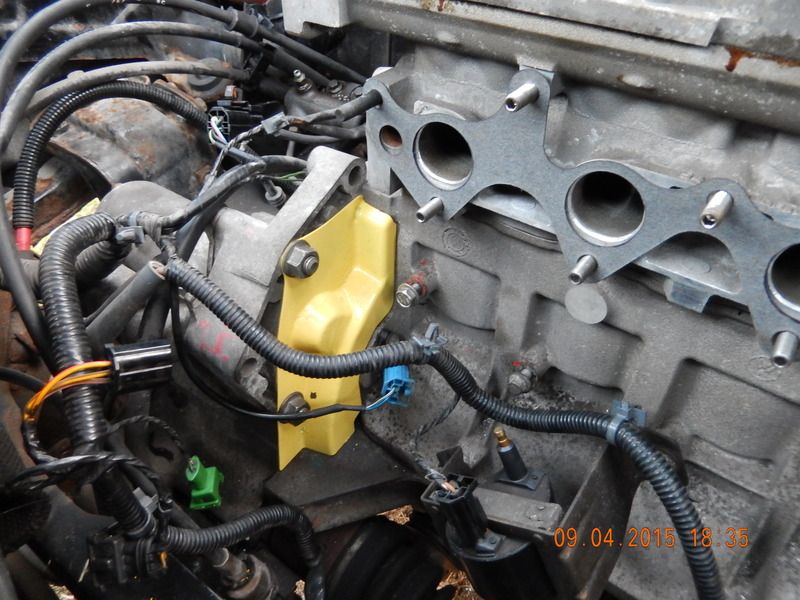
Also dropped the cam cover on and dropped some plugs in the holes to stop any debris. Got the starter motor refitted and the flywheel blanking plate fitted again:-


plus the coil fitted to the block. It's a bit theraputic to put finished bits back on rather than stripping knackered and rusty bits off all the time.

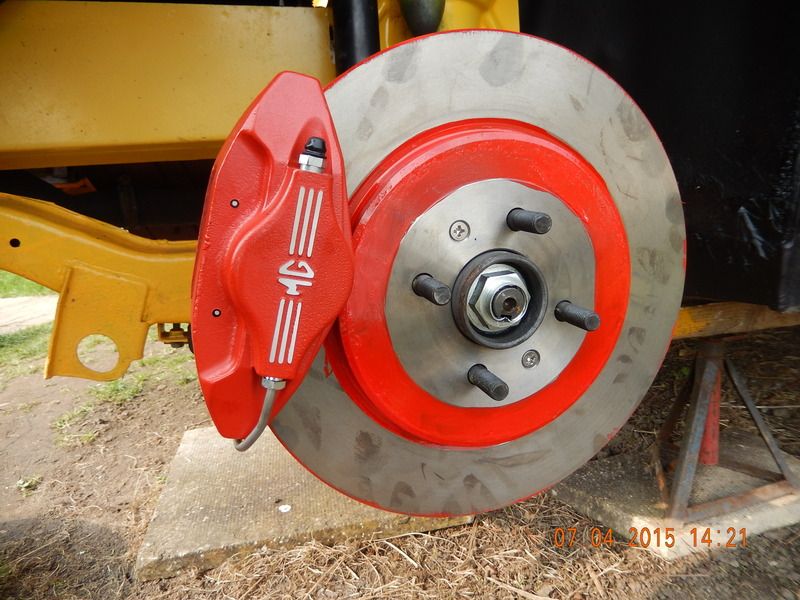
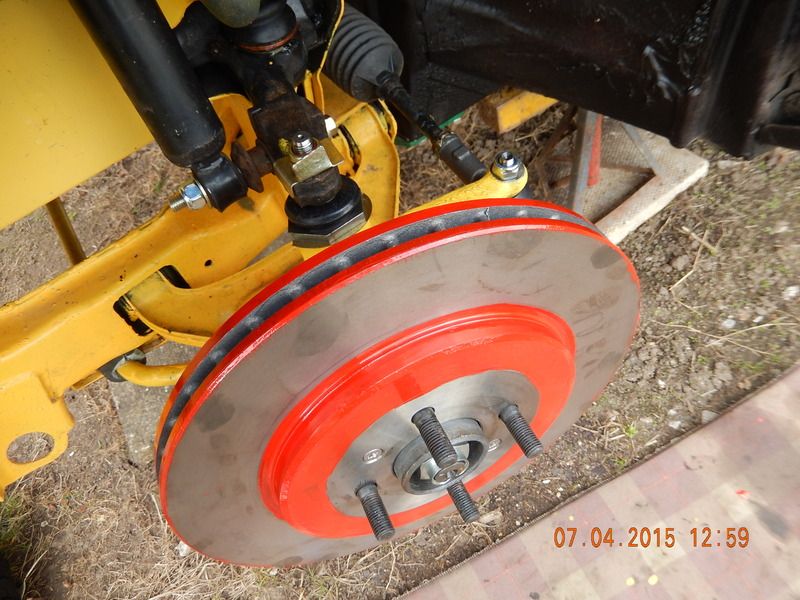
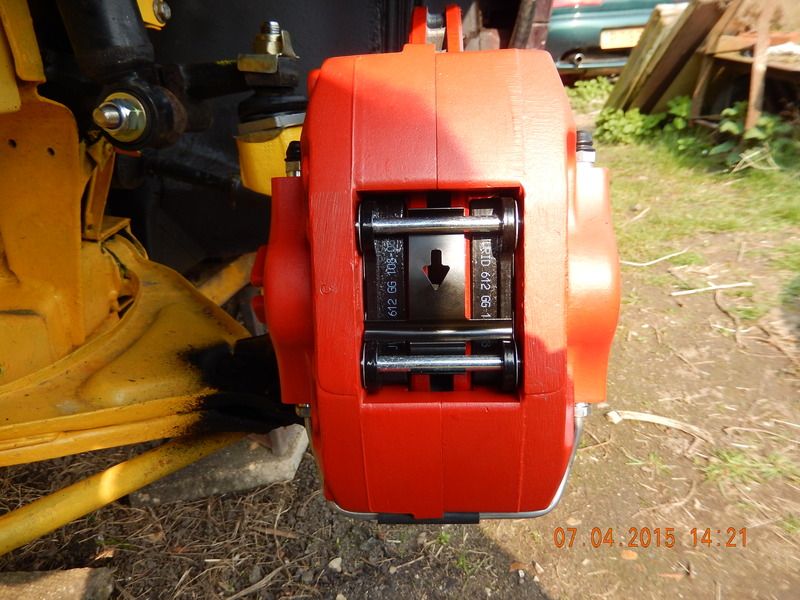
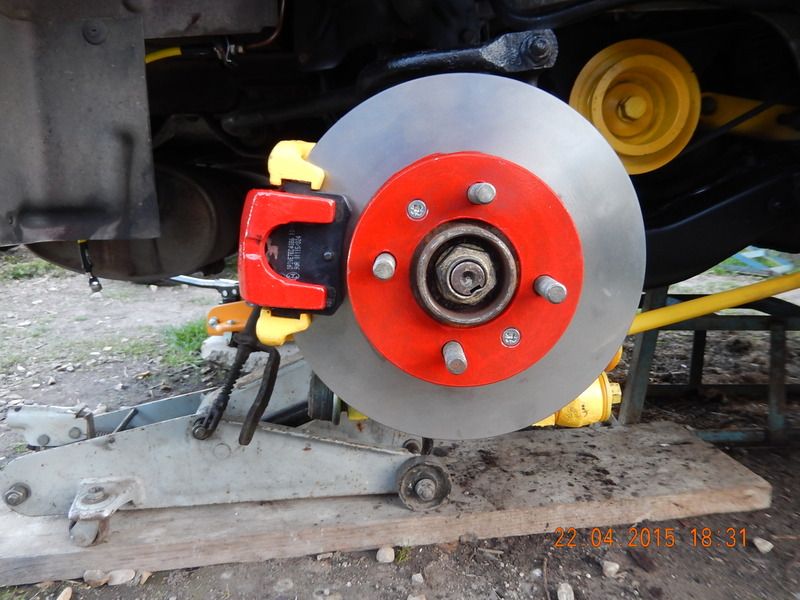
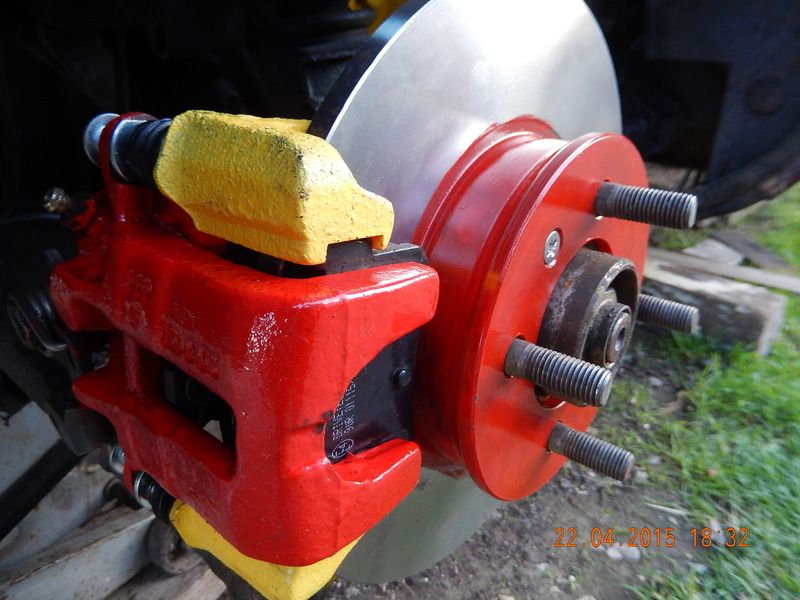
We have new front brakes:-


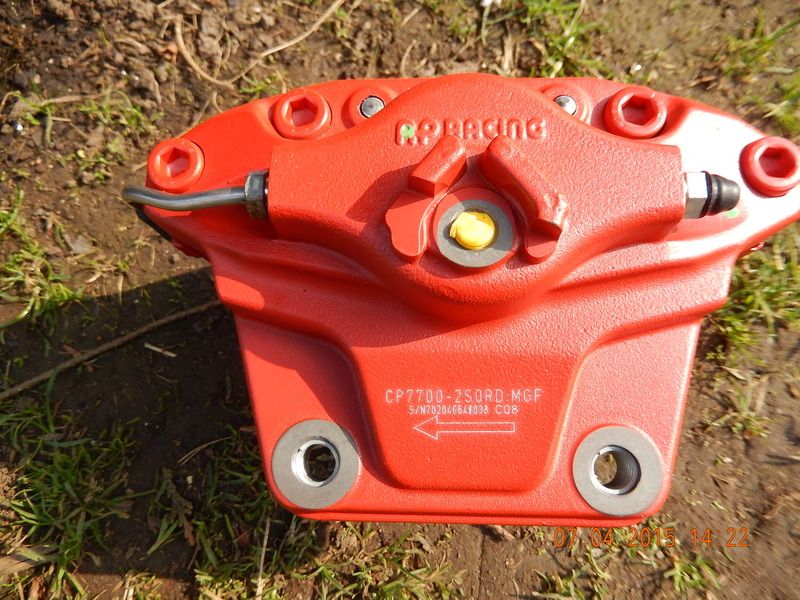
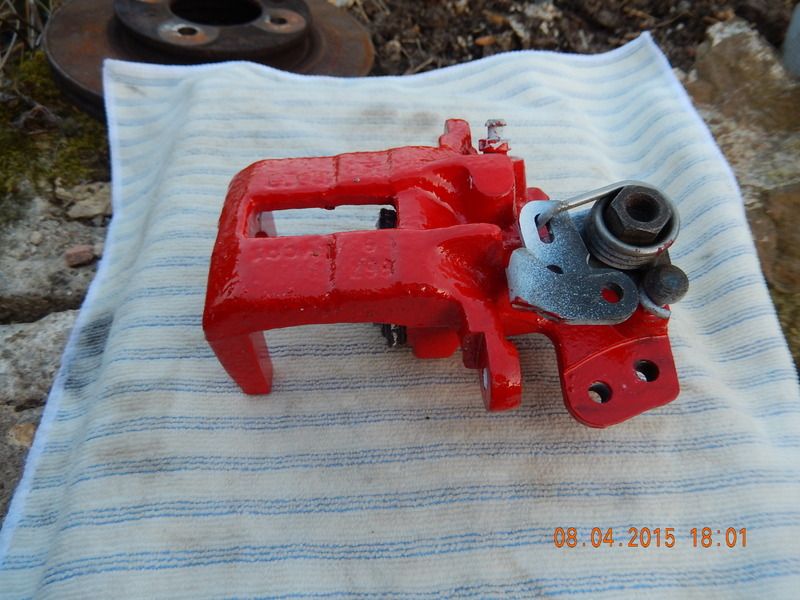
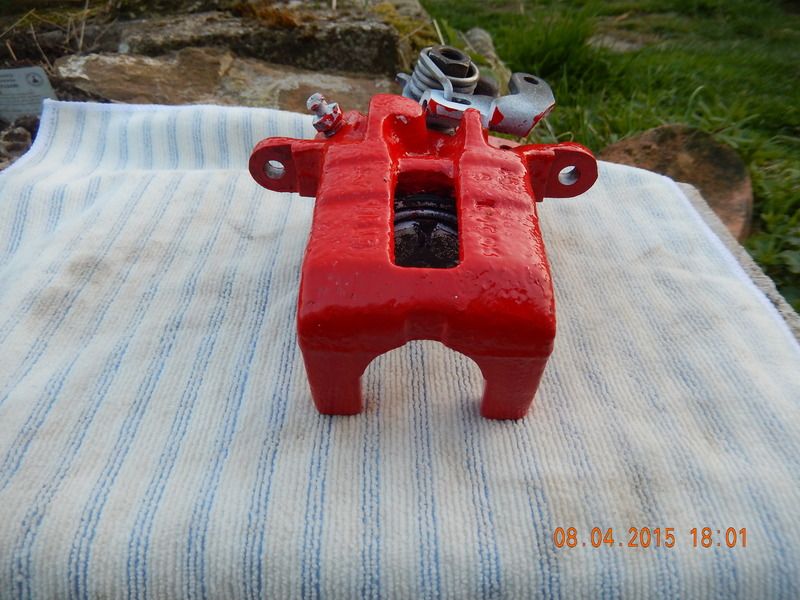
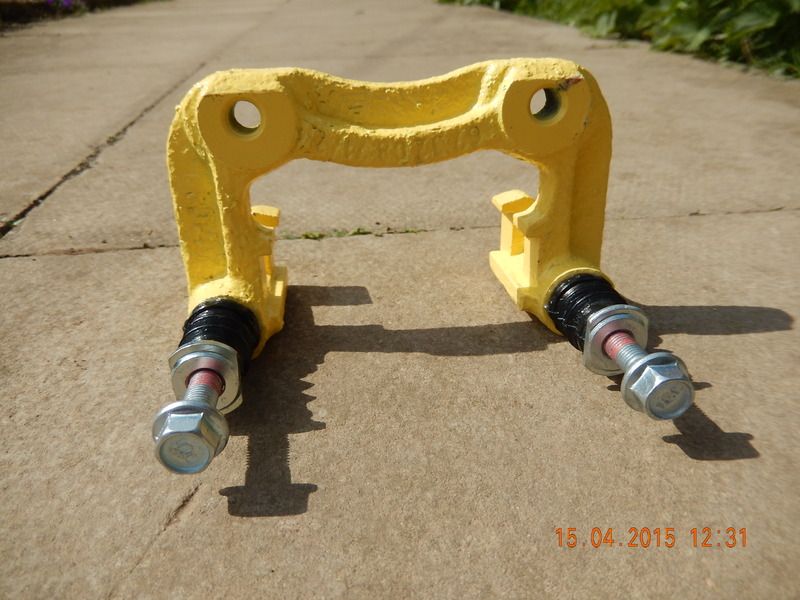
Brand new AP Racing 2 pot calipers from MG mania along with new uprated caliper bolts and new APEC 304mm discs. No they didn't come all tarted up I did that to stop the rust and keep them looking good. Did the same to the ones fitted to "Elsie" and some 6000+ miles later they still look good.


Looking good. Just need new banjo bolts and fix the new Braided brake hoses so they cannot chafe. Have begun on the rear brakes too:-


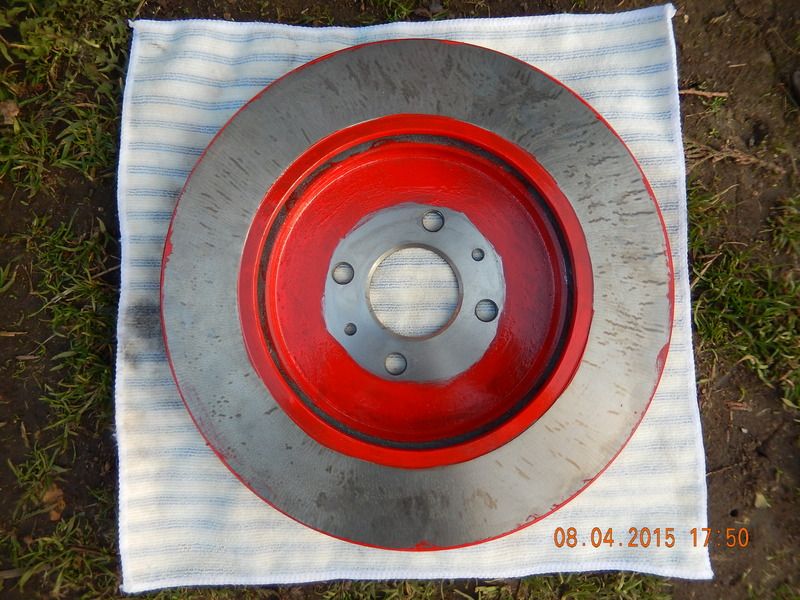
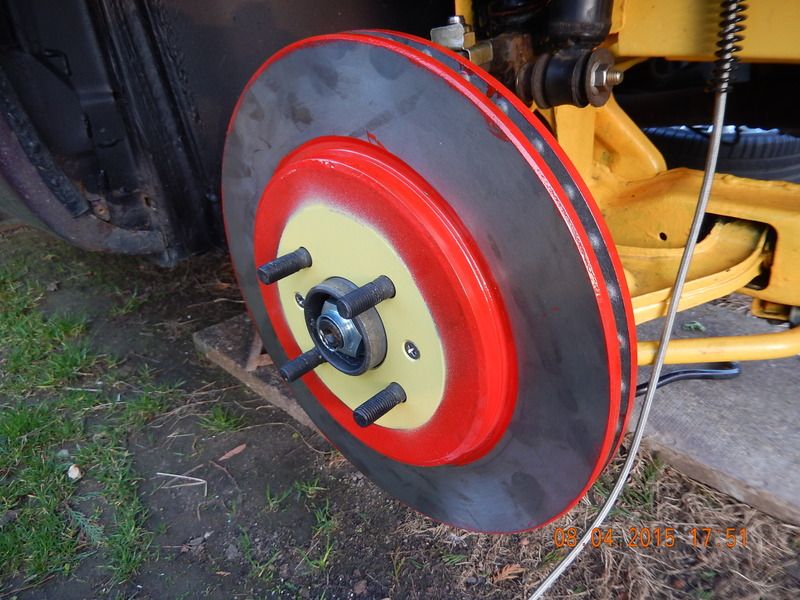
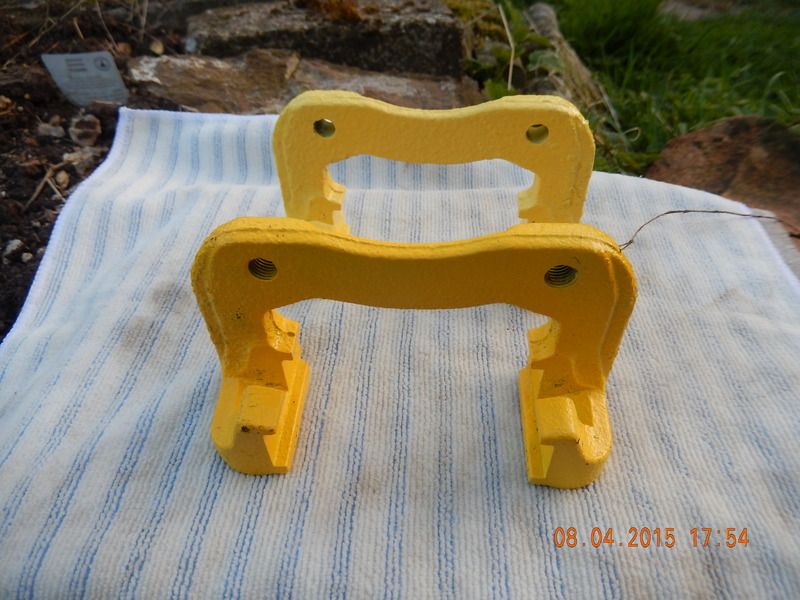
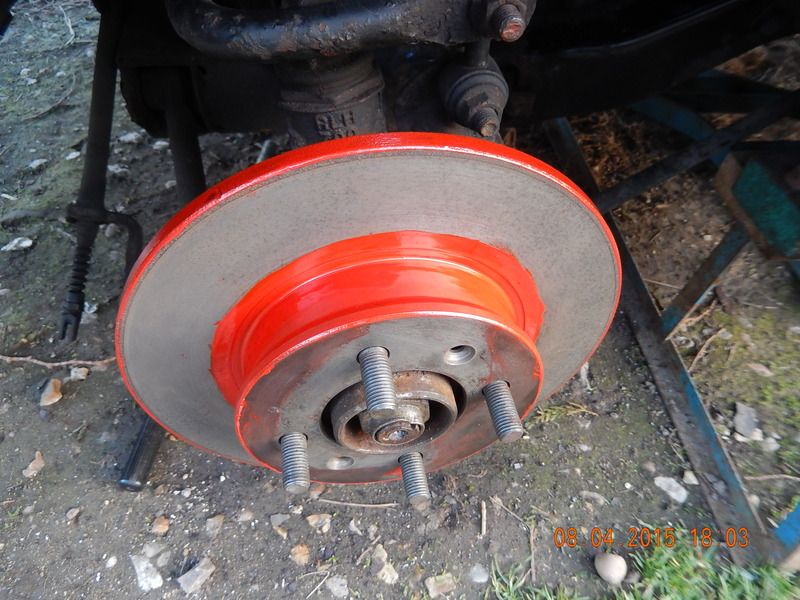
Cleaned and derusted the rear disc then painted it to keep then looking good. The O/S disc was stuck fast to teh hub with one really chewed up screw so drilled it out and retapped the hole and has to use a large hub puller to get teh disc off so that's not ready for painting as yet. Going to order new slider pins and bolts along new carrier to hub bolts for the rears. This afternoon managed to get the compliance tie bars undone from the front of the sub frame so will be looking at renewing the eye bushes along with the bushes and washers. Next it's remove the track control arms to check the inner bushes on those and remove the lowe radius arms from the sub frame ............................. All good clean fun ................................... now where is that bottle??????

Please Log in to join the conversation.

75th Anniversary 9 years 2 weeks ago #157749

What paint do you use for the hubs & discs?
Also,, do you use Kurust first or just rub them down?

Please Log in to join the conversation.

75th Anniversary 9 years 2 weeks ago #157761

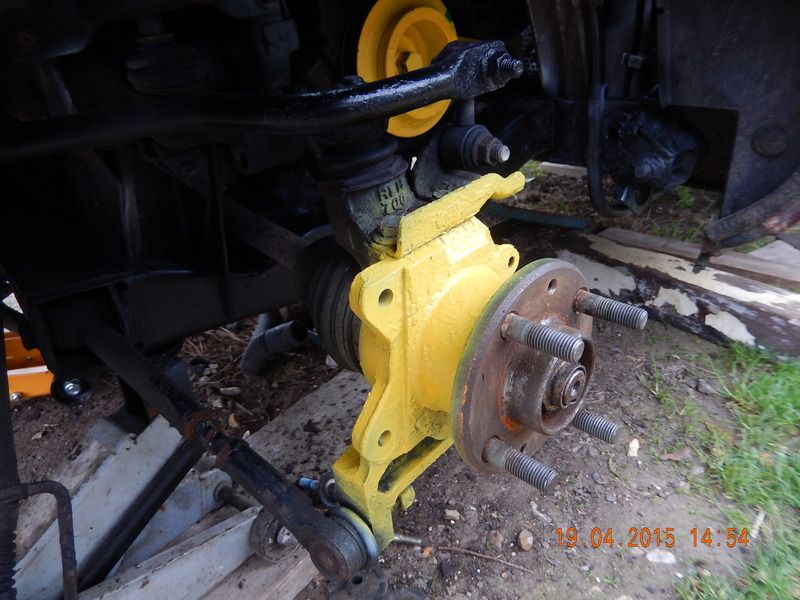
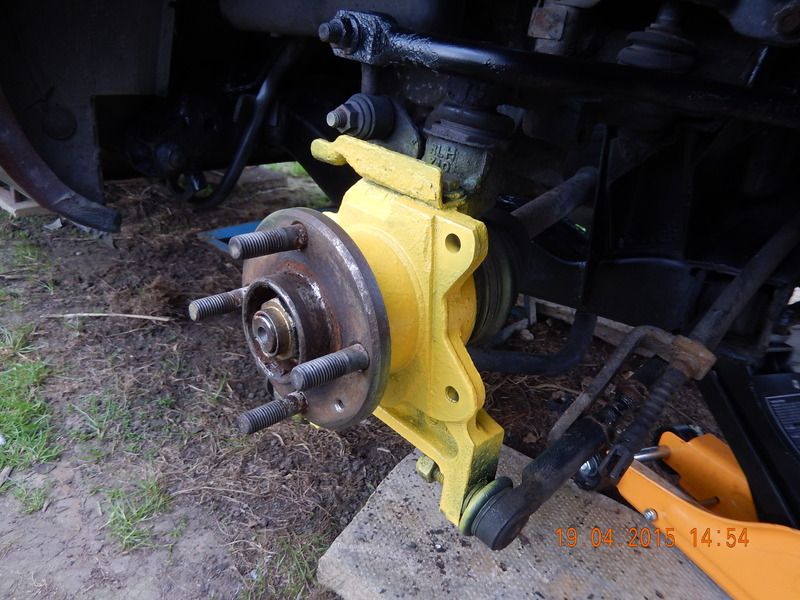
The hubs were first pickled, that's about the best description, in a bin of Bilt Hamber deox-c which removes rust. Mixed up 20 litres of it. I pickled them again and again as they were really bad.................... then washed them off and allowed to dry. Once dry primed with an aerosol can of primer bought from B&Q which does most materials. then sprayed with aerosol from Halfords in my chosen yellow (Fiat Broom Yellow) followed by a coat of lacquer.

Did similiar but only wire brushed the lower radius arms on "Elsie" for her mot last year when replacing the Complaince bushes and those are still yellow so am hoping this extra derusting will make it last even longer.

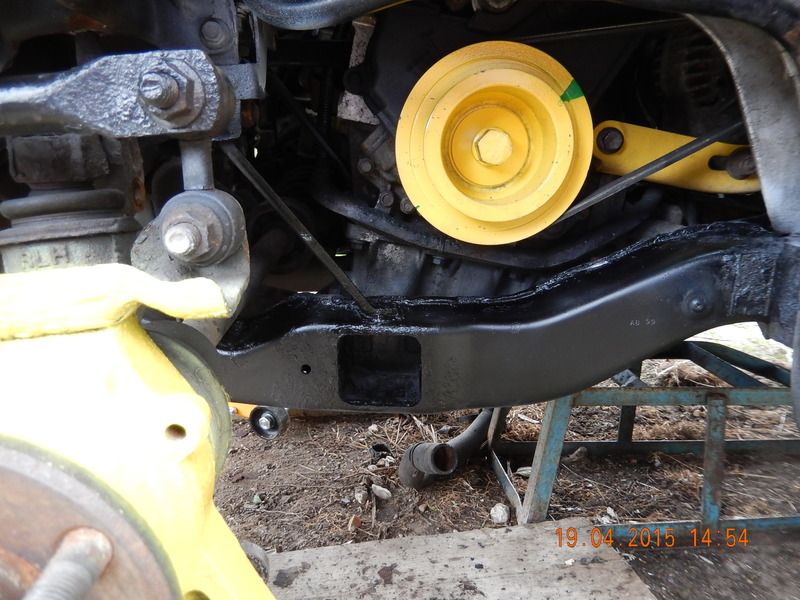
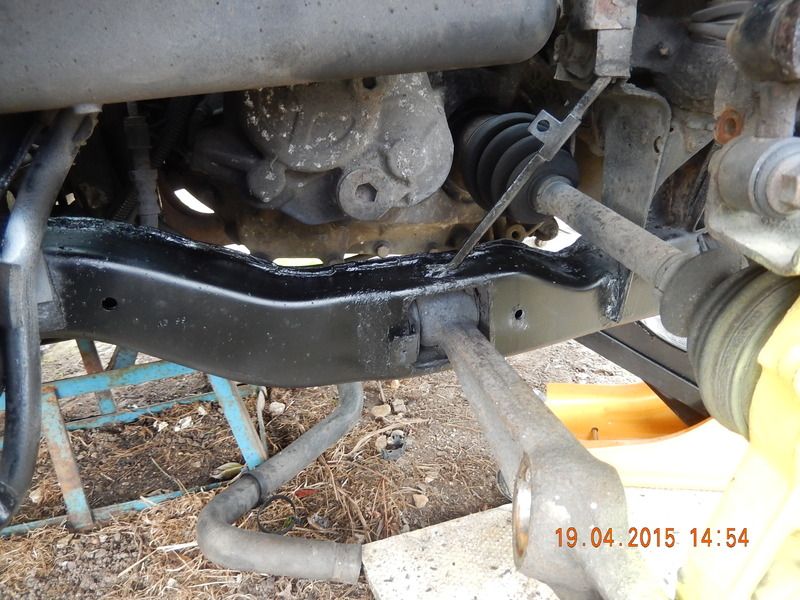
The front sub frame was cleaned off then painted with a rust treatment that they use in the North Sea Oil Industry then painted with smooth hammerite. That was done in Feb 2014 and has stood outside since then.
The following user(s) said Thank You: Forrester

Please Log in to join the conversation.

75th Anniversary 9 years 1 week ago #157998

Well it's done ................................................ although getting those two lower nuts onto the studs for the manifold was a real PITA. Got everything plugged back in and after much deliberation decided that the vacuum line to the ECU would have to connect to the second vacumm outlet on the plenum that was capped off on the TF 135 one although the original black hose was too large. Hmm so a length of clear tubing was cut and fitted and this fits the spigot on the plenum so we have no leak.

However when cranked over no start .....................................Hmmmmm no even attempting to fire. Pull the plugs and they are wet so we have fuel check for spark and it's very weak to non existant. Try again still nothing so pull plugs again and get out compression tester and check all cylinders. #4 is about 10 psi down on the others but still showing 160 psi (about 11 bar) so that's not the problem. Search the forums and the web and try various things but still no joy. Now we KNOW that she ran ok:-


sounds quite good even. So this morning it was back on the hunt for the problem .............................................. so it was check every connection and multiplug that culd be reached even those not touched before. Had the H/T lead from the coil resting on the cam cover to check for sparks and today there was none but we had a weak spark before .................................... Hmmmmmmm?????

So wiggle the CPS .......................... nada ................................. onto the coil connection and voila we have a spark ...................... then it stopped so have another go at it and voila a nice fat spark like there shouod be. It would seem that we have a bad connection here that needs further looking at but with a spark the lead was reconnected to the cap and she fired up.

Arghhhhhhhhhhhhhh she sounds like aknackered diesel:-


It would appear that at least one of the tappets had decided to quit working. Running it for some time whilst the coolant was bled again made no difference that tappet is stubbornly refusing the fill with oil ........................................ so it would seem that the new cam belt has to come off again so the cam ladder can be removed to change the offending tappet. Not best pleased and it now means that the body shop will have to be cancelled as there is no way to get this all done now in time.

In the meantime a small package arrived this morning containing new slider pins for a rear brake carrier which were duely fitted:-


Now we know they fit a second pack has been ordered. Could find none listed except on Rimmers for the MGF and they are rather pricey. These came from an ebay vendor and are listed for the early Rover 800. Seemed daft not the replace these as well whilst overhauling the braking system.

If by some miracle I manage to get this tappet sorted as well as rebush the rear suspension and rebuild the rear brakes including getting and fitting new discs and pads along with the new bolts needed then bleed the brakes. Locate and fit rear shocks and get the suspension filled and pumped up to the correct ride height there is still the rot in the sill to be cut out and a plate welded in then finished so it's not noticable then it can go to the body shop to have the paint repaired on the rear quarter.................................. all this in 4 days ?????????????? I cannot see it happening now!

Please Log in to join the conversation.

75th Anniversary 9 years 1 week ago #158001

Oh dear it seems my Duraflex bushes will not be here until next week. It seems that asking for S/S inserts is the problem that is holding up the order.

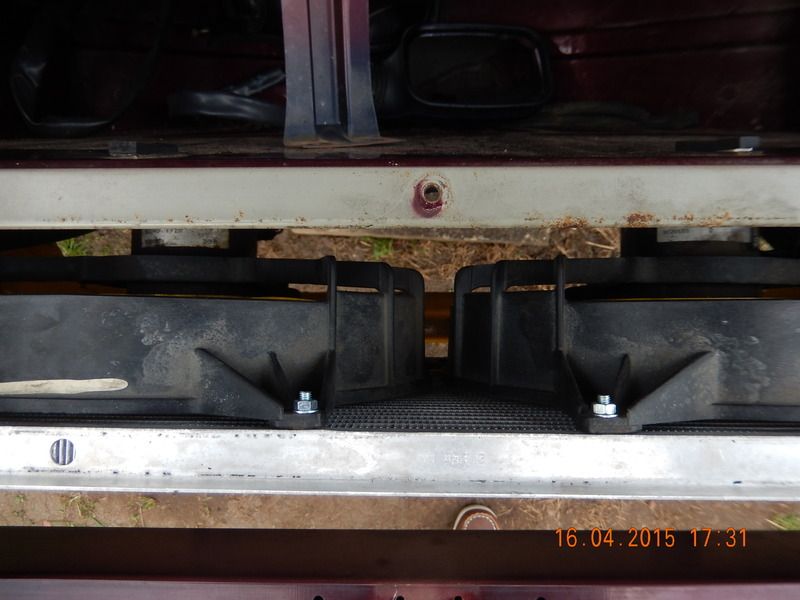
On a lighter note and more pleasing is the fact that I don't actually need to buy another radiator fan as this afternoon I managed to get the broken stud out of the original so can use it and then I decided to try the one off the VVC donor which felt a little stiff. Once it kicked in the fan was as free as the other so as the new radiator has studs to mount two fans that is just what I did:-


Due to the extra load have increased the fuse from 15 amp to 20 amp but thinking on it some more it might be as well to go to 25 amp. Need to check with someone more familiar with such upgrades first though................................ Hmmm wonder if an uprated relay is available?????

Now yesterday once the engine fired up it sounded dreadful with a tappet obviously not working ........................ clack .............. clack it was going. Today I fired her up and it was the same but left her running to check the radiator fans and re-bleed the system and after a while she suddenly got quiet and ran properly.

Went to start her this evening to record how she is running and she is tapping again. Not as bad as before but tapping no less:-


Will continue to monitor it and see how it does.

Please Log in to join the conversation.

75th Anniversary 9 years 1 week ago #158002

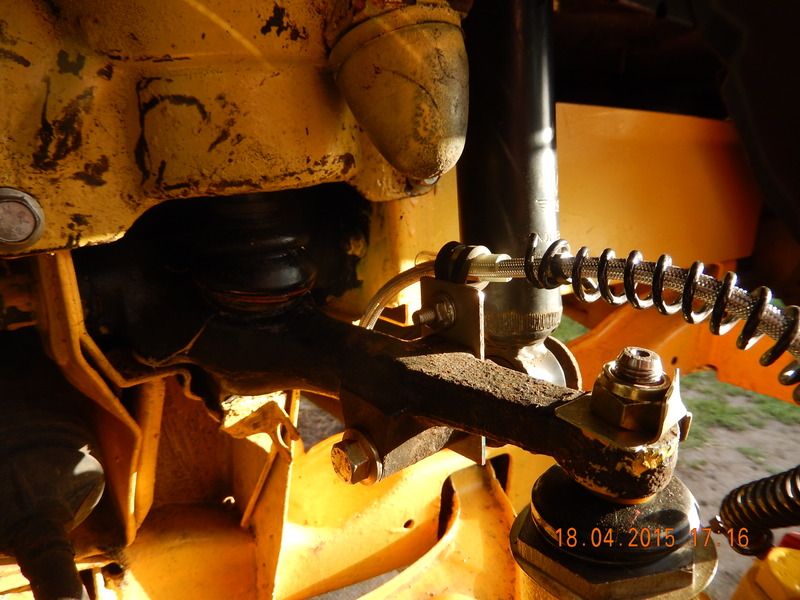
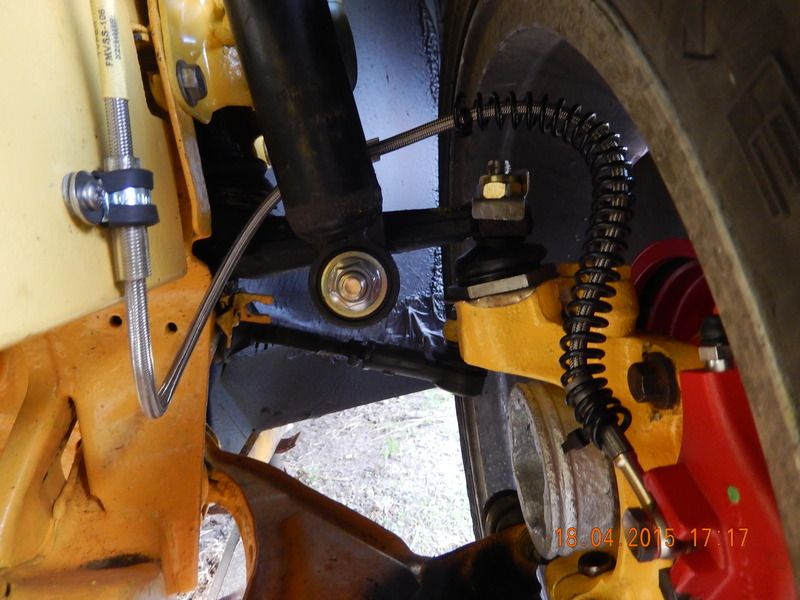
First thing was to route the S/S braided front brake hoses so they are safe and secure:-


I believe this is the neatest solution that I have found to date so will copy it and do the same to "Elsie" . Then it was onto wire brushing the loose paint and rust on the rear subframe then treat so it can be painted .

Please Log in to join the conversation.

75th Anniversary 9 years 1 week ago #158003

Well the day dawned chilly and very windy with a spot of rain thrown in for good measure .........................

Well in a lull when the sun was actually showing it's face it was coat on and out to undercoat the treated hubs and sub frame. As the aim was to get it done as quickly as possible no photos were taken. Retreating indoors for a cuppa to allow the undercoat to dry then after a while in another break it was out to spray some top coat on. Yellow for the hubs ................................ of course. I was even thinking of buying another tin of Hammerite Smooth in Yellow but that can wait until much later ........................... time is the enemy right now.

So an aerosol can was used. The subframe needs to be ALL yellow if that is the colour and as we don't have the time, access, or the paint right now the subframe was done in Satin Black:-


The rust was only surface but stopping it going further is always a good move :) . The hubs especially will need another coat before an application of lacquer and the sub frame will get another coat. I did breifly consider underseal.

My intention is to get the rear sub frame from the Donor VVC stripped then blasted so it can be properly painted then rebuilt and then swapped into one of the F's and then that sub frame can be treated the same. Likewise the front sub frame from the 75 will be stripped and painted then rebuilt and swapped into "Elsie"....................................... all part of the ongoing restoration.

Still no sign of the darned Durflex bushes though :doh: :tapfoot:

Please Log in to join the conversation.

75th Anniversary 9 years 1 week ago #158012

Bit the bullet and ordered a pair of std TRW rear discs so at least will be able to get the brakes built up and bled if the darned suspension bushes ever arrive that is.

Please Log in to join the conversation.

75th Anniversary 9 years 5 days ago #158102

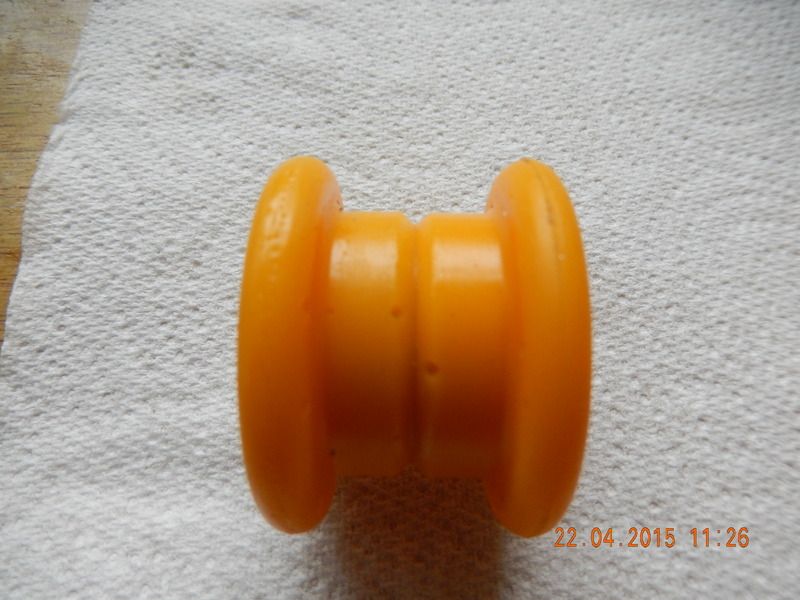
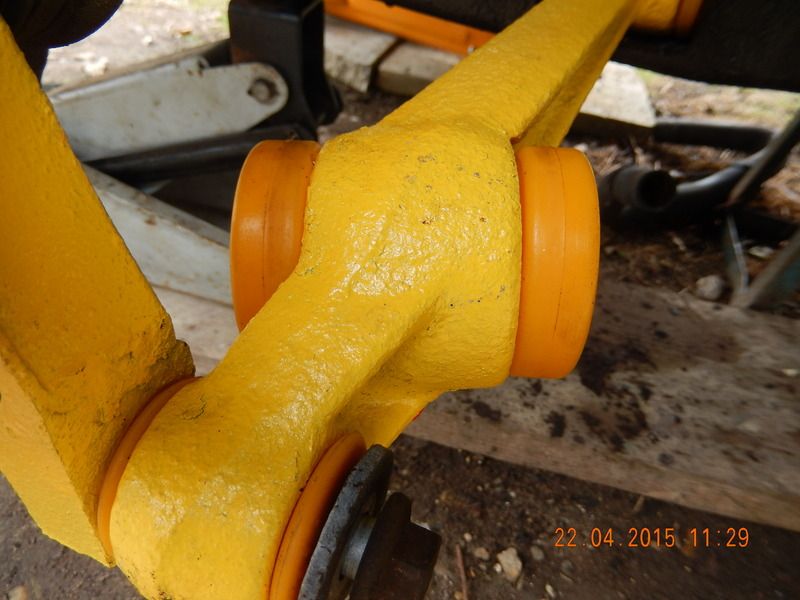
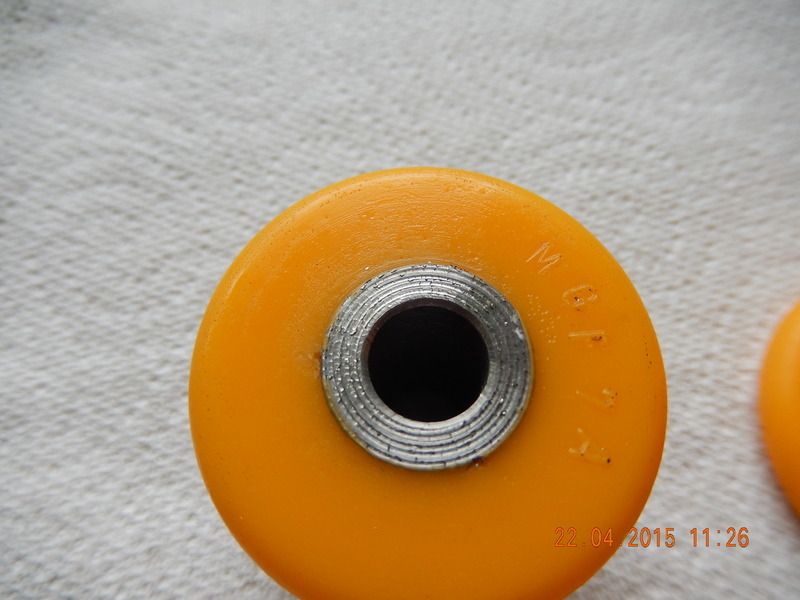
Well the bushes eventually arrived, was promised them for last Saturday so they turn up the Wednesday after :tapfoot: , and am sorry to say that I am not impressed. Firstly my order was for Yellow bushes with Stainless ferrules, tubes, spacers, it seems these were the problem. Don't know why people seem afraid of machining stainless but they are :-? looking at the tube ends it appears that the tooling was blunt the finish is like a ploughed field and rough as a badgers backside. The finish in the bores is also not good and in the days of carbide U drills it seems these were done with a good old twist drill which wandered. I had to skim the ends on one tie rod eye bush to get it into the bracket on the subframe so chucked in the the small lathe and the hole is not concentric with the tubes outside ................................. Hmmmmm


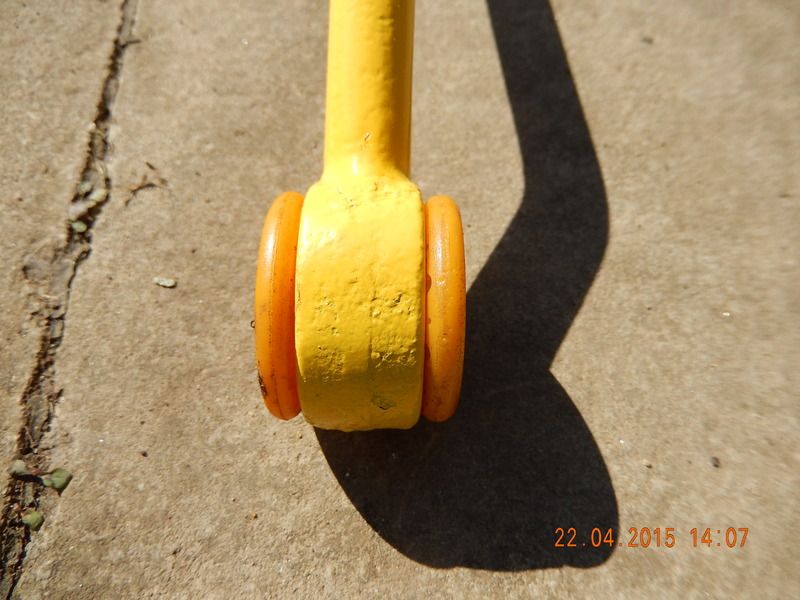
A tie rod eye bush ................................................. remember these are YELLOW!!!!! the chap at Durflex assures me that these are Yellow despite their own web site showing they are Orange as the Yellow IS yellow on their web page.


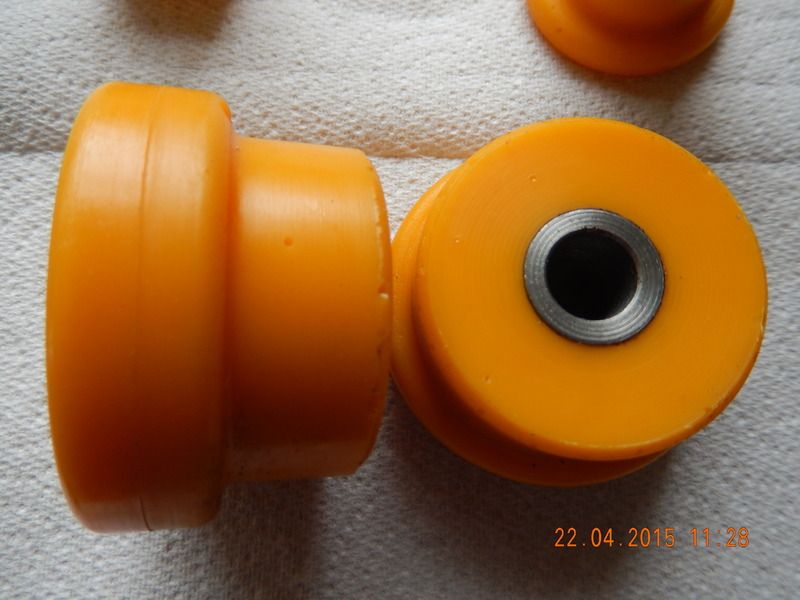
Not the poor finish to the tubes end :( ..................................................... Now these are the complaince bushes:-


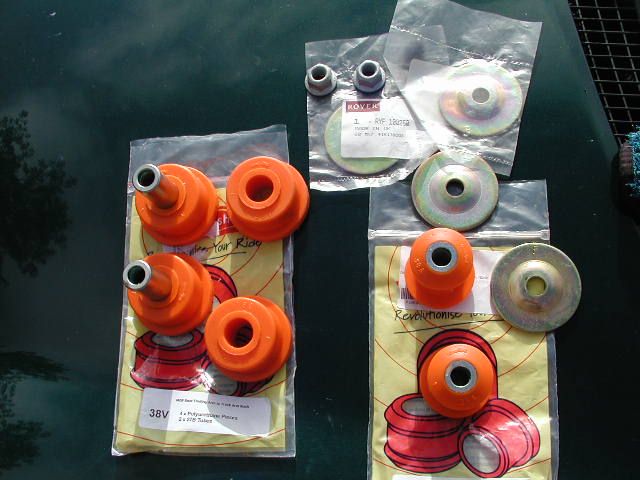
Hmmm they don't look like any other complaince bush that I have seen on an F ???????????????? For compaision these are Polybush ones:-


that I fitted to "Elsie" for her MOT last September.


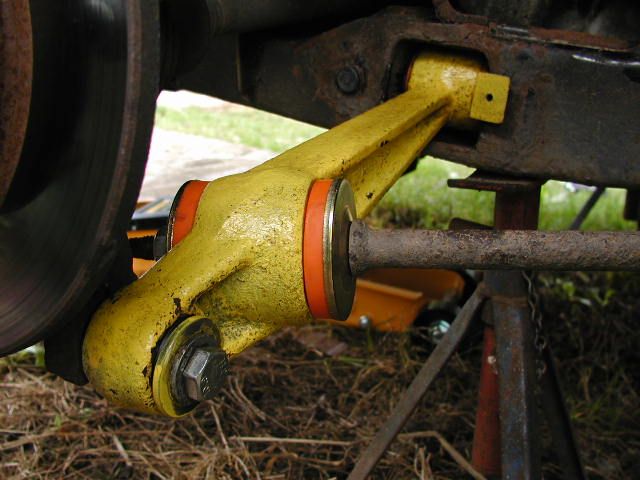
The tubes are one piece that passes through both bushes unlike the Duraflex which have short tubes through each bush. I am wondering if they have trrouble drilling through a length of Stainless the required length????? :-? if so this calls the skill of their machinist and their choice of tooling into question. Simple tube spacers like this would be 2nd year apperentice work and can be achieved on a centre lathe. Using a capstan would make the job even easier and with modern CNC machines a doddle and yes I have many years experience running and setting such machines. Now these are the Duraflex bushes fitted:-


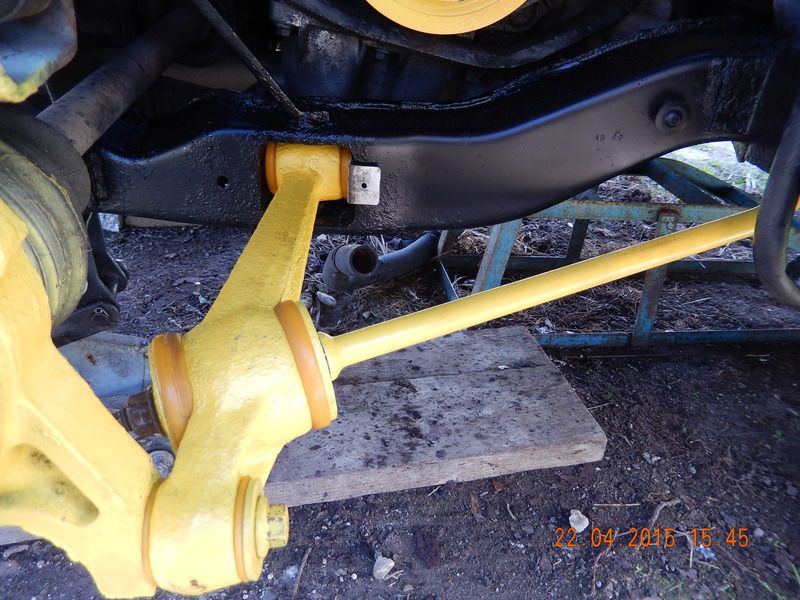
I was worried that the tie bar nut would not have enough thread to grip on but it seems one has to wind the nut on and squish the Duraflexs Complaince Bushes :slapme: :omg: I am also wondering about the lower arm to hub bush as on the standard one the steelof the arm is against the hub but the Duraflex bush is squashed between arm and hub ????? now I simply so not have enough knowledge about polymers and polyurathene to make an informed judgement here so it's a "suck it and see" scenerio :-? .

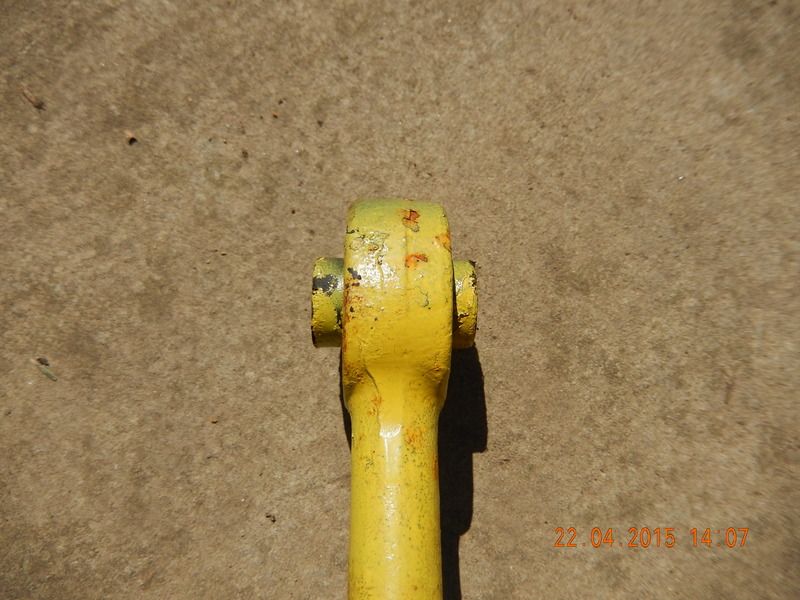
A tie rod with standard MG-Rover bush:-


That one was painted over a year ago and has lain out on the old steel saw bench since then.

The standard bush is a right Mare to remove and I found the only way with no proper press as to tear the rubber out by shearing it under pressure in the 6" bench vice, used a large deep socket and a smaller one to shear the rubber bush through, then cutting the steel ring with a hack saw before punching the split ring out with a cold chisel the Duraflex bush being in two halves was easy to fit the tube is one piece but of course is fairly short:-


Once the old bush was out the tie rod was cleaned off and primed:-


then painted Yellow to match the rest.

Of all the Duraflex bushes that I have these are the ones I would buy again as they do stiffen up the the tie rod and stop it twisting which I am hoping is a good thing! I also don't know of others offering a replacement bush for this!!!!

The lower radius arm inner bush is again very thick and it proved very difficult to get the shims in place:-


The O/S went in a bit easier and further. Anyway apart from rear shocks the rear suspension is back together. The dampers on her were no good due to poor condition so have to get replacements as NONE of the ones here are in good enough condition to use :bang: and the money has run out. The new TRW rear discs did arrive though:-


so got cleaned and titivated ................................. they are only fitted for the photo as the edge/rim is not painted and have not bought the new bolts for the caliper carrier mounting to the hub as yet along with the new bleed nipples.

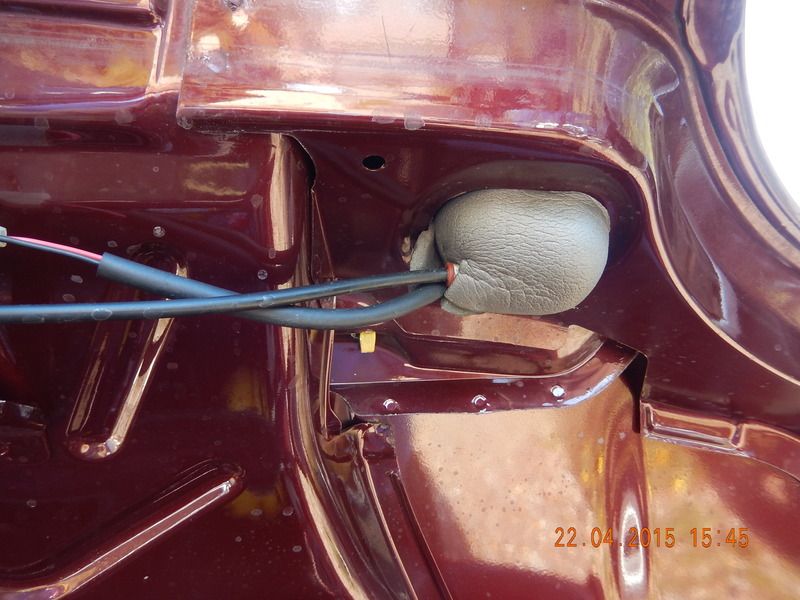
Another job completed on her was the swapping of the ingition switch so she now has the full lock set from the Donor VVC fitted so she has two keys just have to sort out a second key fob as we still only have the one of those. The Donors boot lock has this cover:-


so that was swapped over too :yesnod:
The following user(s) said Thank You: cairnsys

Please Log in to join the conversation.
75th Anniversary 9 years 4 days ago #158118

Top work mate keep it up
The following user(s) said Thank You: Plezier

Please Log in to join the conversation.

Time to create page: 0.135 seconds
© 2024 The-T-Bar.com All Rights Reserved. Hosted By SEBS IT