AP discs and pads. - How to change
First of all a bit of sanity in the form of safety. DO NOT work on the brakes or under the car with just the jack for support, it is not designed for this and could collapse with you under it. ALWAYS use axle stands to support the vehicle and chock the wheel with a suitable device. This will prevent the vehicle rolling off the axle stand.
So, lets get started.
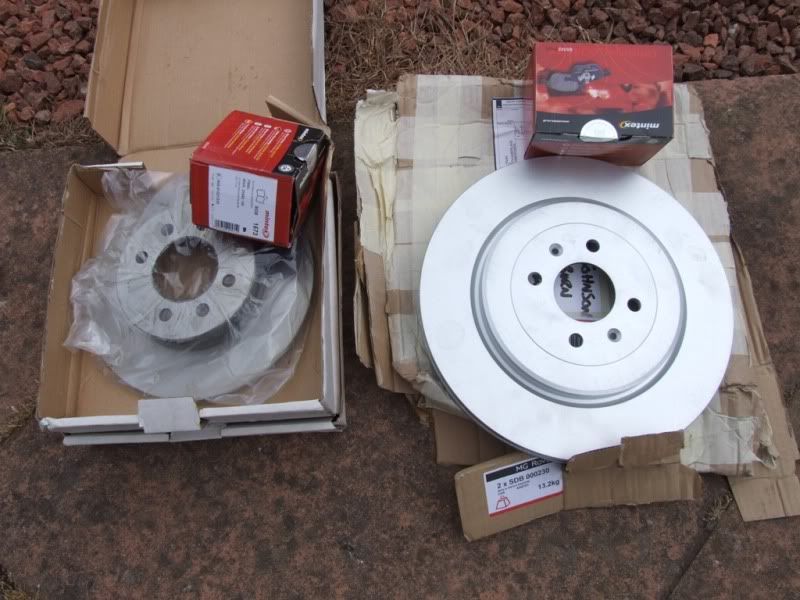
The new discs and pads waiting to be fitted
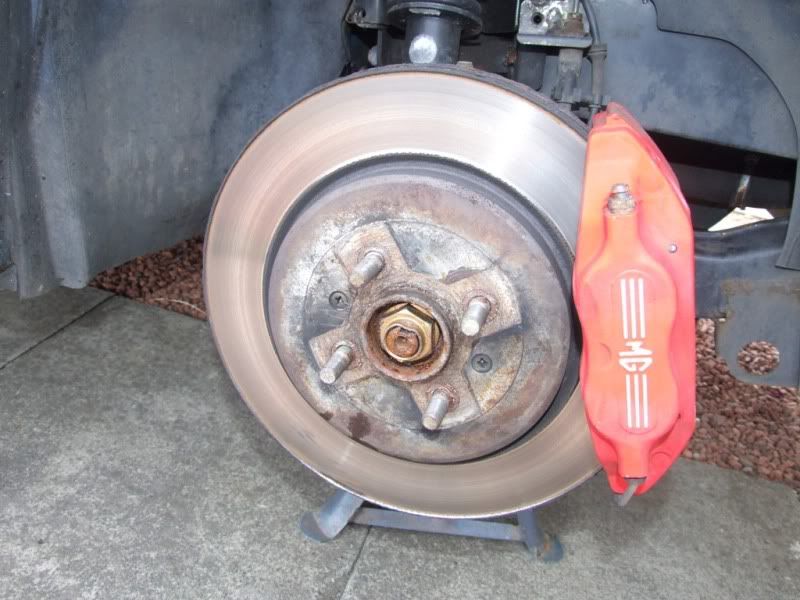
First we remove the road wheel exposing the old disc.
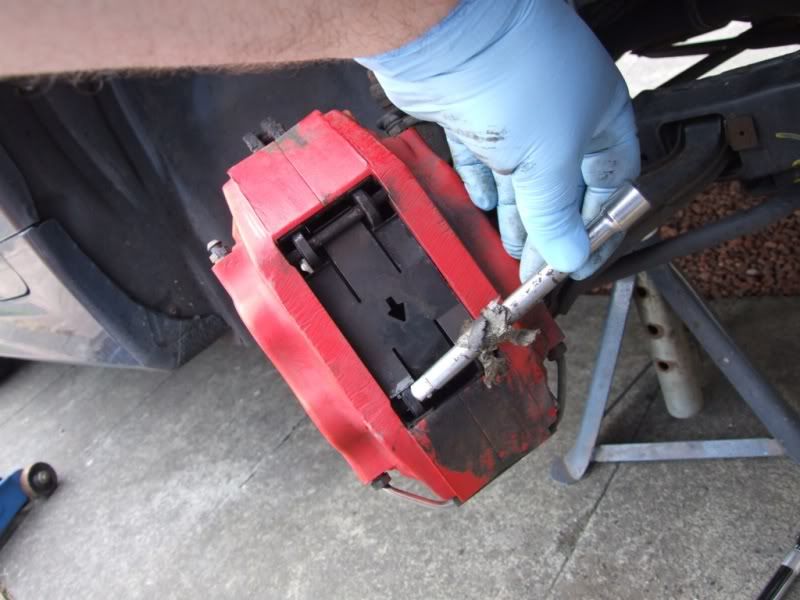
Remove the two bolts that secure the calliper to the hub. It is easier to do if you apply full lock on the steering.

Then force the pads apart so that they clear the outside lip on the disc.
Next, remove the two cross headed disc retaining screws. There are two methods to this. First one is to hammer the ends of the screw which should loosen them up and remove with a large cross headed screwdriver. The second is to use an impact driver. As both of these didn't work for me (one sheared and the other rounded off) I ended up drilling the heads off.

Persuade the disc off by tapping from behind with a suitable hammer. Mine came off fairly easy, but it may take some "heavy" persuasion if it is rusted on. Remember that the force you are applying to the disc is also applied to the wheel bearing etc, so be careful.
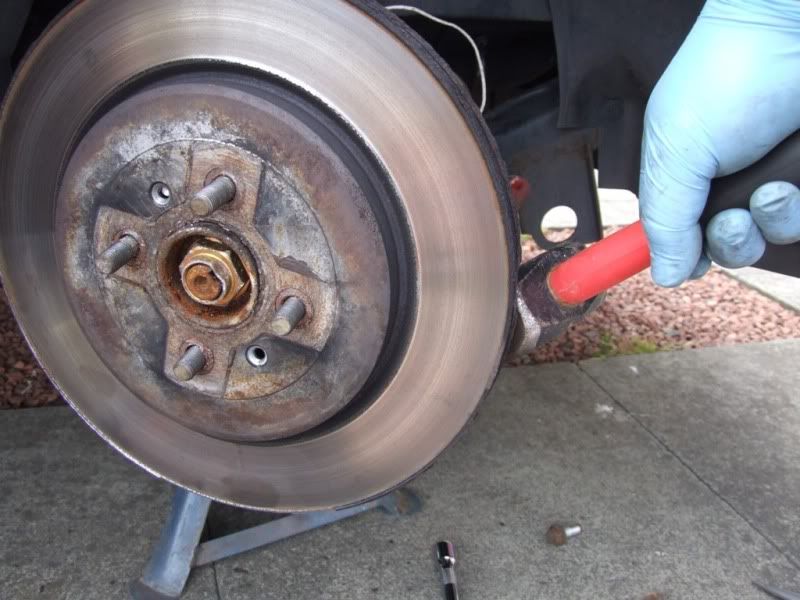
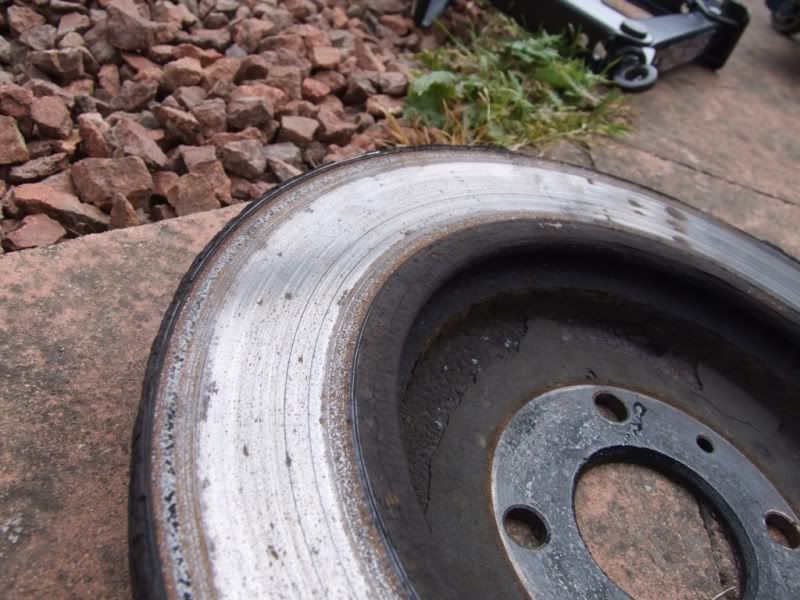
And, in the words of Haynes manuals, simply remove the disc

The old disc has a small lip on it, but is not too bad. I may look into getting them skimmed and keeping as spares.
Once the disc has been removed, bolt the calliper back into place. This will make it easier to work on.
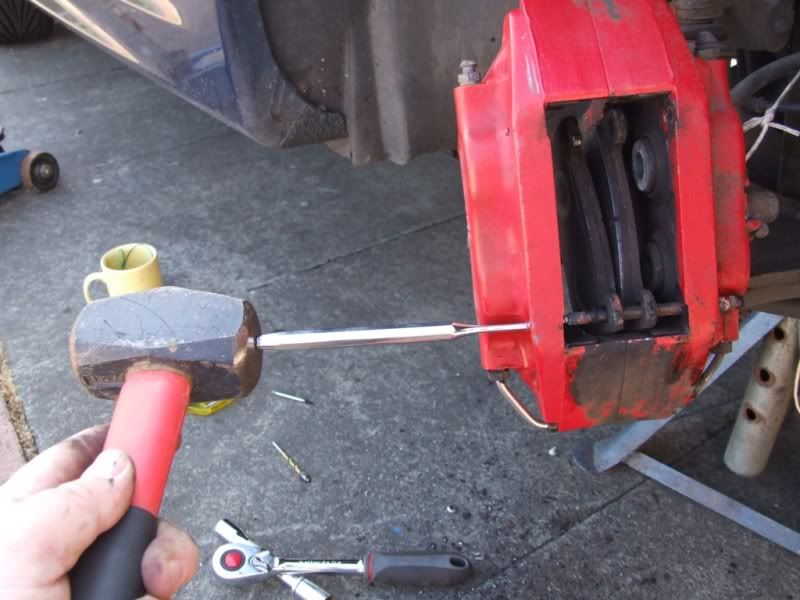
Hammer the pad retaining pins out using a suitable drift and hammer. I had a hell of a time removing the bottom pins on both callipers. I ended up soaking them in release oil. I still ended up mushrooming the small ends, but they eventually learned who the boss was. Remove the retaining spring (One on each calliper) and then withdraw the pads.
Once the pins were removed I cleaned the corrosion off with wet and dry and coated them in copper slip.
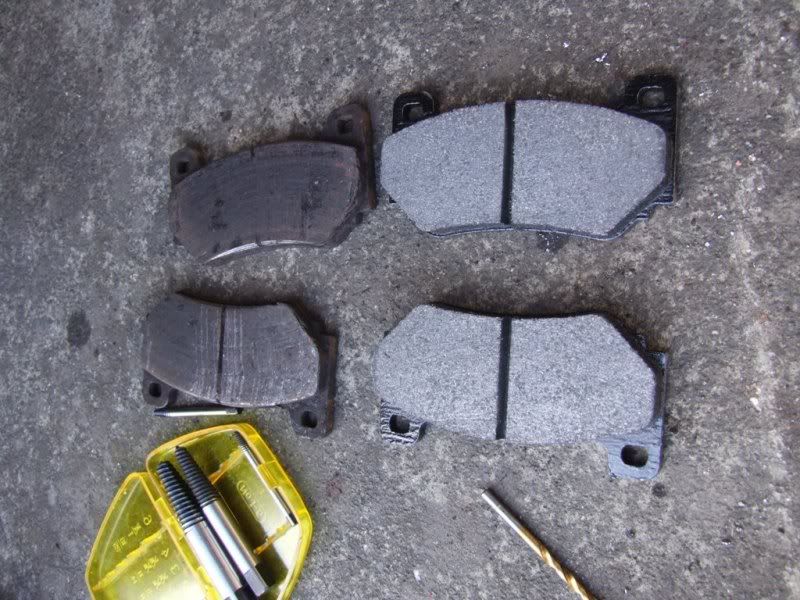
Here we have the old and new pads as comparison. The pads still had life in them but I feel happier with new pads on.
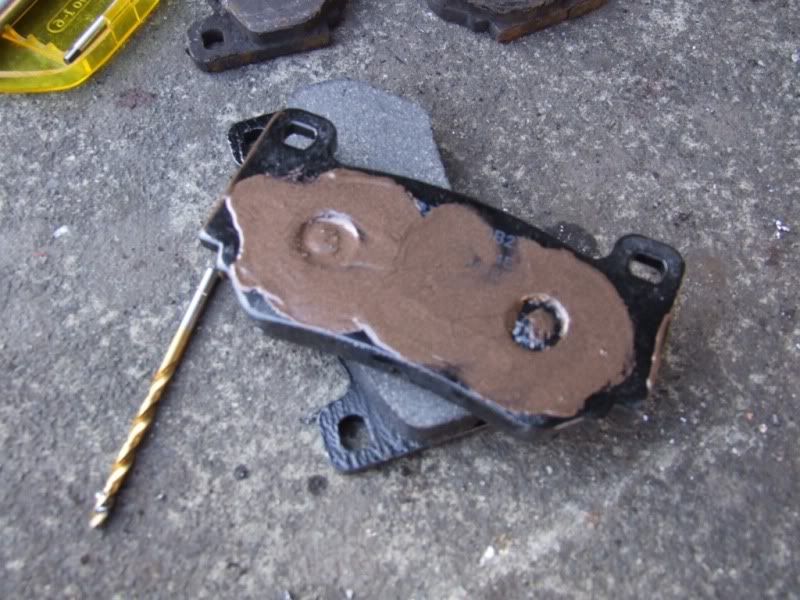
Now prepare the pads for fitting. Trial fit them first to make sure they fit. I had to file a bit off the edges of both pads (the left and right edge as you look at the photo below) on the passenger side to get them to fit freely. Apply copperslip to the back of the pads and to the sides that you may have just filed.
Now open the pistons as far as they go. Be careful that the displaced brake fluid does not cause the brake reservoir to overflow. Remove some fluid if necessary.
Refit the pads, retaining spring and hammer the pins back in place from the rear of the calliper. The springs need to be replaced the same way that they came off, so make a not. Mine had arrows cut in to them. These arrows follow the direction of rotation of the road wheel.
Once the new pads are fitted, remove the calliper.
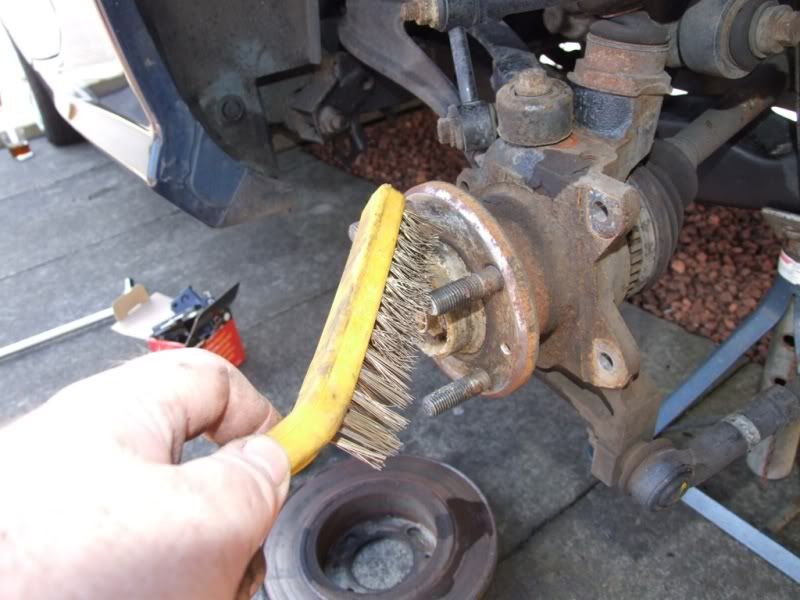
Clean the hub with a wire brush. This will help with the fitting of the new disc and will help it seat correctly.
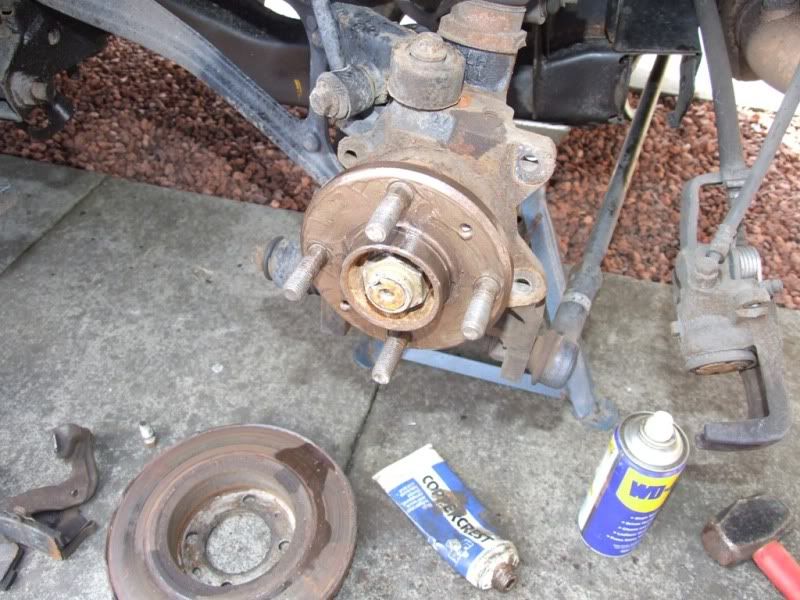
Apply Coppercrest to the hub. This will help when you need to remove the disc next time. Do not use to thick a coating as this could loosen the wheelnuts etc when the hub heats up and the grease melts. It also spins out at speed and makes a mess on your wheel. It is also worth noting that some people do not recommend that you put coppercrest on the face of the hub/disc. I have never had any problems, but the choice has to be yours.
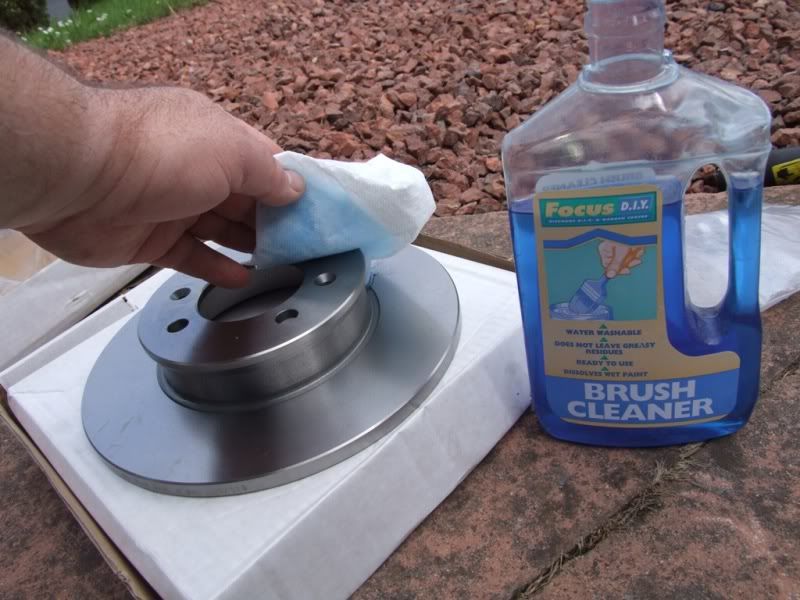
Next prepare the new disc by removing the protective oil with some form of degreaser.
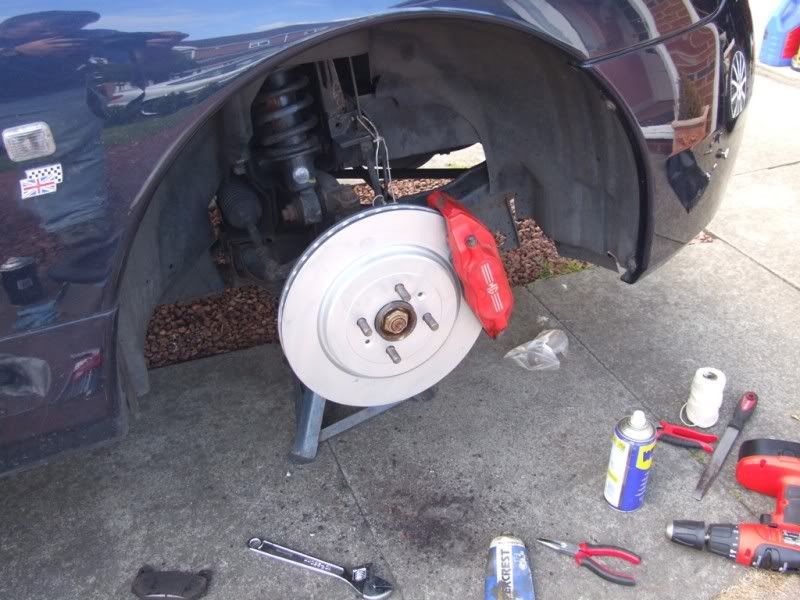
Fit the new disc, disc retaining screws and calliper. One tip worth mentioning is after fitting the road wheel to the correct torque, remove it again and retighten the disc retaining screws. You will find that the action of tightening the wheel on will have forced the disc further onto the hub.
Now refit the road wheel, tighten the wheel nuts and lower the car back onto the wheel. Torque the wheel nuts to their correct setting.
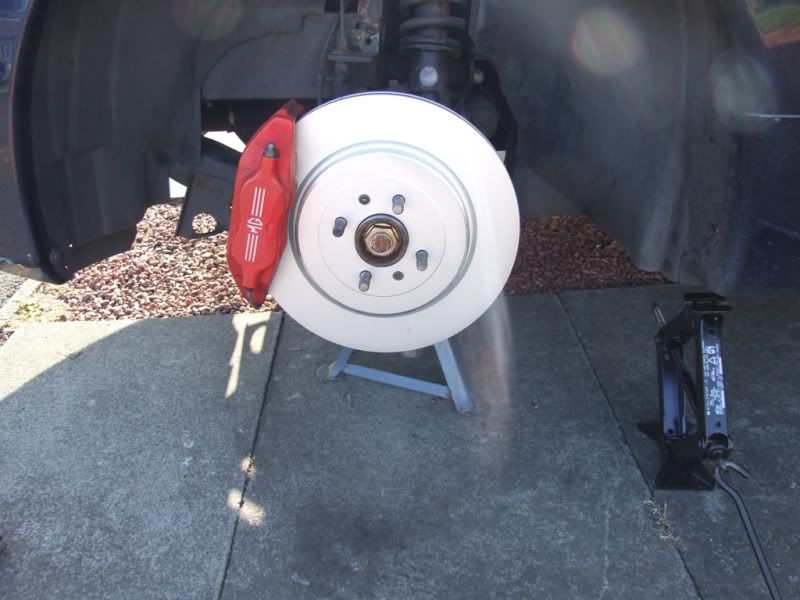
Mmmm, shiny brakes.

Now do the same to the other side
Remember that you have just fitted new discs. Adjust the brake fluid level and drive carefully until your new brakes are bedded in. It may be worth checking all the bolts are still tight after a short period of driving.
So, lets get started.
The new discs and pads waiting to be fitted
First we remove the road wheel exposing the old disc.
Remove the two bolts that secure the calliper to the hub. It is easier to do if you apply full lock on the steering.
Then force the pads apart so that they clear the outside lip on the disc.
Next, remove the two cross headed disc retaining screws. There are two methods to this. First one is to hammer the ends of the screw which should loosen them up and remove with a large cross headed screwdriver. The second is to use an impact driver. As both of these didn't work for me (one sheared and the other rounded off) I ended up drilling the heads off.
Persuade the disc off by tapping from behind with a suitable hammer. Mine came off fairly easy, but it may take some "heavy" persuasion if it is rusted on. Remember that the force you are applying to the disc is also applied to the wheel bearing etc, so be careful.
And, in the words of Haynes manuals, simply remove the disc
The old disc has a small lip on it, but is not too bad. I may look into getting them skimmed and keeping as spares.
Once the disc has been removed, bolt the calliper back into place. This will make it easier to work on.
Hammer the pad retaining pins out using a suitable drift and hammer. I had a hell of a time removing the bottom pins on both callipers. I ended up soaking them in release oil. I still ended up mushrooming the small ends, but they eventually learned who the boss was. Remove the retaining spring (One on each calliper) and then withdraw the pads.
Once the pins were removed I cleaned the corrosion off with wet and dry and coated them in copper slip.
Here we have the old and new pads as comparison. The pads still had life in them but I feel happier with new pads on.
Now prepare the pads for fitting. Trial fit them first to make sure they fit. I had to file a bit off the edges of both pads (the left and right edge as you look at the photo below) on the passenger side to get them to fit freely. Apply copperslip to the back of the pads and to the sides that you may have just filed.
Now open the pistons as far as they go. Be careful that the displaced brake fluid does not cause the brake reservoir to overflow. Remove some fluid if necessary.
Refit the pads, retaining spring and hammer the pins back in place from the rear of the calliper. The springs need to be replaced the same way that they came off, so make a not. Mine had arrows cut in to them. These arrows follow the direction of rotation of the road wheel.
Once the new pads are fitted, remove the calliper.
Clean the hub with a wire brush. This will help with the fitting of the new disc and will help it seat correctly.
Apply Coppercrest to the hub. This will help when you need to remove the disc next time. Do not use to thick a coating as this could loosen the wheelnuts etc when the hub heats up and the grease melts. It also spins out at speed and makes a mess on your wheel. It is also worth noting that some people do not recommend that you put coppercrest on the face of the hub/disc. I have never had any problems, but the choice has to be yours.
Next prepare the new disc by removing the protective oil with some form of degreaser.
Fit the new disc, disc retaining screws and calliper. One tip worth mentioning is after fitting the road wheel to the correct torque, remove it again and retighten the disc retaining screws. You will find that the action of tightening the wheel on will have forced the disc further onto the hub.
Now refit the road wheel, tighten the wheel nuts and lower the car back onto the wheel. Torque the wheel nuts to their correct setting.
Mmmm, shiny brakes.
Now do the same to the other side
Remember that you have just fitted new discs. Adjust the brake fluid level and drive carefully until your new brakes are bedded in. It may be worth checking all the bolts are still tight after a short period of driving.
Last Edit:15 years 8 months ago
by cjj
Last edit: 15 years 8 months ago by David Aiketgate.
The following user(s) said Thank You: Notanumber
Please Log in or Create an account to join the conversation.
Time to create page: 0.375 seconds