ok boys and girls, got the resistors, and they were well packaged. 3 wire coils, in a plastic pot. so far so good
")
1. open your glove box and remove all of the contents. you will notice two phillips screws, one each side on the outer edge of the glove box. remove both of these.
2. underneath the glove box you will see a further two screws, undo, but do not remove these two completely. they will slide out of the grooves they are in without being removed totally.
3. pull the glove box forwards, bearing in mind that you have stil got the light and switch assembly plugged in. once you have access to the light and switch, unplug them,and pull the glove box clear.
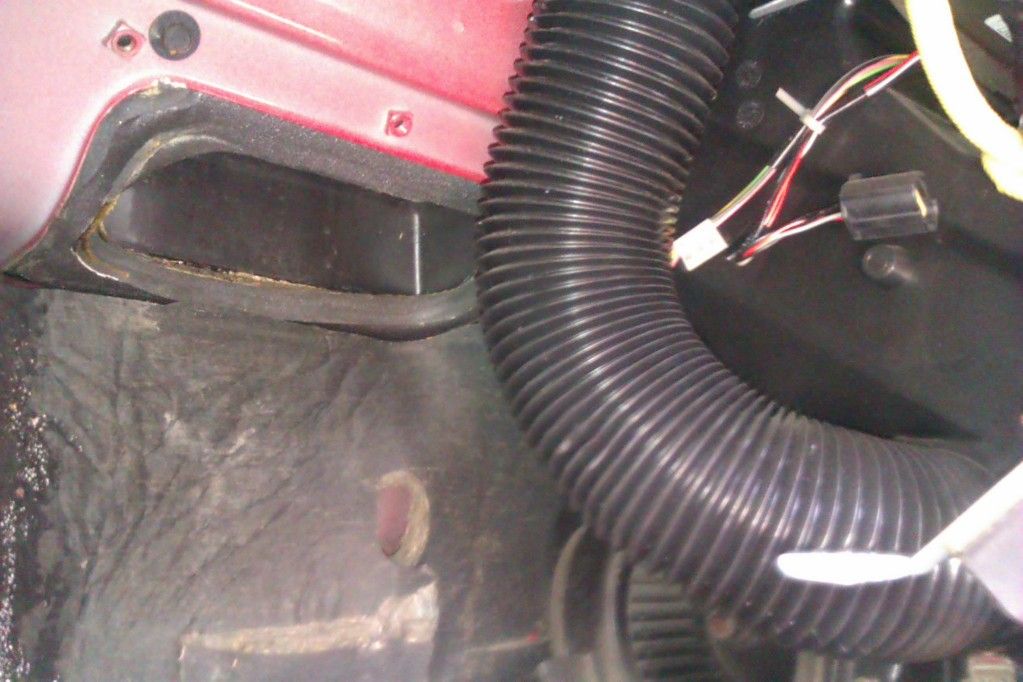
4. you will now see a big plastic elbow duct, running from the front bulkhead to the heater fan. on the front bulkhead (left hand side) there is a 10mm nut. remove this and the elbow will pull clear.
5. you will now have a view similar to this, but a different colour if you don't have a red car lol
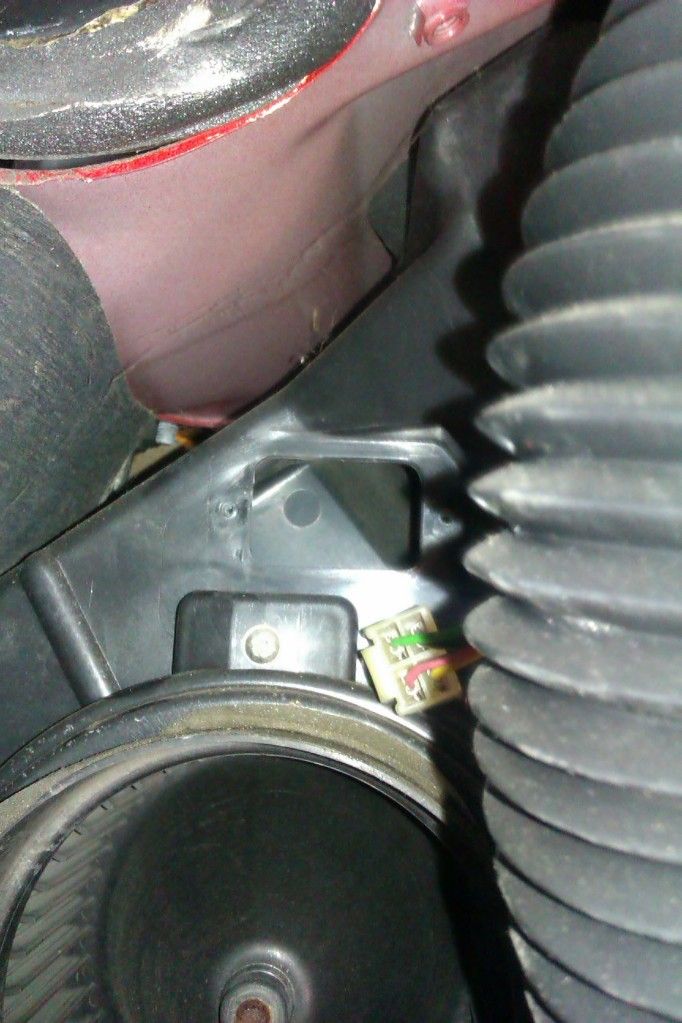
behind the big flexible duct, you should see this (but there will be a bit with a plug attached in the hole lol
6. remove the plug, and the two phillips screws holding the resistor pack in. then remove the resistor pack.
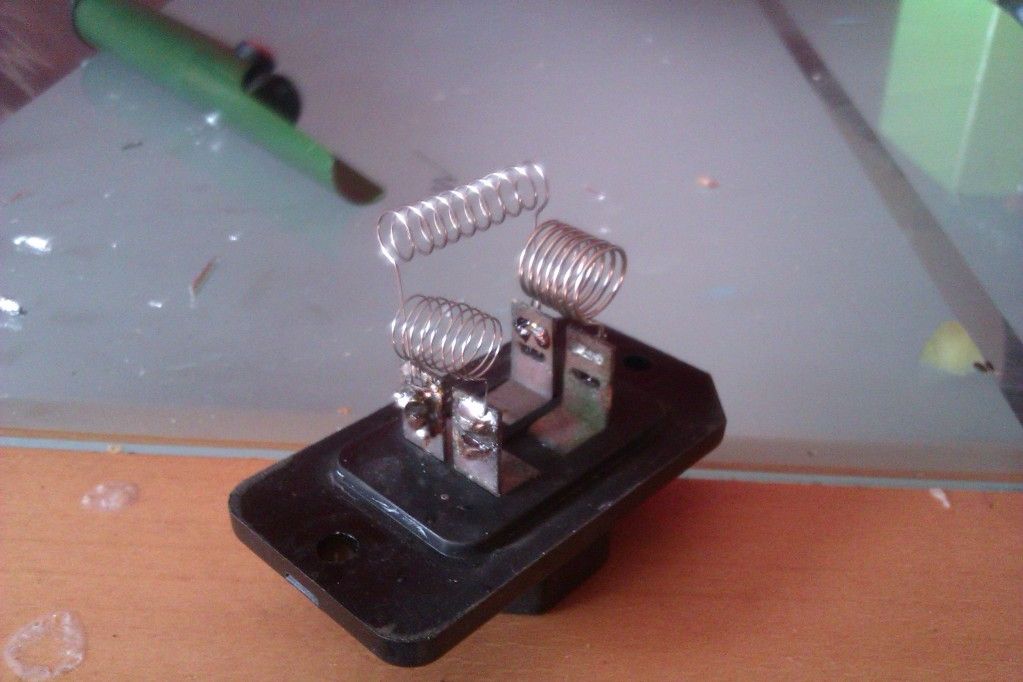
7. you now have the resistor pack in your hand. take a look for the broken coils. the thinnest one controls speed 1, the next up speed 2, and the third and thickest coil is speed three. if you have bought the kit from rezpax, you might as well replace all three for the new ones.
so, on to the actual repair bit:
8. get yourself a soldering iron, a solder sucker (much much easier with this, believe me) and some solder. begin by removing the three resistors, and removing all of the solder from the posts.
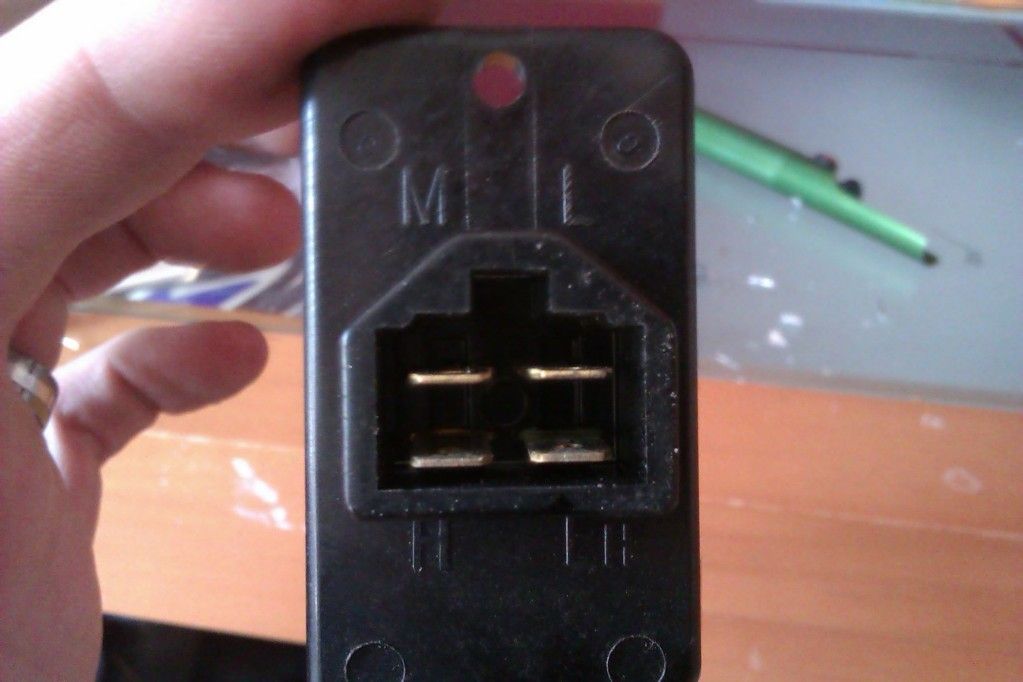
9. So, i hope that you remembered which pins were for which resistors

good job i took note isn't it

the thickest one goes between H and LH, the medium one between L and LH, and the fine one between M and L. i found the best way to do it is to fit all of the resistors first, then heat and solder each pin in turn. they do take some heating, and quite a bit of solder, but it really is easy, honest.
when finsished, it should look like this:
and then, refitting is the reverse of removal. simples
then test, and sit back and smile at your fully functioning fan

cheers,
Lee


 When i took it out i found it to be ok and had been replaced with a new unit a few years ago. saw no point in fixing it now as it aint broke.