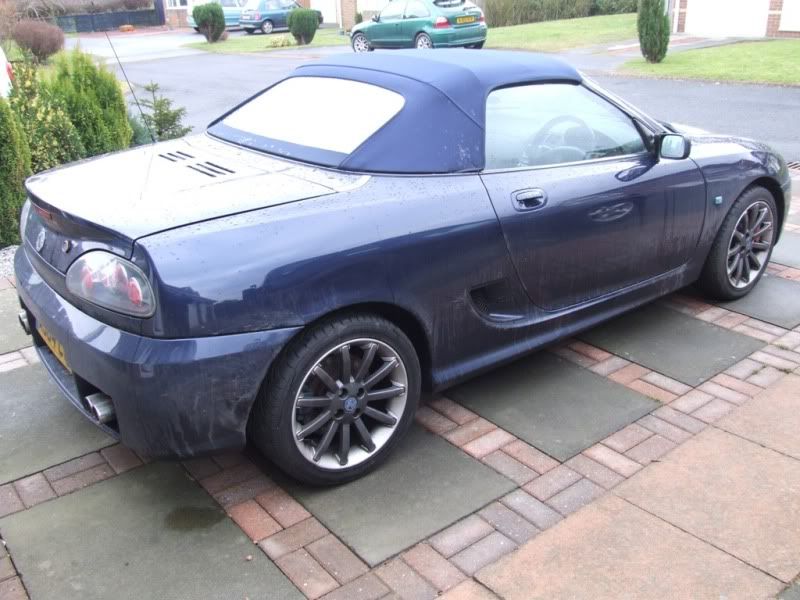
One problem that pops up more often than anything is “My car feels unstable”.
A lot of times this is put down to tyres or tyre pressures, but if these check out OK then it is worth checking the wheel bearings.
If the rear wheel bearings wear or collapse it will result in a lot of play on that wheel and it will start “self steering”, which means the wheel can actually move or steer a couple of degrees without any input from you. This will feel as though you are driving on ice, especially when cruising along a straight road such as a motorway.
The easiest way to check for play in the wheel bearings is to jack the car up so that the wheel is off the ground and grab the wheel at the 6 o’clock position (hand top and bottom) and the 2:45 position. In either of these positions, try to make the wheel rock around the hub. In other words push with one hand while pulling with the other and reverse the motion.
Do this several times.
The wheel should not move.
If it does then you need to look to see whether the wheel is rocking while the hub stays still or if the wheel and the hub are moving. If it is the former then it is most likely the wheel bearing. If it is the latter then you may have play in one of the many bushes or control arms.
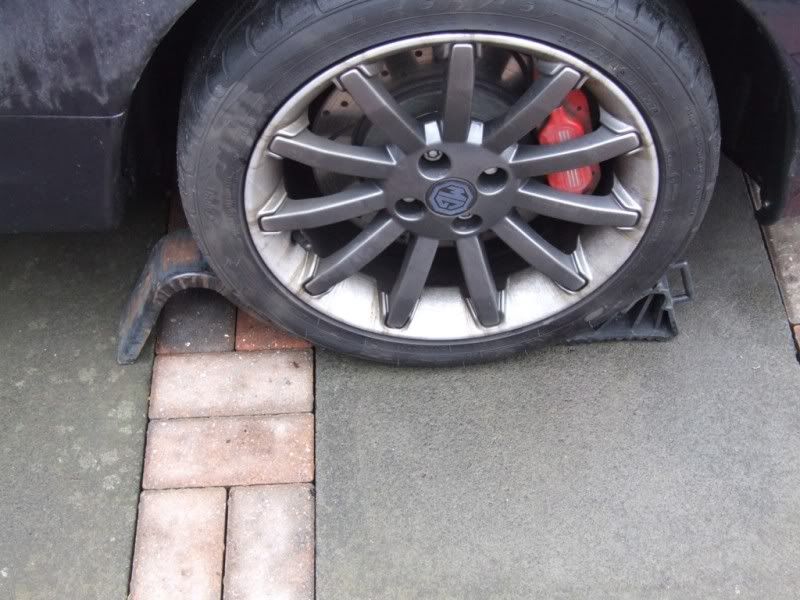
If it is the wheel bearing then you will see something like this, which is not good.
As you can see, my rear offside bearing has gone, so I need to change the bearing.
Two things which I prefer to do which affect this how to.
One is that I prefer, when working on the drivetrain, to change things in pairs. So if one bearing gets changed then both do, if one tyre gets changed then they both do. You get the idea.
The second is that I bought 2 new hubs, bearings, drive flanges and top ball joints so that I could assemble them prior to working on the car. You can see this procedure here http://www.mgfforum.com/forum/22-cjjs-guides/19222-new-wheel-bearings-how-to-press-in
The usual procedure is to remove the hubs and then hand them over to a garage who will press out the old bearings and press in the new ones. This relies on the hubs/drive flanges being serviceable, but either could have worn and simply fitting new bearings may not solve your problem, or may solve it for a short time. This, plus the fact that things tend to be seized and get damaged when removing was why I decided to use new hubs etc.
So, down to the nitty gritty.
First you need to remove the old hub, even if you are just replacing the bearing.
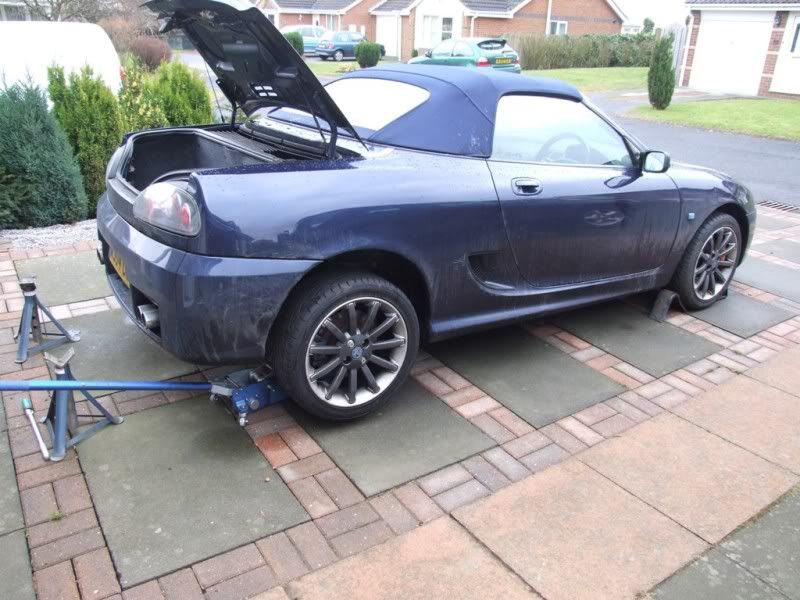
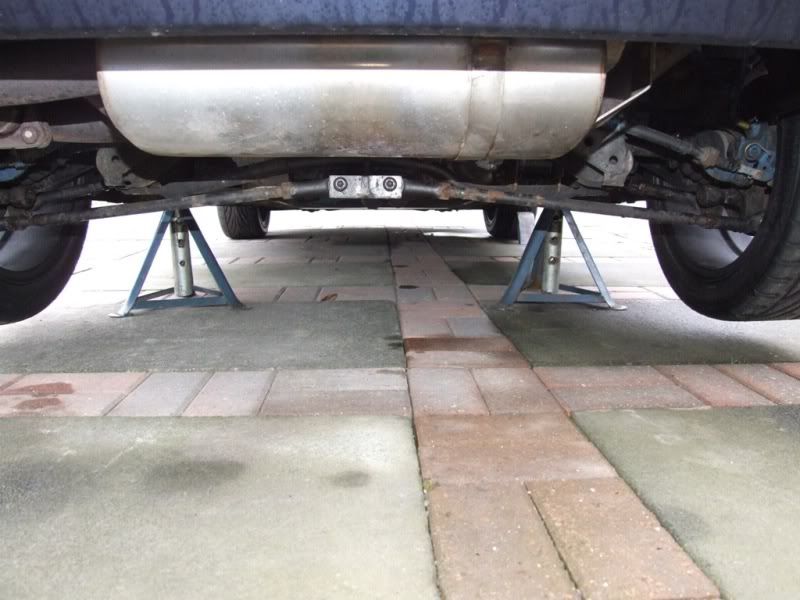
So, park your car on a level surface that can take the weight of the car on axle stands so that it can’t move or fall.
Next, chock the front wheels so that the car cannot move when you jack it up at the rear.
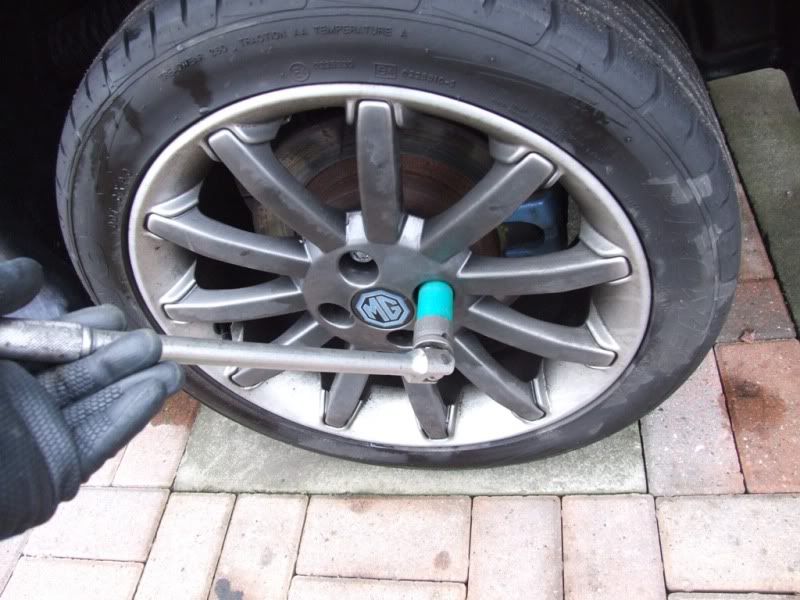
Loosen the wheel nuts of the wheel that you will be working on, but do not remove them.
Then jack the car up so that the wheel is clear of the ground.
Now place an axle stand on a load bearing member such as the subframe. DO NOT work on the car if it is only supported by the jack. They are not designed for it and if they collapse it will damage the car at best, at worst it will damage you.
Once the car is safely supported you can remove the wheel nuts and the wheel. Try to lie the wheel on a soft surface so that it doesn’t fall onto the face or get scratched/chipped on concrete etc.
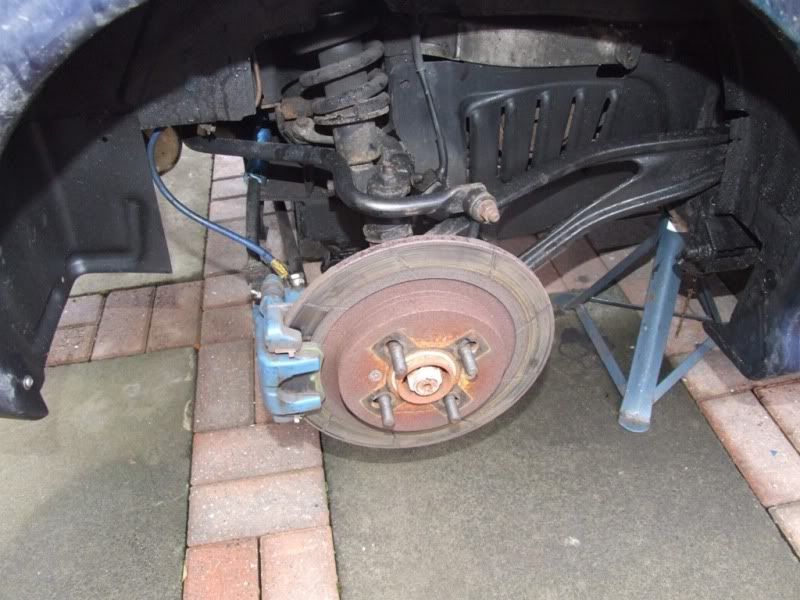
Now loosen and remove the two bolts holding the brake calliper to the hub. You will need a 15mm socket.
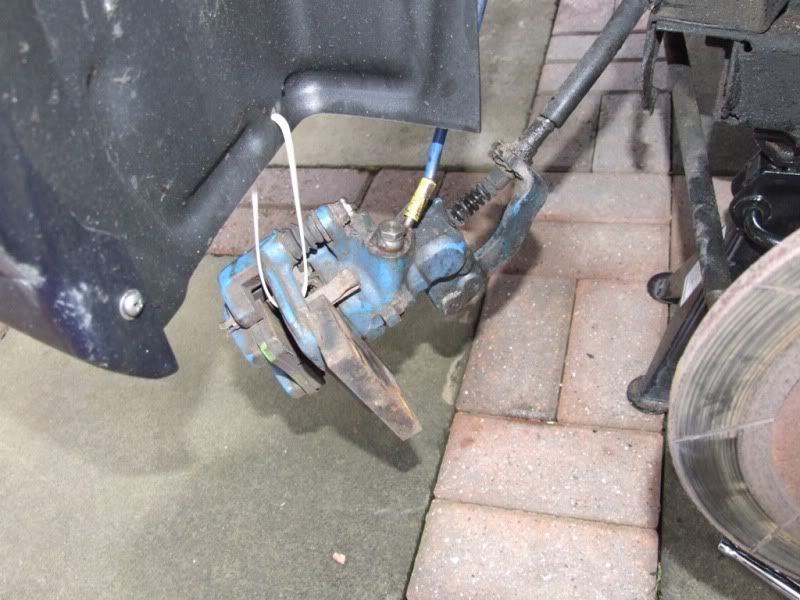
Release the handbrake and slide the calliper off the disc. Try to support the calliper so that it isn’t hanging by the brake hose as this will put strain on the hose. I tie wrapped the calliper to the wheel arch out of the way.
Loosen and remove the two disc retaining screws. An impact driver and hammer is best for this. Set it to tighten, give a sharp blow then set it to loosen and give it a couple of sharp blows. The screws should come loose and you can screw them out. If they become rounded off then you may have to drill them out and retap. I had to drill one, but that was because it was a crappy allen headed screw.
Now knock the disc off with sharp hammer blows from the back of the disc. It may take some time and force if the discs have been on for a while. Try turning through 90 degrees, tapping, turn through 90 degrees, tapping etc etc until it starts to move. Try not to damage the discs if you are reusing them, but it would take a fair bit of hammering to do that. My discs are on and off regularly so came off quite easily.
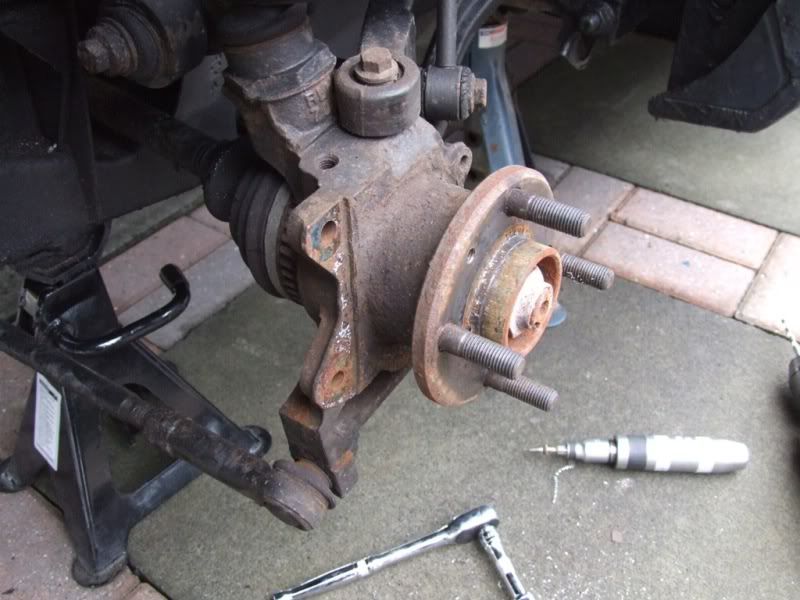
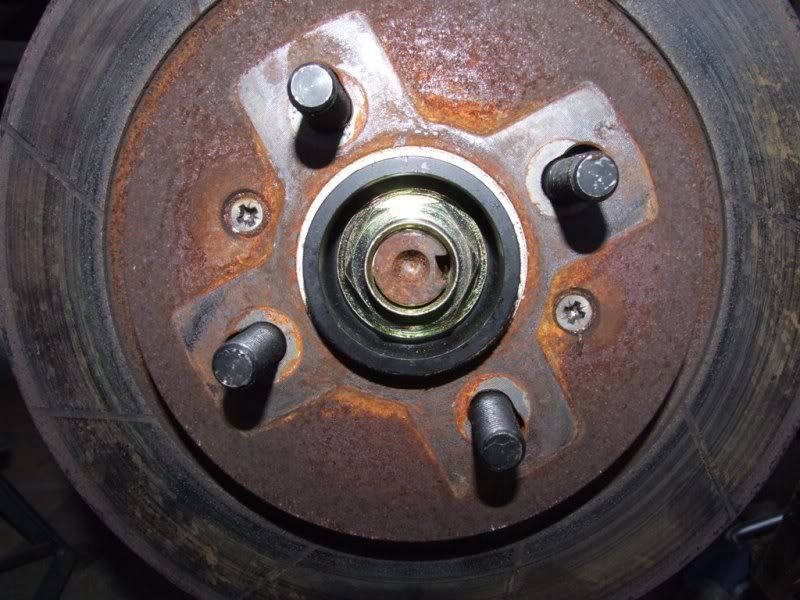
Now you can see the hub and drive flange.
You need to disconnect all of the arms, ABS sensor (if fitted) and the driveshaft itself to get the hub free. The order you do this is down to you, but this is the order that I found easiest.
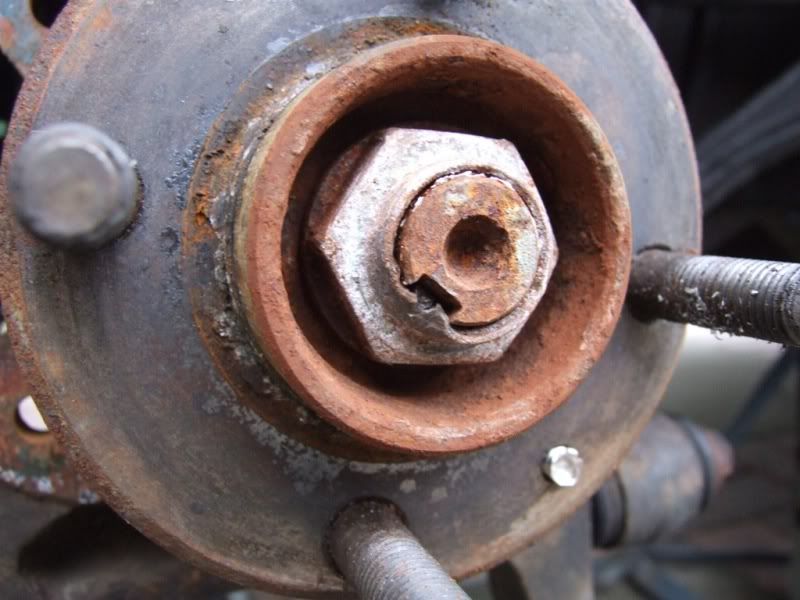
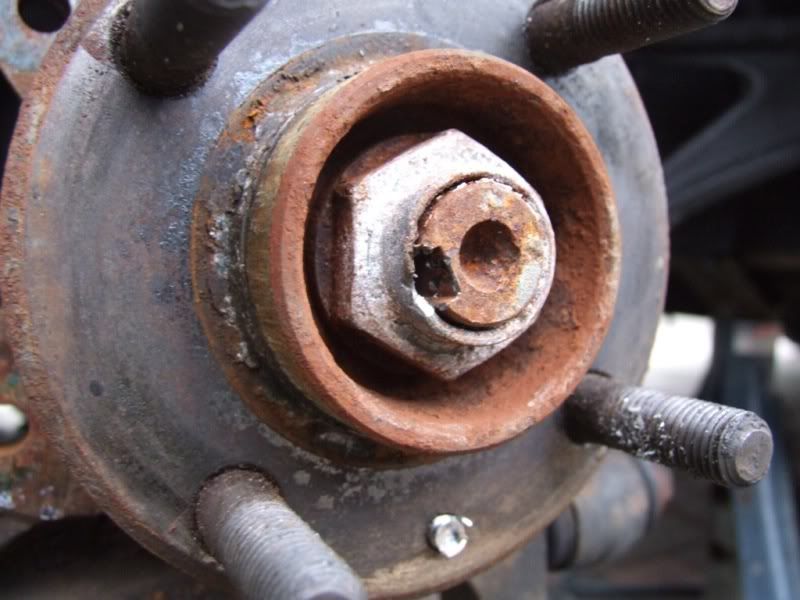
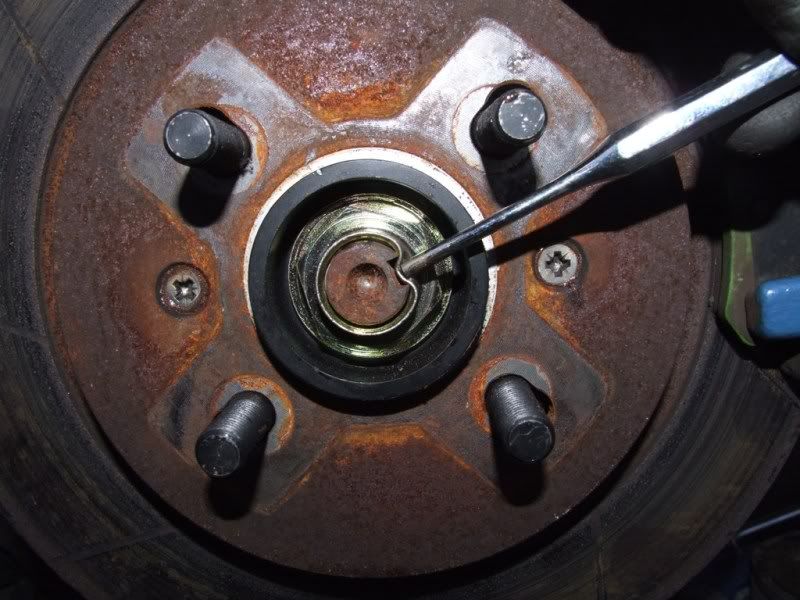
The hub nut, which holds the drive flange onto the driveshaft, is staked so that the nut will not come undone. This means that a portion of the nut is hammered into a recess on the driveshaft.
You need to use a small chisel or hole punch and un stake the nut by hammering out the bit that is bent in.
It has to be totally clear of the recess otherwise it will make the nut difficult to remove.
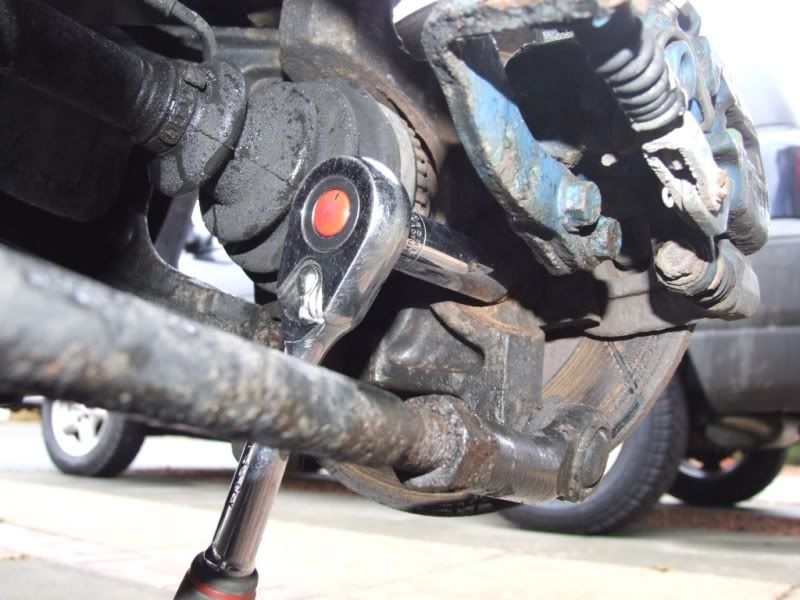
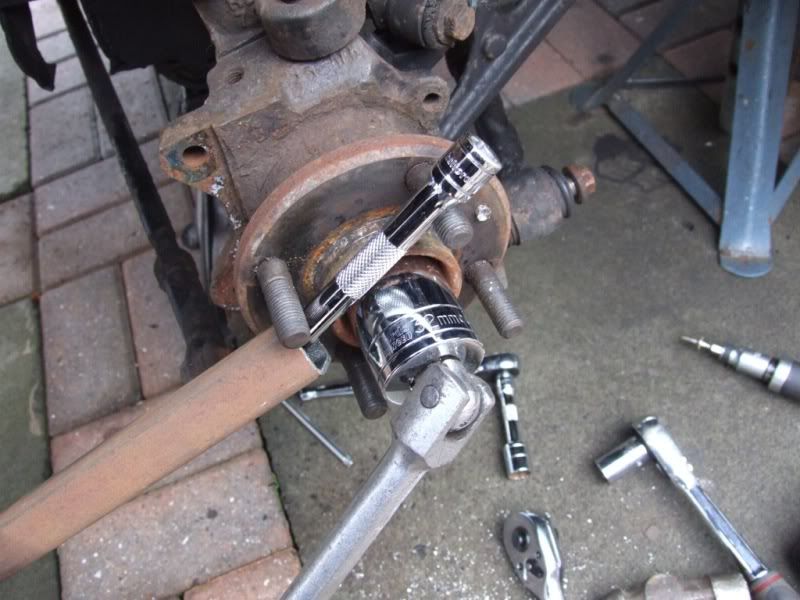
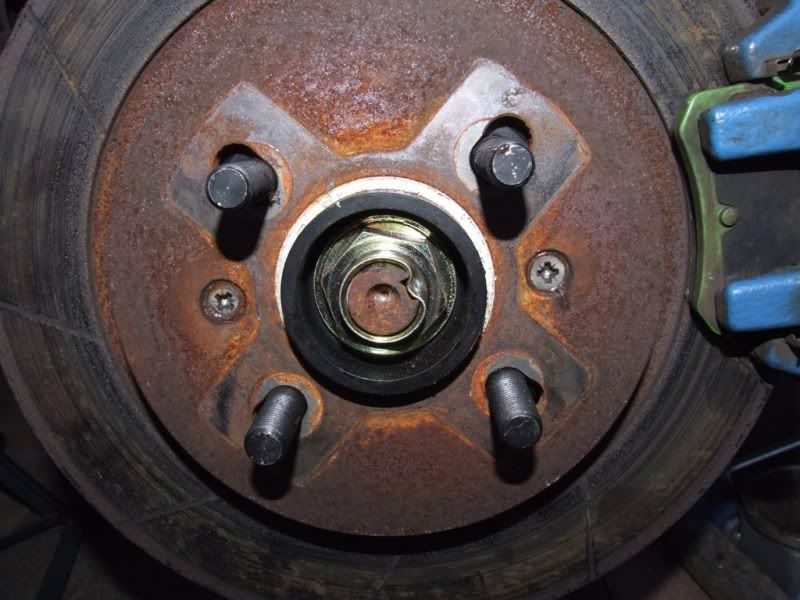
Now, using a 32mm socket and long bar, slacken off the hub nut until it is just hand tight. I locked the hub off with a ¼ drive extension and square tube acting against the wheel studs. You might find it easier to do this before removing the brakes and have someone push the brake pedal. DO NOT use the pedal or handbrake if the calliper is removed on the rear discs.
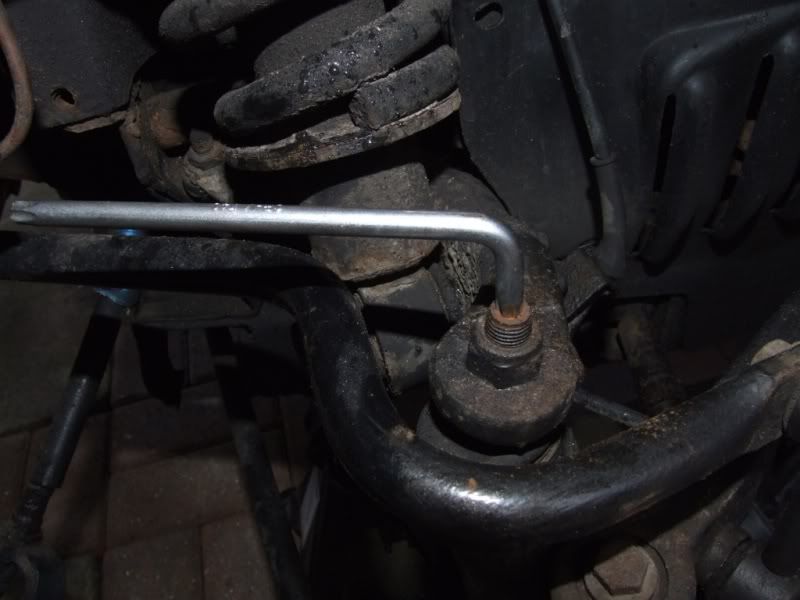
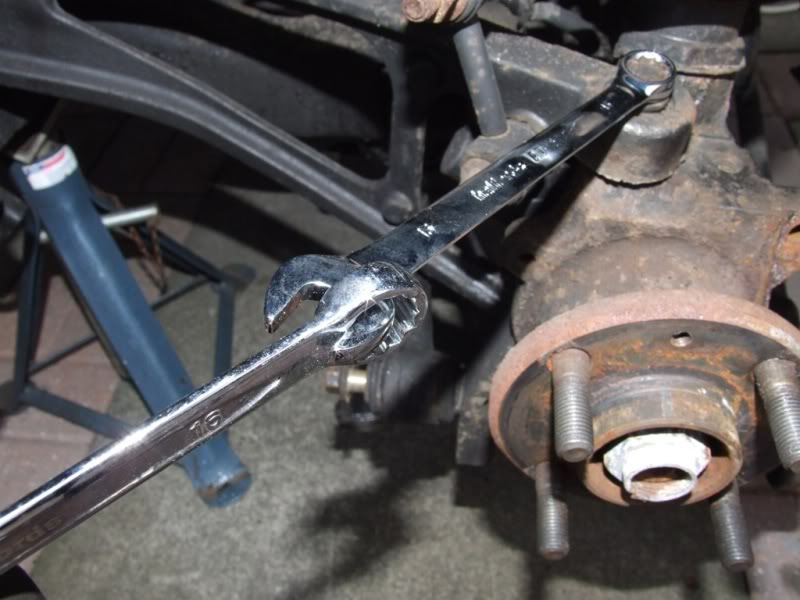
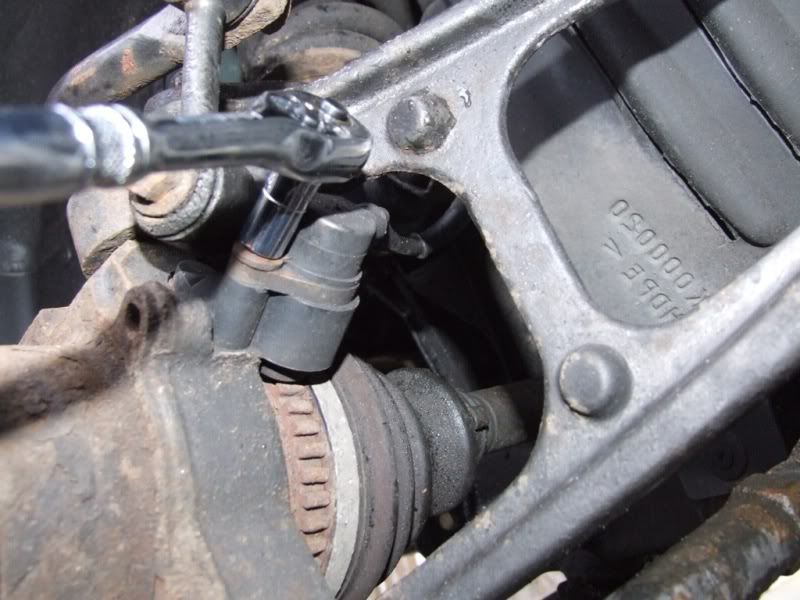
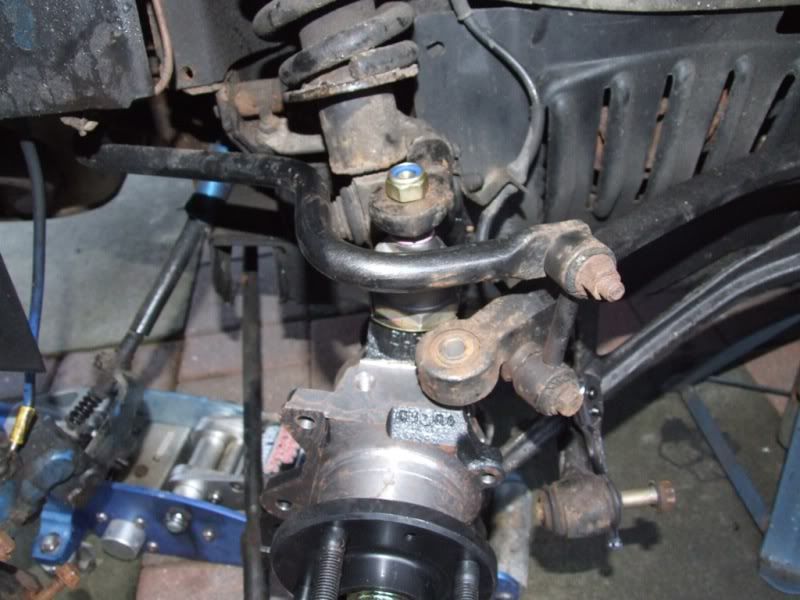
Next, Loosen the top ball joint. To do this you will need a 19mm ring spanner and a T40 torx which fits into the top of the thread. Before you start you might find that the torx recess in the top of the thread is full of crap/corrosion. It is best to clean this up first. Use a small drill bit and just twist it into the hole to remove the crud. If you don’t do this the torx key will not go far enough down and will result in the torx hole rounding off. If this happens it is now down to you and a nut splitter/grinder to get the nut off.
Try to get as much crap out as possible.
Next, hammer the torx driver into the hole to clean the splines out. And clean the threads using a wire brush to get any rust off. This will make it easier to undo the nut.
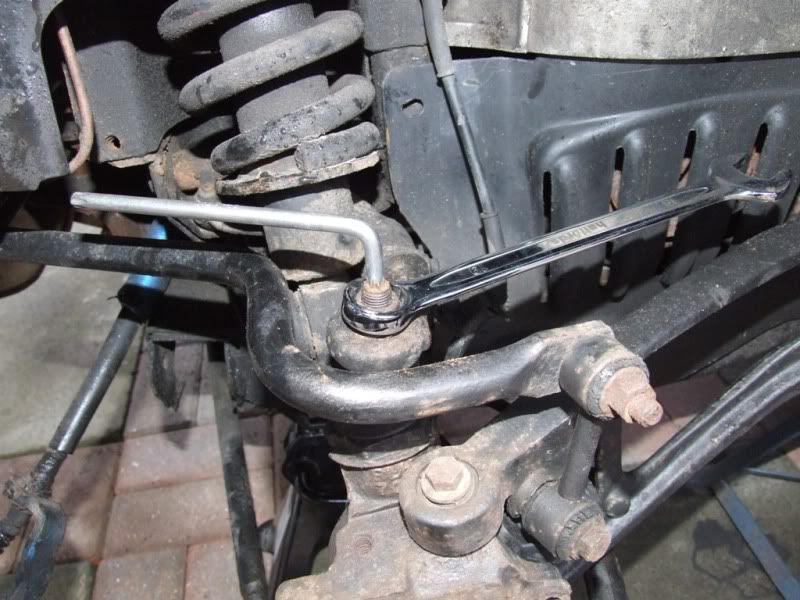
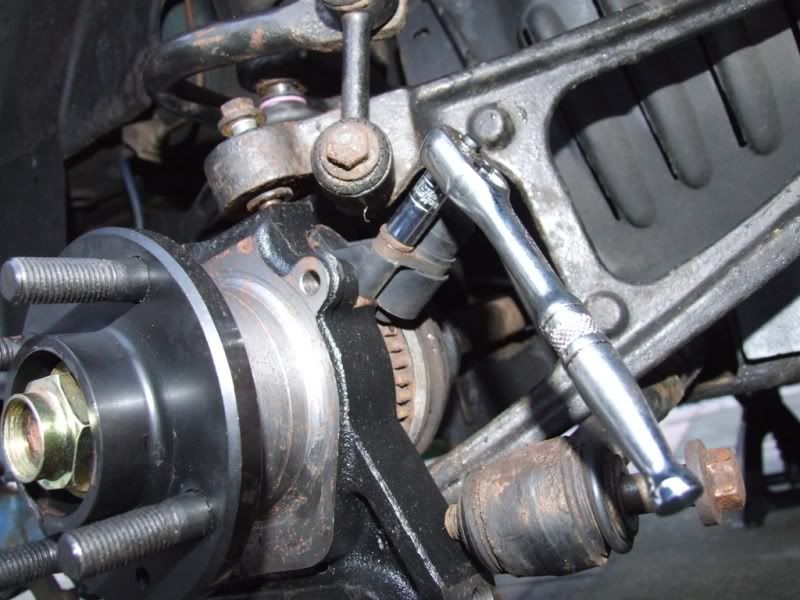
Using the 19mm spanner, loosen the top ball joint nut. Once it starts loosening you will have to hold the thread still using the torx key. Leave the nut on enough to take the weight of the hub.
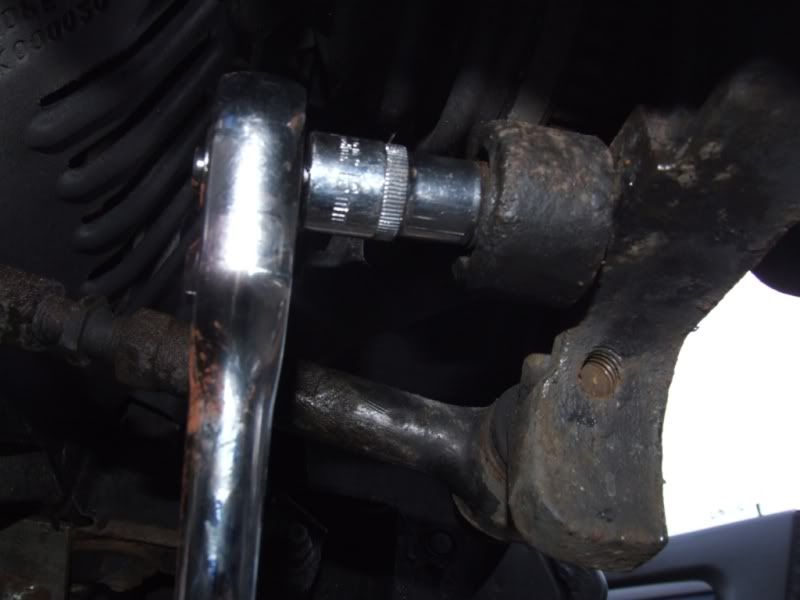
Next, clean out the torx recess on the track control ball joint to hub thread and use the same procedure to loosen the nut using the 19mm spanner. Leave the nut just on the threads.
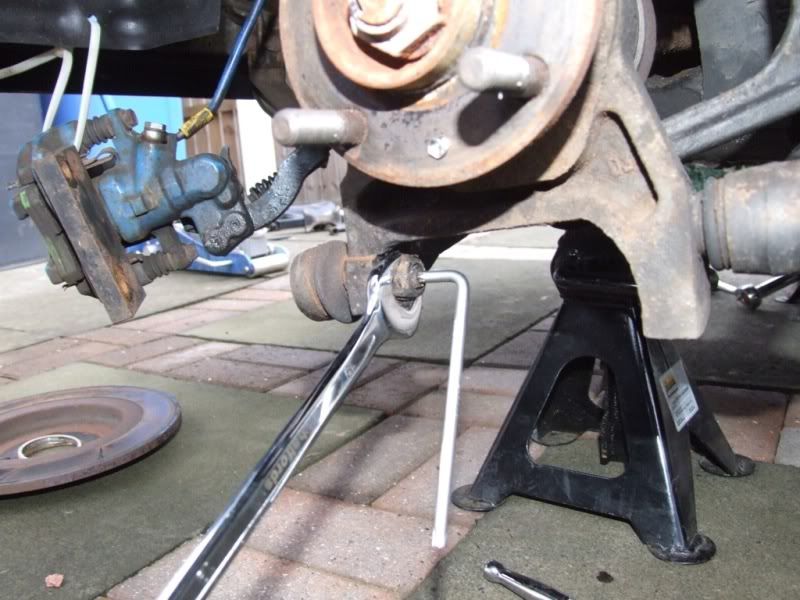
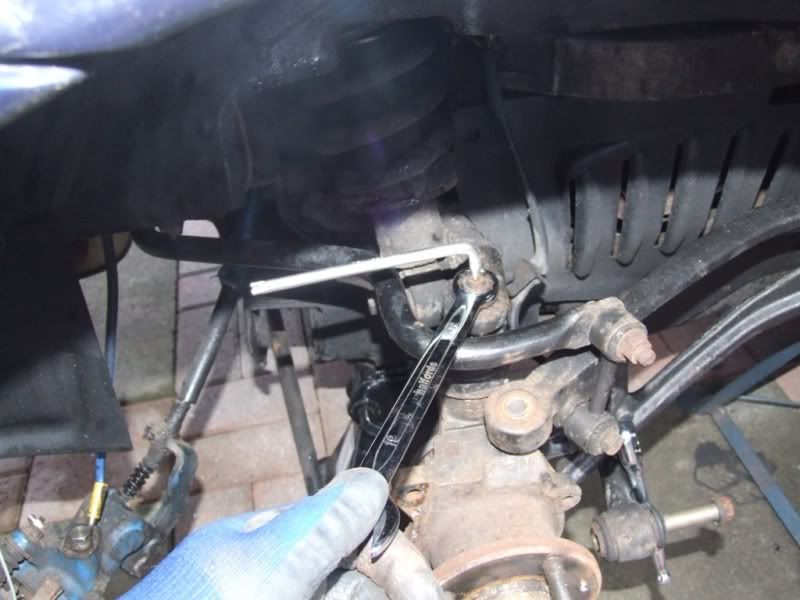
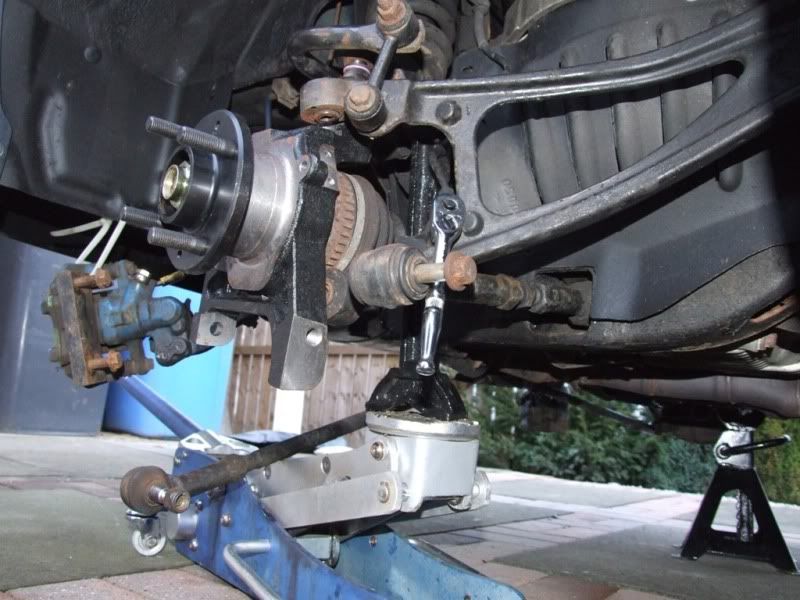
Next, undo the lower link to hub bolt using a 15mm socket and leave it in place by a couple of threads.
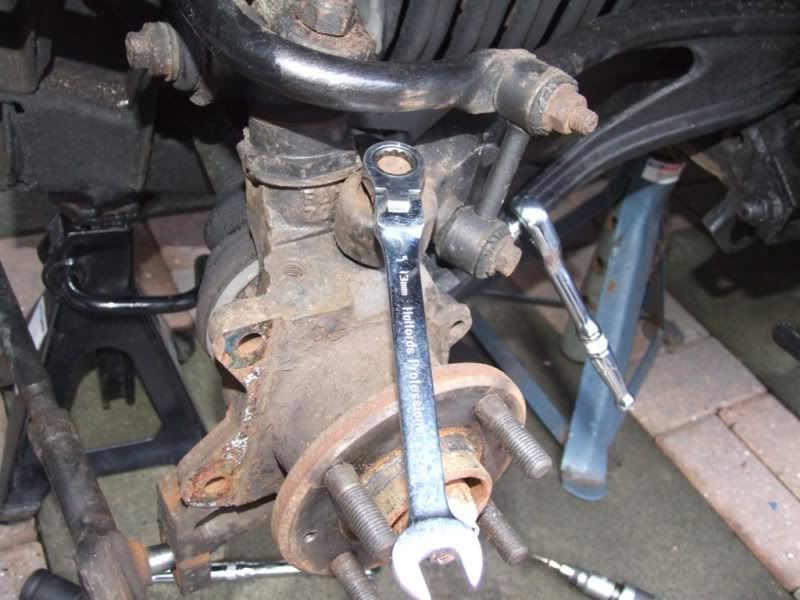
Next undo the top trailing arm to hub bolt using a 13mm spanner. You may need to extend the spanner with a bar, or use a method of linking 2 spanners together to get the extra leverage. This is a method often used by mechanics to get extra leverage. Put your left hand around where the 2 spanners join and apply steady force using you right hand. Be careful that the spanners don’t slip. Remove the bolt.
Now do the same with the 13mm bolt at the bottom rear of the hub. You can use a socket for this as access is better. Remove the bolt.
A word of warning now for those that don’t know. The reason that I have left some of the bolts/nuts on by a couple of threads is to hold the hub in its position. Once these nuts and bolts are fully removed there is nothing taking the weight of the hub. The hub is still connected to the driveshaft and the gearbox end of the driveshaft is only held in place by an internal retaining clip. If you pull on the hub, or allow it to sag too much it could result in the driveshaft coming out of the gearbox. This is bad as the contents of the gearbox will now empty over your drive. Gearbox oil is nasty, smelly and expensive.
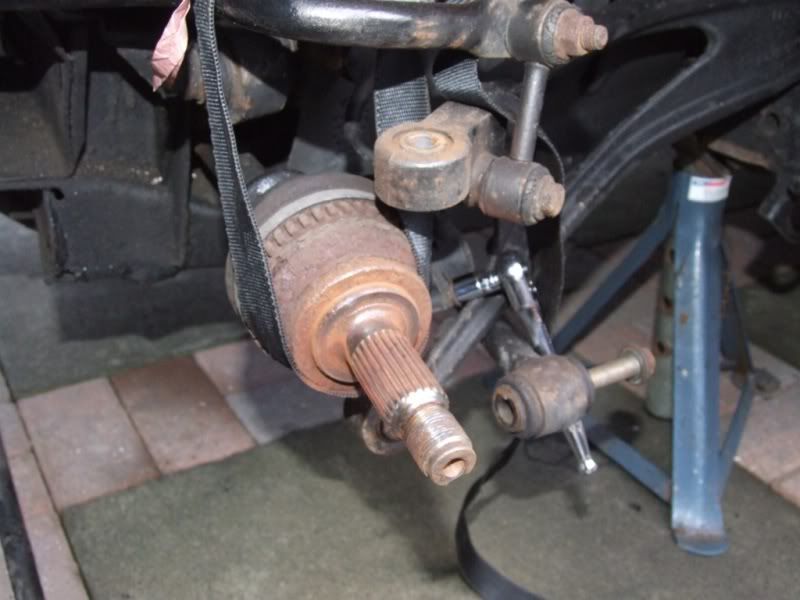
So, before we remove the final nuts and bolts, I supported the driveshaft with a strap and the hub with an axle stand and fully remove the hub nut.
Remove the lower link bolt
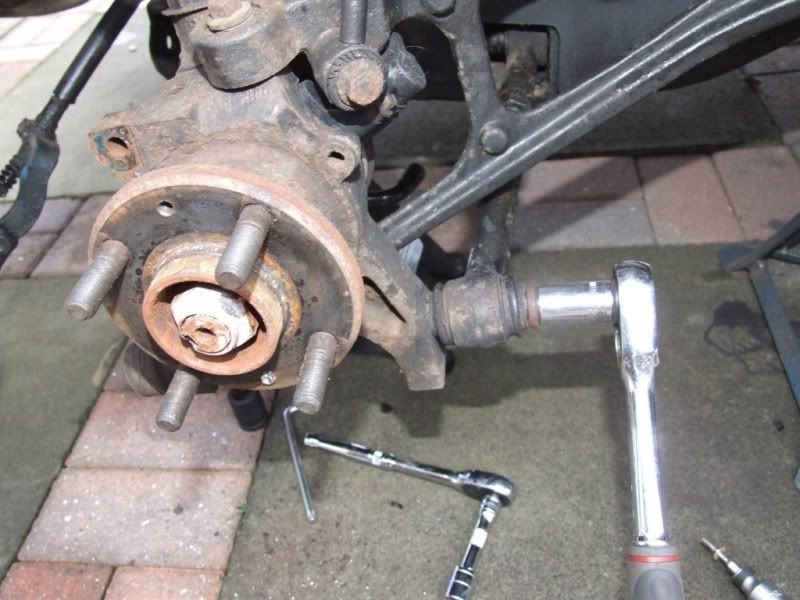
Now you should have enough movement to get an 8mm socket in and remove the ABS sensor (if fitted). Be careful not to shear the bolt, as I did, as you will need to drill and retap if you are reusing the hub. The sensor is partly obscured by the trailing arm and this is why we need a bit of movement so we can get it out. If you are reusing the hub and it is proving difficult to remove the sensor then you can unplug it at the other end of the lead, in the engine compartment and feed it through.
Now you can remove the track control arm
And finally the upper ball joint nut
You might find that you cannot get the threaded part of the upper ball joint clear of the arm. This is because the suspension is down on full travel. I used part of an axle stand and my jack to compress the arm to give more clearance.
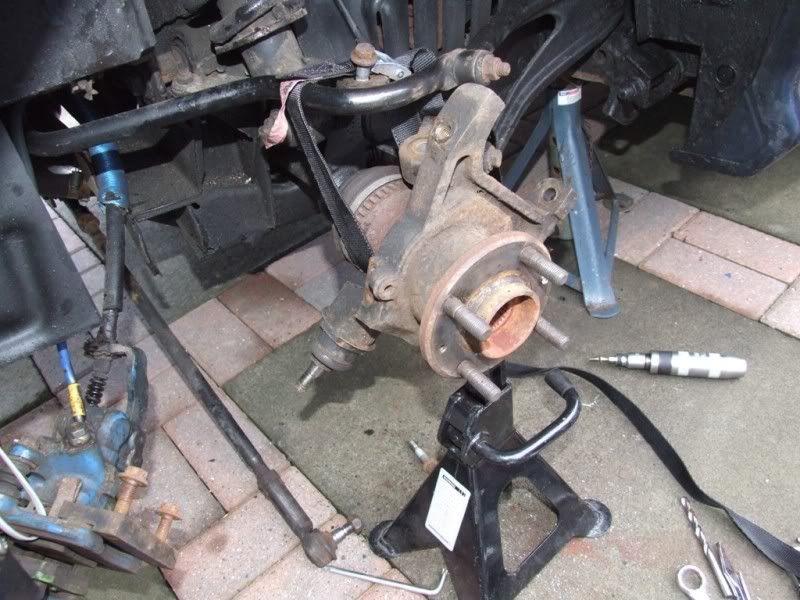
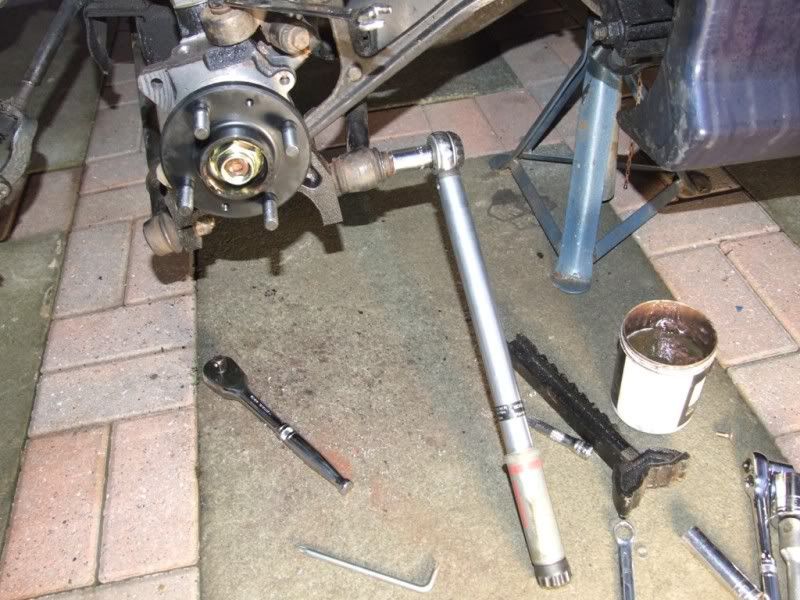
The hub is now free. Making sure that you do not pull on the drive shaft, ease the hub off the end of the driveshaft. I found it useful to put a long reach socket on the end of the drive shaft, where the hub nut used to be, and tap it gently with a hammer. This drove the shaft out of the drive flange.
The hub can now be pulled clear, leaving the driveshaft in place. You might want to use a wire brush to clean the splines and mating face to get rid of any rust.
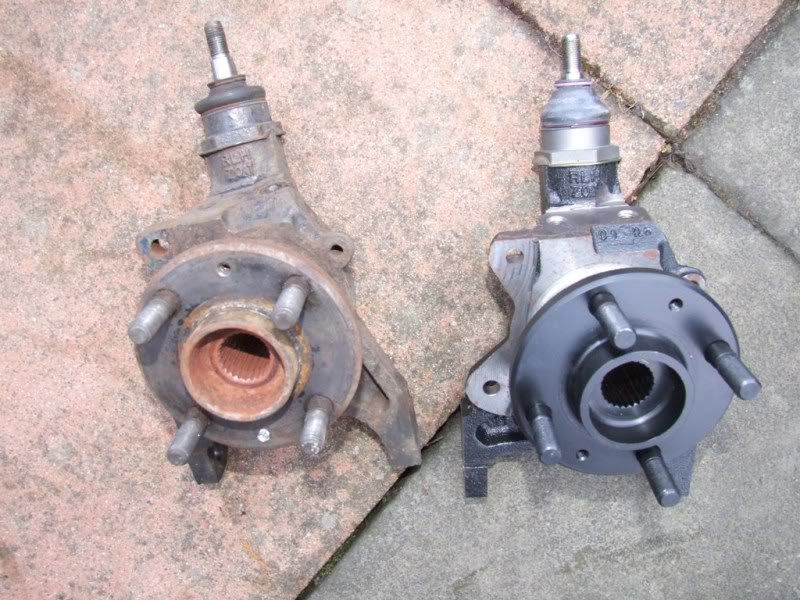
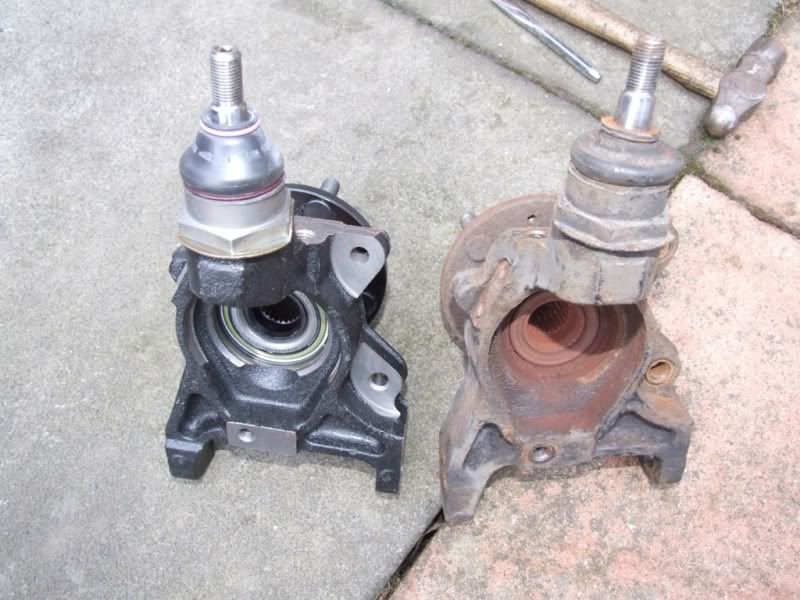
Well, that is the hub removed. It is your choice whether you now take the hub to get new bearings fitted, or build a hub from new parts.
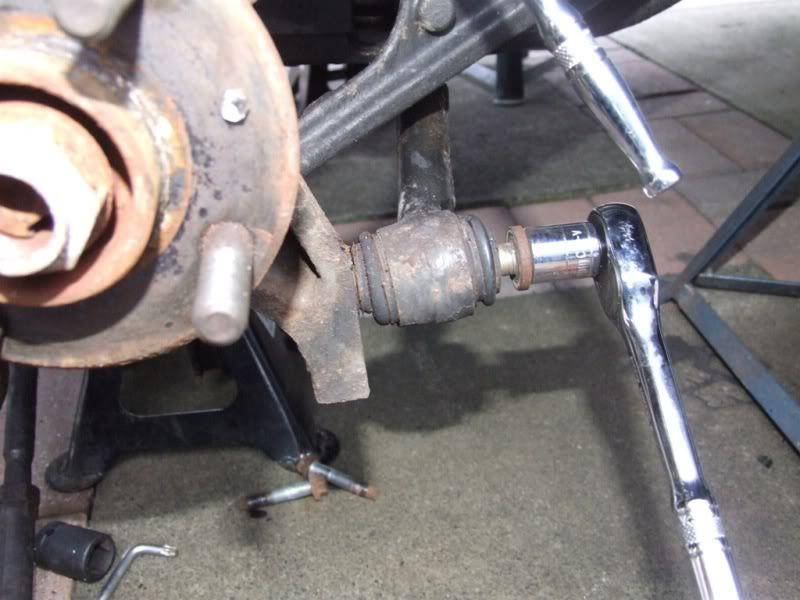
This was the old hub alongside the new hub.
And you can see the play on the old hub here
Refitting the hub is simply the reverse of removal.
Offer the hub up onto the splines of the driveshaft and hand tighten the new hub nut.
Using the jack again, compress the suspension and push the threaded part of the upper ball joint through the hole in the arm and loosely tighten the nut.
Loosely refit the lower link to the hub.
And reattach the ABS sensor (if fitted)
Now loosely reattach the track control arm to the hub.
Loosely attach the upper trailing arm to hub bolt
And the lower rear bolt.
Now, using an appropriate torque wrench, go around and torque the fittings to the correct setting.
You should consult your manual for the correct settings, but I torque mine to the following:
Upper ball joint nut....................................54Nm
Trailing arm to hub bolts............................60Nm
Track control arm to hub............................38Nm
Lower link arm to hub.................................100Nm
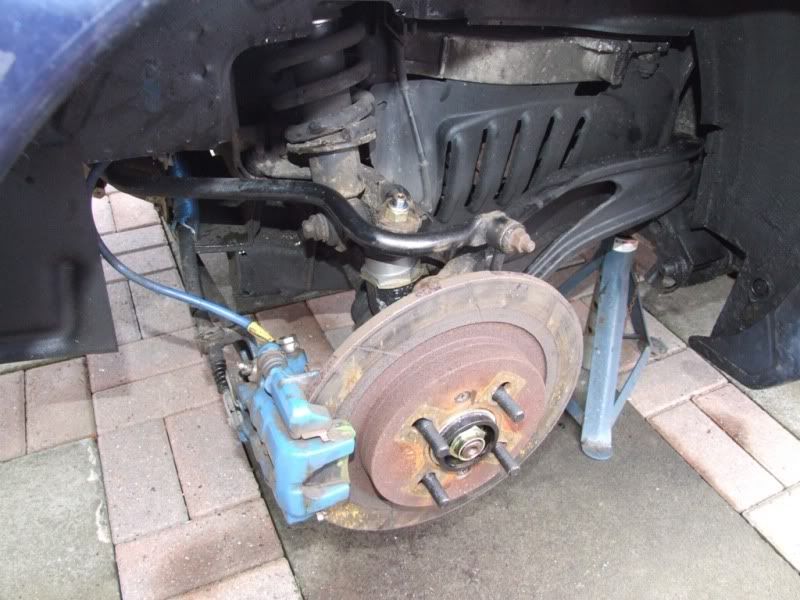
Now refit the disc and calliper
You can now pump the brake a few times before putting the handbrake on.
Get someone to start the engine (making sure the car is out of gear first, and apply the brakes quite hard.
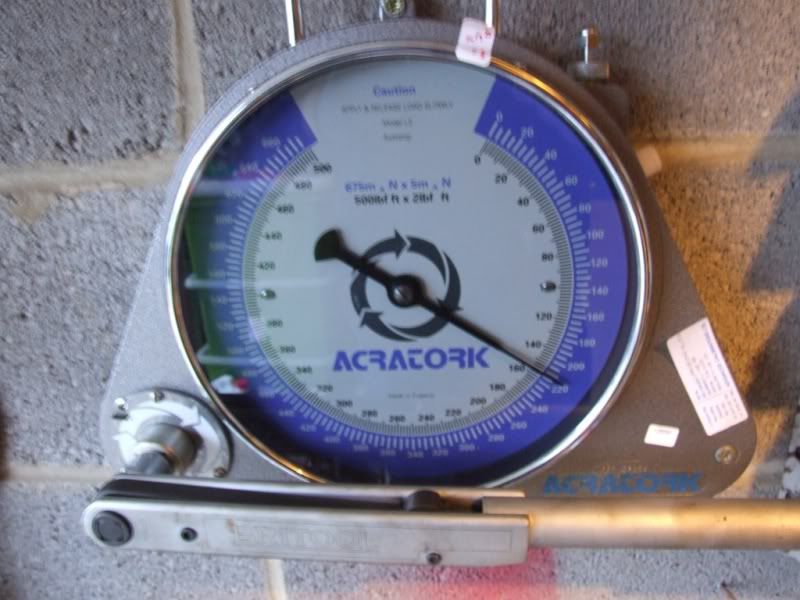
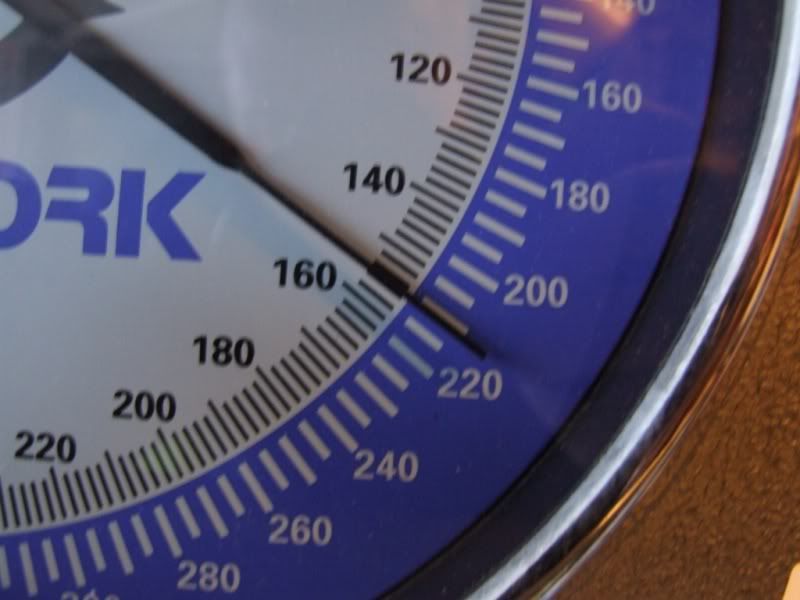
Using a suitable torque wrench, torque the hub nut to 210Nm.
I set my torque wrench using my torque tester and found quite a discrepancy from what the setting was on the wrench. I suppose that is what they are for.
Now you need to use a punch and hammer to stake the new hub nut. Don’t reuse the old nut.
Now, refit your road wheel and you are good to go.
Any work carried out on suspension components should be followed up with having the tracking done to check that the wheels are running true. I will be taking the car to have four wheel laser alignment done, which is the best method for the TF.
Hopefully this will have inspired someone to have a go at doing their own hubs, but please remember that the suspension is a critical component so should be correctly torque on completion. If you are in any doubt you can take the car to a garage and have them check your work.
This post is correct to the best of my knowledge but mistakes do happen. If you spot any mistakes, or have a better way of doing things then please feel free to add to the thread. I cannot take any responsibility for work carried out using this post and it is intended as a guide only, to be used alongside a current manual for your vehicle.


 It took a 3/4" socket set and a scaffolding pole to loosen the damn thing!

")


")
 Driving at 50 along a nice straight flat road was terrifying...like driving on black ice with a strong cross-wind. Turns out the rear offside wheel moves about 1cm top to bottom...makes the car steer itself a bit like a wonky supermarket trolley
  Booked in to my "local" MG garage (not easy living much of the time in France) to change the bearings and hub.
 Quack Quack.....