RADIATOR REPLACEMENT
I had to replace the radiator on our MGF recently.
Well I took some pictures at the time, so here goes on a How-to.
Firstly, A Warning- Don't mess with the cooling system unless you have confidence in your abilities. Also you will encounter hot things and sharp things and may burn yourself, scratch or cut yourself, or break things. It's not my fault.
OK, the radiator is well hidden beneath the slam panel, under the bonnet.
To begin with, I found it easier to remove the spare wheel and tool bag before I started. I also removed the black plastic shielding, it is held in with four plastic nuts and a plastic screw as I wanted access to the two coolant hoses. ( I had a cunning plan, explained later.) I also shifted the washer bottle out of the way.
The radiator is held to the panel by the two black metal and rubber plates, remove the four bolts and take off the brackets.
To remove the slam panel you then need to take out the other seven 10mm bolts.
Then remove the five screws. To get to the back of the (annoying) two nuts and bolts, you can ease the plastic front away enough to get a spanner to hold the bolts.
Using my new Aldi arc welder, I tacked the bolts to the bracket to make re-fitment easier. (If you don't have a welder, replace the two bolts with slightly longer ones, so that you can tighten a nut down onto the bracket to hold the bolt(s)before eventually replacing the slam panel and tightening the original nuts.)
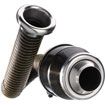
It is also possible to rplace the loose nut and bolt by fiting two nutserts into the bracket. Then you just bolt into the fitted nuts.
Nutsert and fitting tool.
The panel will then lift away. You do not need to touch the bonnet catch and release cable. With the spare wheel removed, the panel will sit in its place with cable still attached.
A good idea to grease up the bonnet release while it's available. The (rusty)security shield is held by two 8mm bolts. (
In addition, it is well worth using a cable tie or similar to secure the release cable end to the lever. These have an annoying habit of coming adrift leaving you unable to access under the bonnet.)
Ooh look! - a radiator.
Now you need to disconnect the top and bottom hose. Check the hoses for any signs of wear or cracks. They are held on with spring clips that need to be compressed to release them. As taking the hoses off at this point this will allow all my coolant to escape, I clamped the hoses between two flat bits of wood.(The cunning plan)
This means that only the coolant in the radiator would be lost.
With the hoses free, the radiator is only now held in position by two further rubber locating holes in the cross member. Ease the radiator up to free the locating pins. Now you can lean the top of the radiator forward in order to access and disconnect the fan connector.
Now ease the radiator up and out.
Not a pretty sight! This radiator is probably the original and is therefore at least seven years old. Most of the cooling fins are rotten, and you can see the temporary repair the AA carried out.
Nice shiny new radiator.
I flushed the new radiator with a hosepipe just to ensure there were no foreign bodies in there.
The fan is held on with three fixed bolts, so I swapped the fan to the new one and tightened the three holding nuts.
The radiator is ready to go in now. Ease it in, connect the fan plug and then fit the locating pins into the lower rubber brackets. I found a little grease on the pins allowed them to slide in smoothly. Do make sure the bleed/fill hole is at the top!
Push the hoses back on and refit the spring clips.
Jacking the front of the car now may aid any bleeding necessary.
Now I refilled the radiator with some coolant I had prepared earlier in a clean container. Once it was full, I slowly released the clamp on the bottom hose. Once the hose was fully open and the radiator full again, I repeated the procedure with the top hose.
I then fitted a new Mike Satur alloy radiator bleed/fill screw I had purchased separately.
(Be aware that this MS product only fits the thread on the OE radiator. Your new radiator may have a different thread.)
Now, in theory, there should have been no chance of air getting into the system. However, as the coolant system had completely emptied itself earlier in the week, I still bled the system. There are three bleed points, the radiator bleed screw; the heater bleed screw on the bulkhead;
and the bleed screw on the metal coolant pipe on the engine beneath the throttle body. I could write a book on bleeding, but will spare you.
Check the level in the expansion tank, top up if necessary to the maximum level, refit the pressure cap and start the engine. Keep checking the level as the engine warms up, check for leaks at the radiator.
Assuming all is OK, refit the slam panel; the top radiator locating brackets; the washer bottle; the black plastic shroud, and the spare wheel and tools.
Finally, I was much impressed by Budget-radiators78 on Ebay. Ally MGF radiator for £47.99. Fits perfectly, looks a hell of a lot better than the OE.
It was delivered incredibly quickly, despite me ****ing up the Paypal payment.

 Topic Author


")

")


 (I will take a picture for posterity before it comes out!) Despite lots of WD40 and gentle (!) persuasion - it will not budge. My gentle persuasion has also opened the way for the radiator to spring a few leaks
  Hence I will be replacing the whole thing!! I am thinking of buying from Budget Radiators too (even though their prices have crept up since you bought!) and had thought about doing the Mike Satur bleed nipple. Question - did your's fit? You seem to suggest that it didn't.


 ) Luckily I was able to get both nuts on those awkward bolts first try. Life is good!