Well, I have had to change the central locking mechanism for the driver’s door. This is the second I have changed (first was the passenger door) so I thought I would take some photos as you have come to expect.
The first sign of problems is a whirring noise after the door locks/unlocks. It starts of as a quiet whir but gets louder as the fault gets worse. If you start hearing this order yourself a new lock (or fix the old one if the fault is the same as mine - see central locking repair post). Also DO NOT double lock your car (pressing remote twice) as the lock may fail completely when locked and you will be in for a lot of work and possible damage trying to remove the lock.
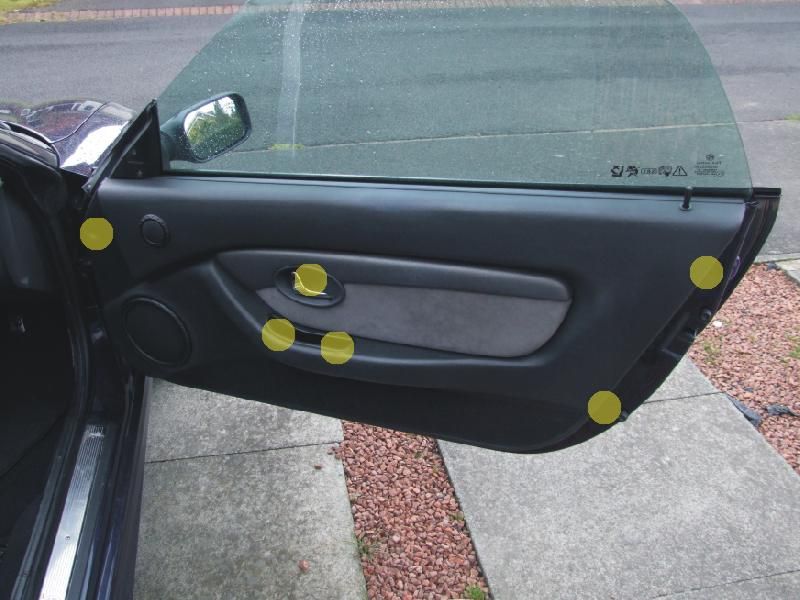
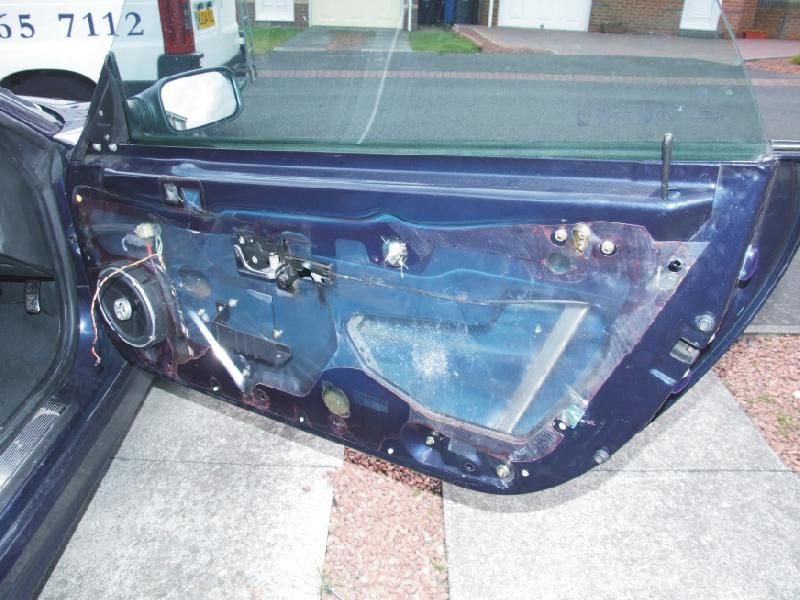
First of all you have to remove the door card. There are 6 screws that you need to remove before proceeding and are located around the door card as shown.
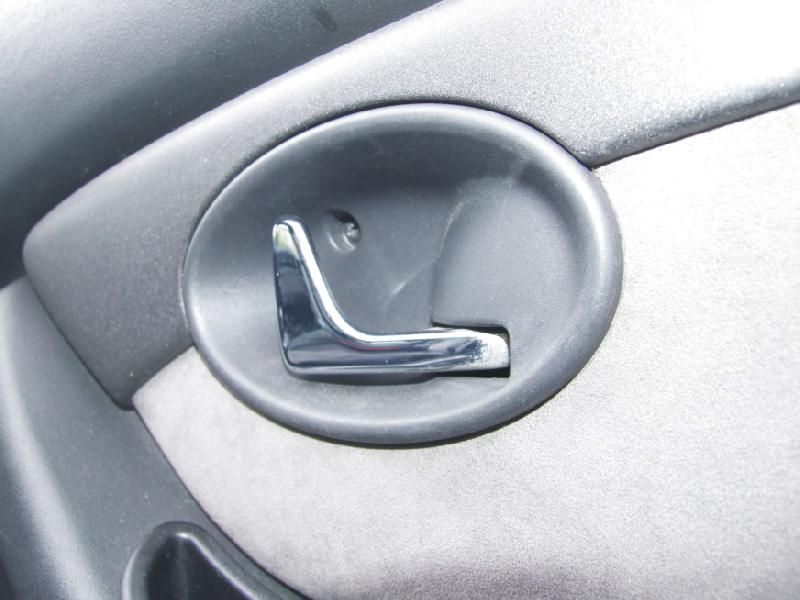
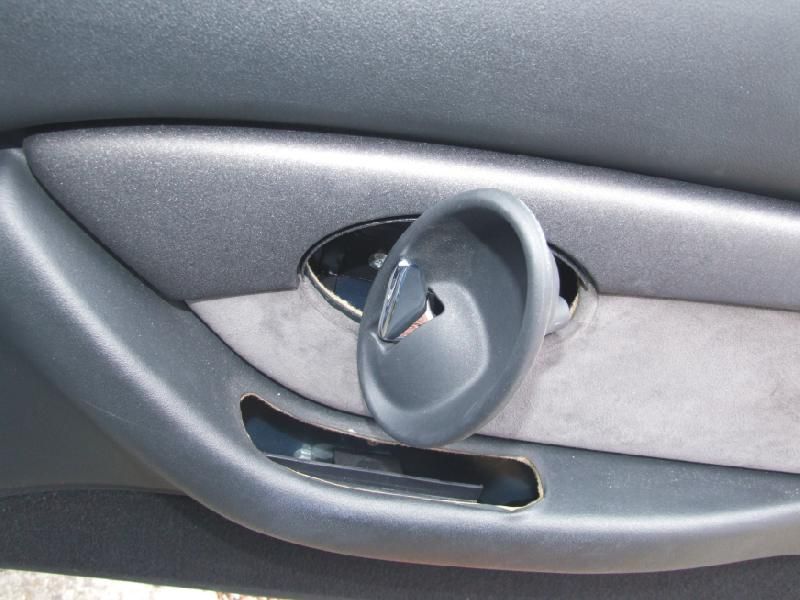
Two of the screws are in the door handle
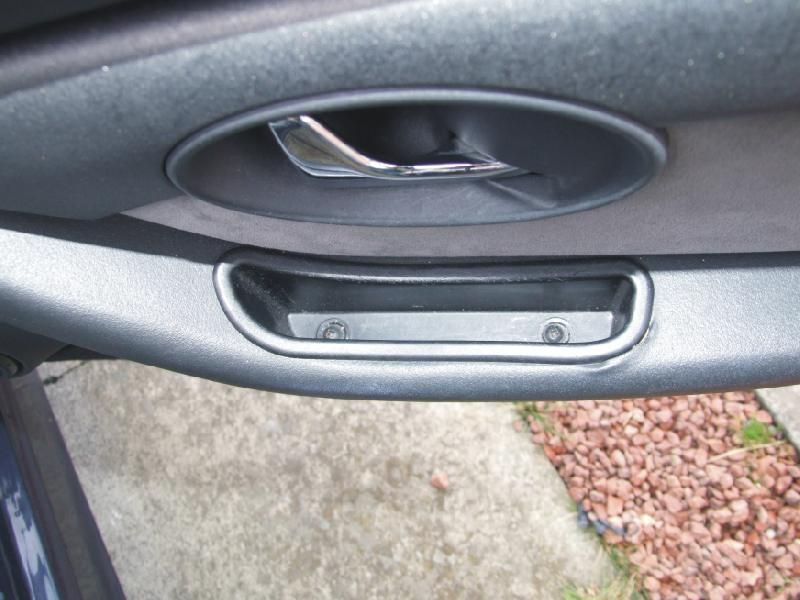
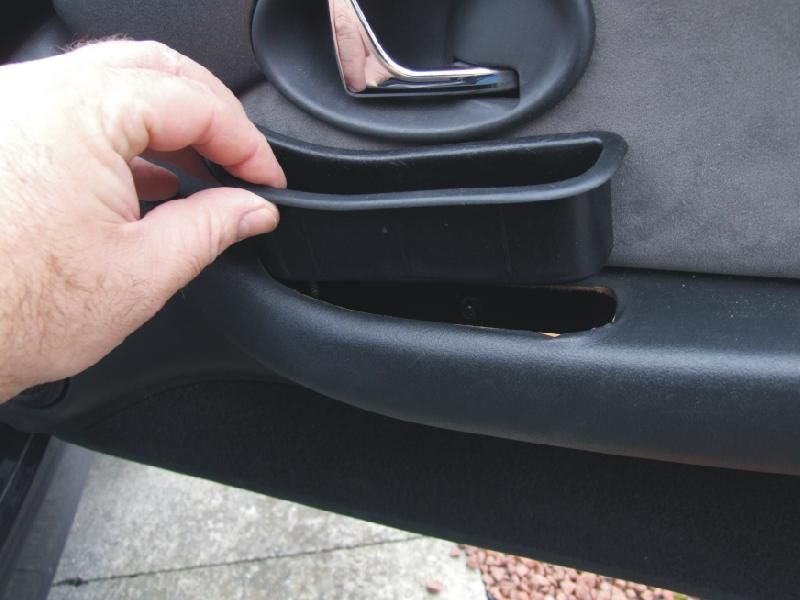
one behind the door pull
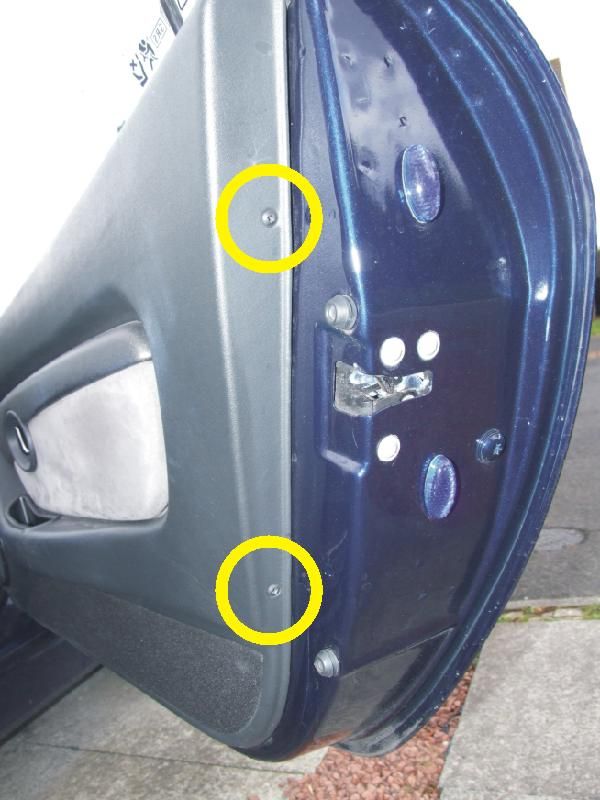
Two at the end of the door
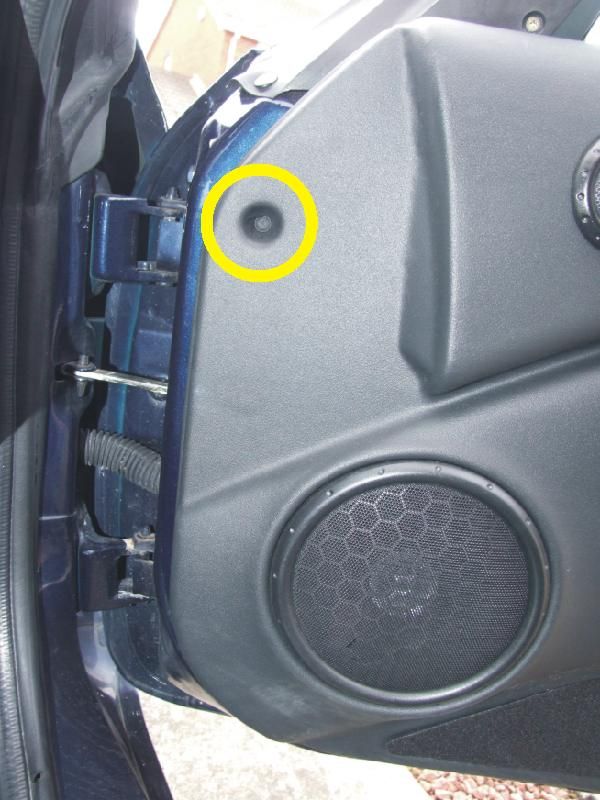
and one above the speaker
Remove the 2 screws in the door handle and pull upwards to remove
Remove the screw behind the door pull and pull the trim towards you. Swivel the trim through 90 degrees to clear the door pull.
Slide your fingers under the door card, working from the lock end, feeling for the fasteners. When you find one, get a finger each side of it and pull towards you to release it. Move along the bottom and front of the door card until all fasteners have been released. Be careful of sharp edges.
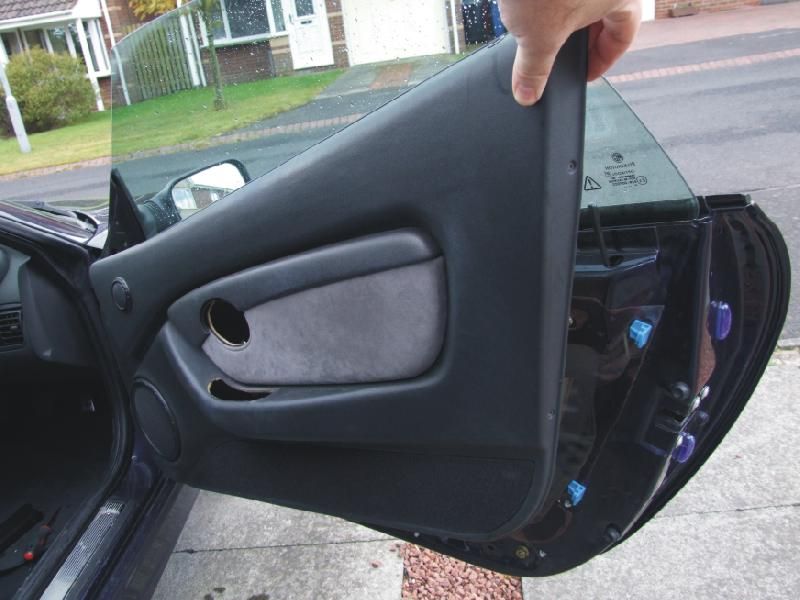
While pulling the bottom of the door card out, swivel it upward to release it from the top of the door
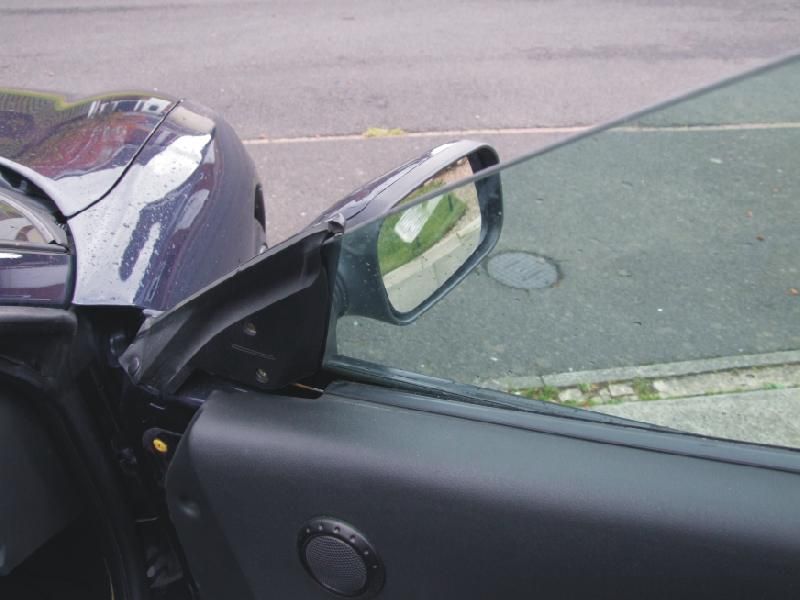
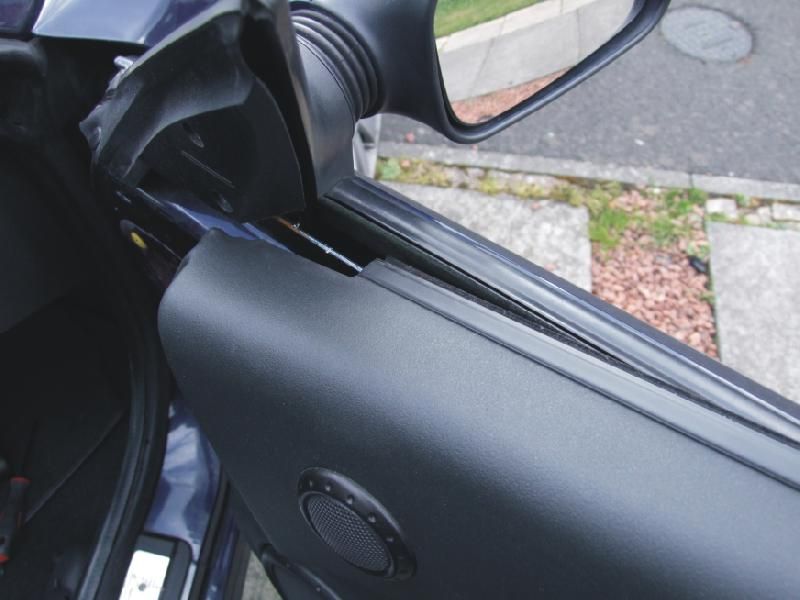
and slide backwards to clear the cheater/mirror assembly.
Now remove the door card, pausing to unplug the tweeter
If you can, remove the two blue clips to help in removal of the plastic membrane. But be warned, they break easily (I now have one less). It may be easier to just pull the membrane away from around the clips.
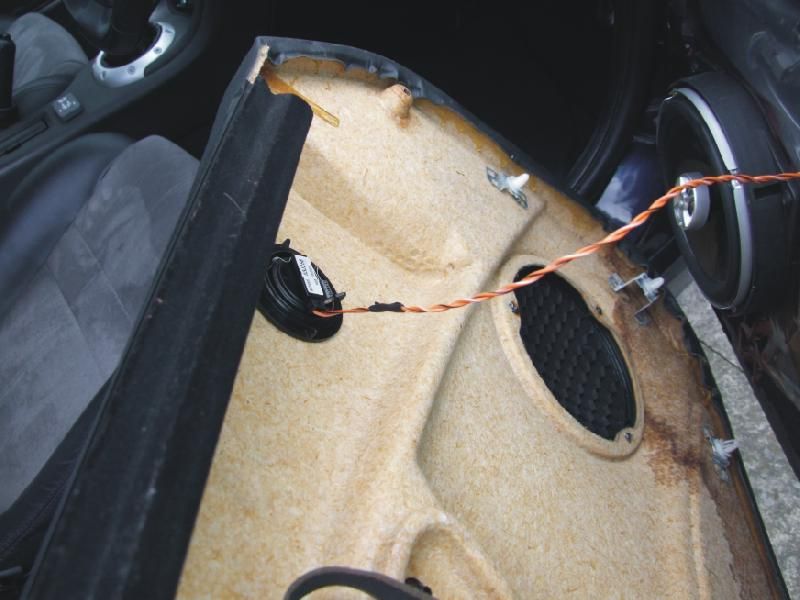
Now peel back the membrane enough to allow access to the door locking mechanism.
Carefully peel back the membrane as you will need to refit it when done. This is a waterproof membrane that stops your door cards from getting wet. It may be worth buying some spray adhesive to stick the membrane back down with.
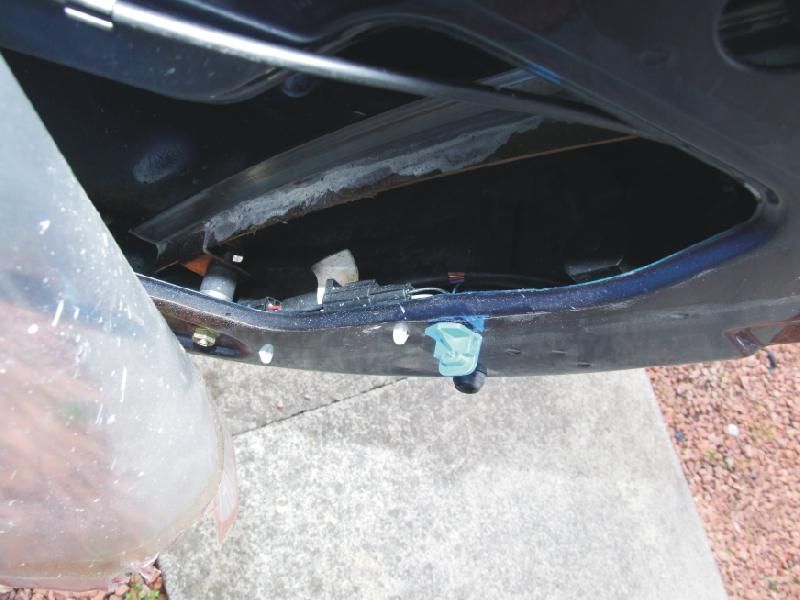
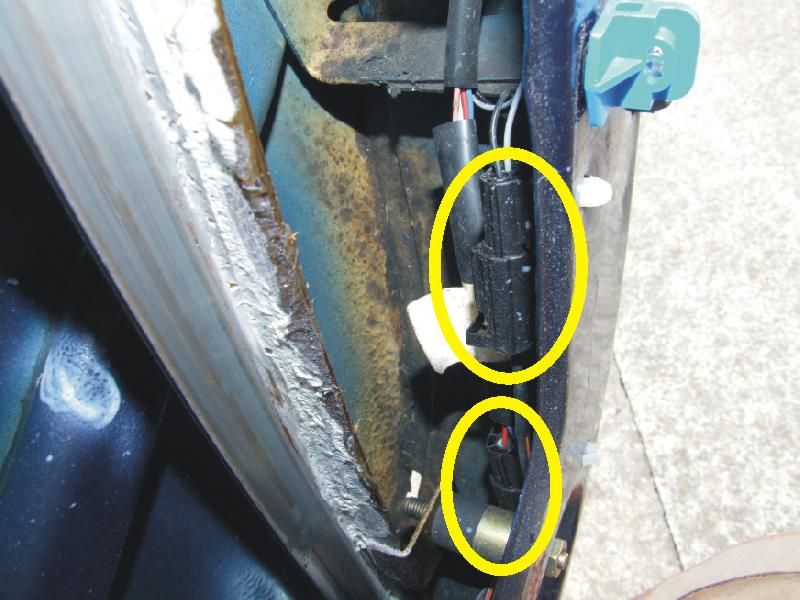
You can now unplug the 2 connectors (1 connector on the passenger side)
Now remove the 3 torx screws that hold the lock mechanism in place
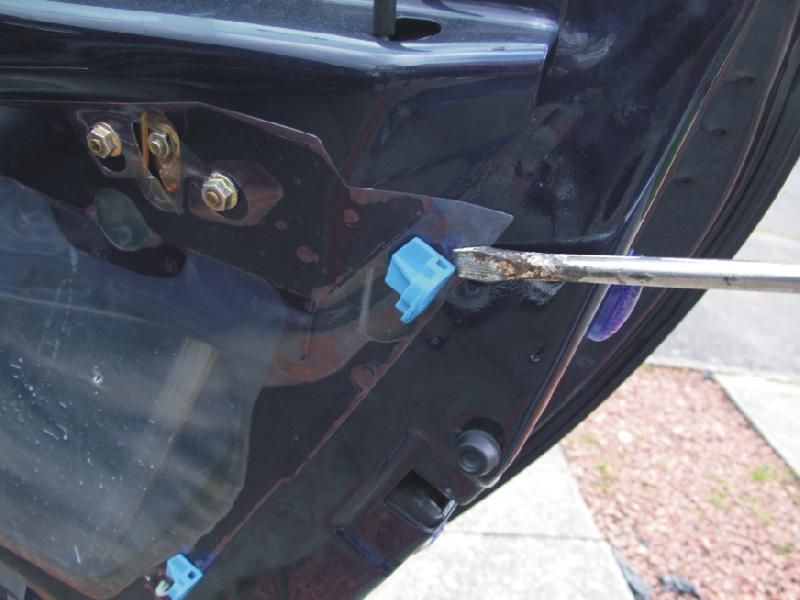
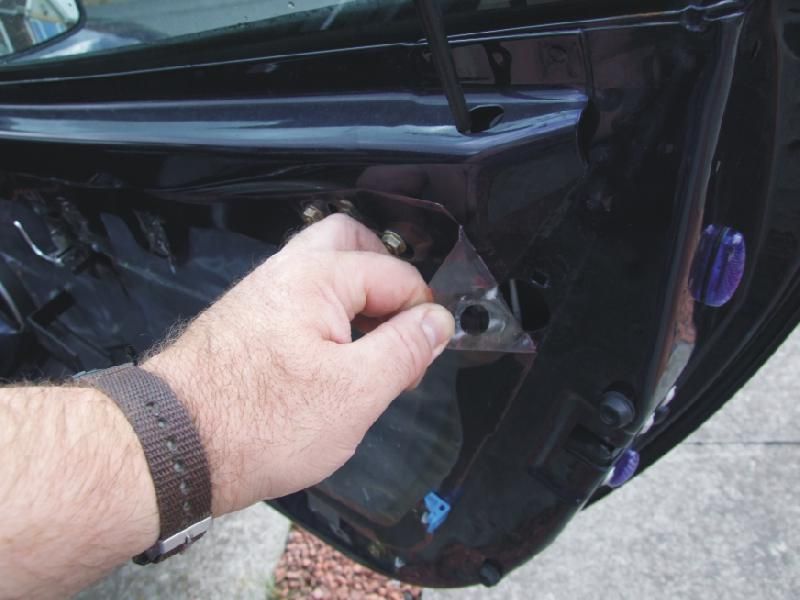
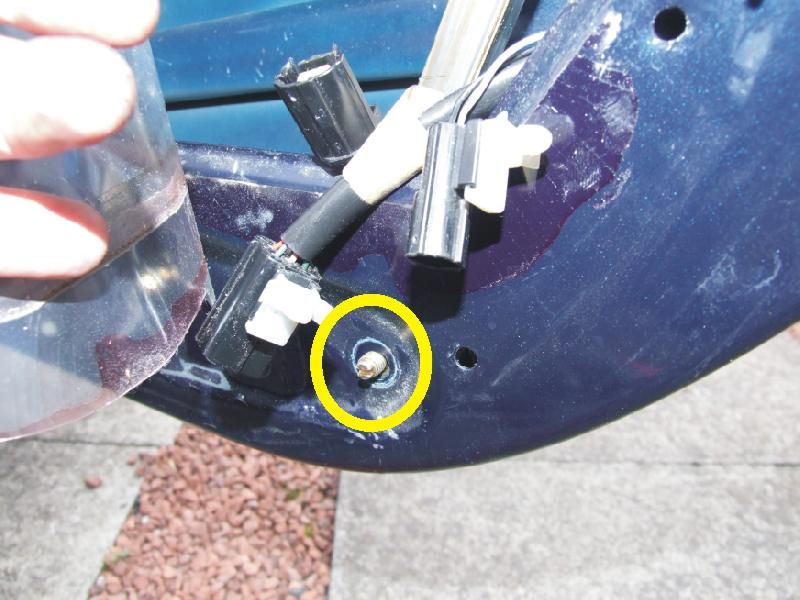
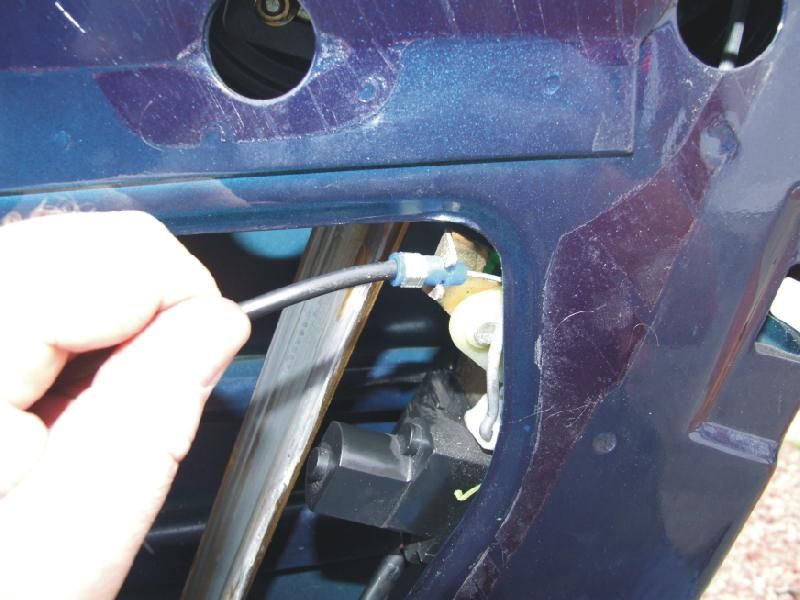
To give you more room to manoeuvre, you should remove this nut (shown with the nut already removed) and push this bolt into the door. This will allow you to move the rear window runner a little to one side to give you more room.
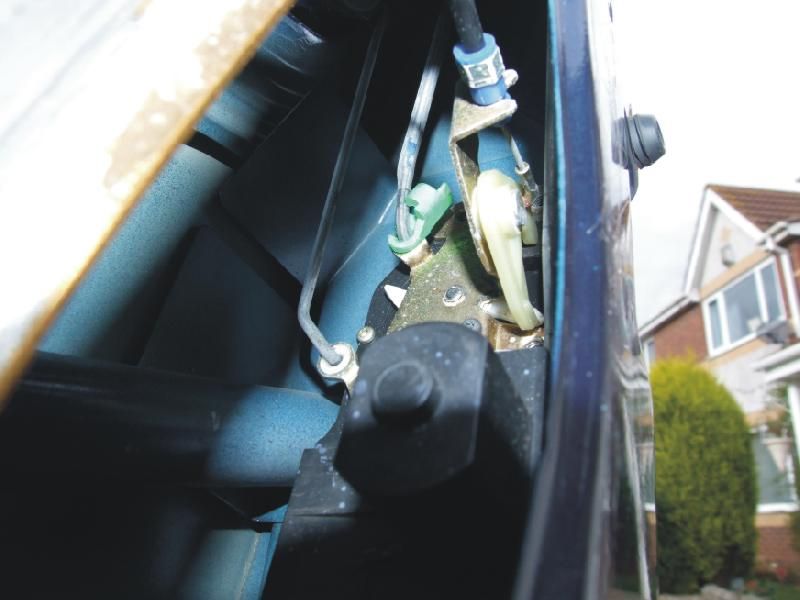
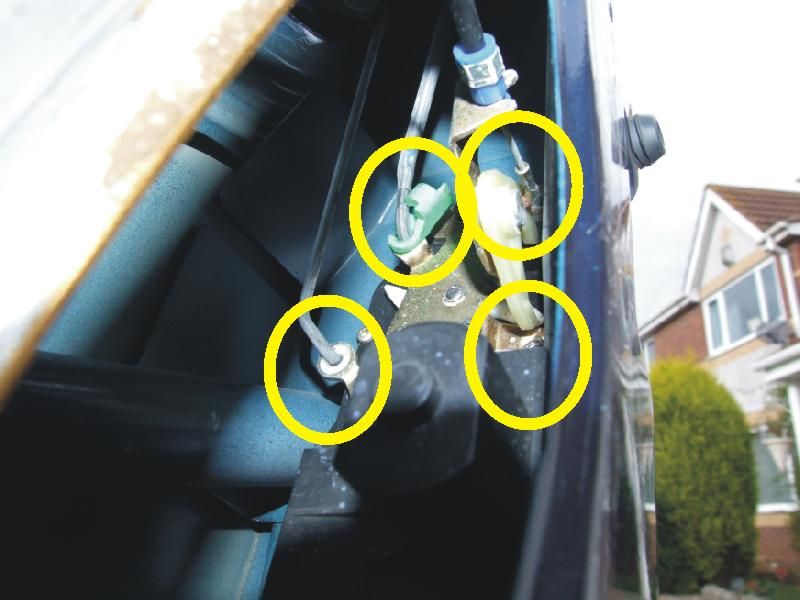
This is what you are now left with. There are 3 rods and a cable connected to the mechanism and they all need disconnecting before removal. Unfortunately this is easier said than done. Those of you that used to be good at Rubik’s cube may find this a doddle.
The left 2 are connected to the outer door handle and lock. The top right is the cable connection to the interior door pull. The bottom right is connected to the interior door lock pull/push.
The first and easiest to remove is the cable. Remove it from the bracket and then remove it from the actuator.
The next easiest is the top of the left two. The one with the plastic clip on. Unclip it and then twist the lock mechanism until the rod can be removed.
Next easiest is the rod to the internal lock push/pull and lastly the bottom left of the 4. These last 2 are a pain the rear and are just a case of manhandling the mechanism until you get the right angle to allow you to remove the rods. The rods are angled and hooked at the ends, so it takes a bit of swearing at this point.
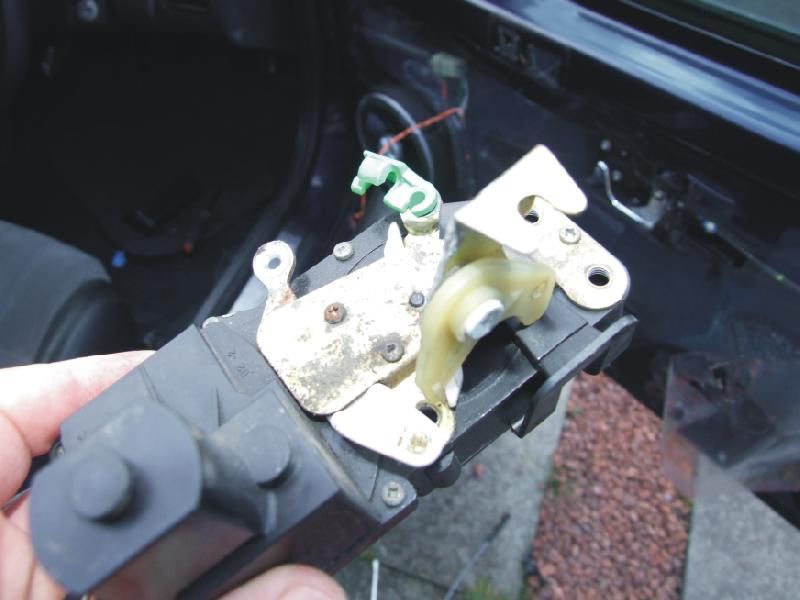
And simply remove the mechanism.
Fitting IS the reverse of removing, but it is a lot harder to locate the rods into the mechanism. Tools needed are patience, small hands, 5 elbows, long nose pliers and more patience. I did use pliers to open out one or two of the loops to make them easier to fit. Not too much as this may cause them to foul.
Refit the door liner
And refit the door card by winding the window down all the way. Reconnect the tweeter. Locate the leading edge of the top into the window recess keeping the card at an angle and slide it under the cheater/mirror assembly.
Now angle the rear of the door card down until the top of the card is located fully into the window recess and the door locking pin locates through the hole.
Now the rest is just a case of snapping the lower clips back into place, refitting the door handles and screws.
Now test the lock.
Congratulations, you have changed your central door lock mechanism.
This is just the way that I carried out the operation. Please use this if it helps but I accept no responsibility for errors or omissions.